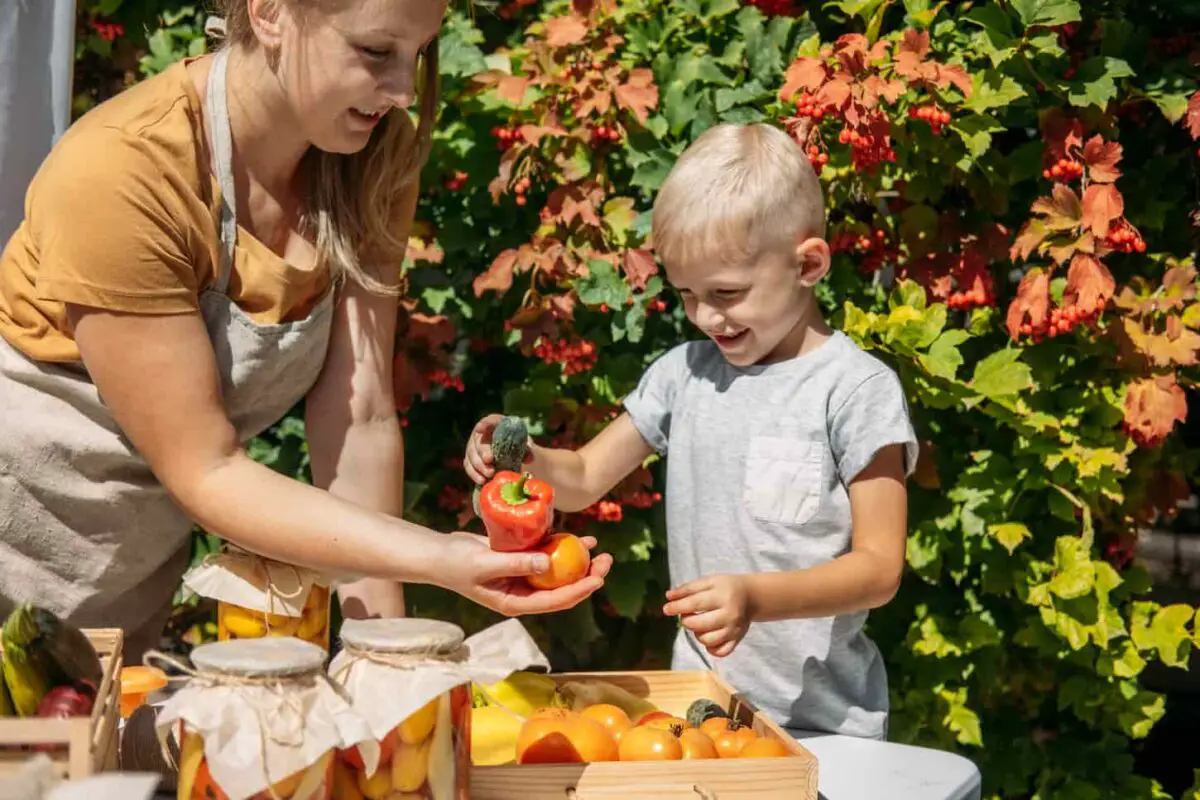
Food preservation is an essential skill practiced for centuries, allowing you to enjoy the abundance of seasonal produce all year. Various methods to preserve food can help you save money, reduce waste, and make the most of your harvested or purchased food items.
With modern technology, numerous ways exist to preserve your favorite foods safely and efficiently. As you explore food preservation, you can choose the best techniques that suit your needs and preferences, ensuring your food remains fresh and nutritious for longer periods.
This article will walk you through the basics and link to more specific guides based on your wants, so enjoy!
List of Food Preservation Methods
When it comes to preserving food, you have several options. Each method has its benefits and drawbacks, but by learning about these techniques, you can choose the best method that meets your needs.
Here are a few of the most commonly used food preservation methods:
- Canning: This process involves heating food in a sealed jar, killing bacteria and preventing spoilage. There are two main canning types: water bath and pressure canning.
- Freezing: This method is straightforward; storing food in a freezer inhibits bacterial growth. Both freezing vegetables and freezing fruits & berries are popular options for this technique.
- Drying/Dehydrating: By removing moisture from food, such as fruits, vegetables, and meats, you can significantly extend their shelf life.
- Fermenting: Fermentation is an ancient technique that uses microbes to break down food, resulting in a unique flavor and increased shelf life.
- Freeze-Drying: Freeze-drying foods is when all the moisture is removed using alternating freezing and a vacuum pump. This gets out 99% of the water, making it possible to store the food for decades.
- Root Cellars: These are naturally cool, moist storage spaces that help extend the shelf life of fruits and vegetables. A more modern-day version is indoor or temperature-controlled cold storage or cold pantries.
In addition to these common methods, you might consider less well-known techniques like vacuum sealing, pickling, and curing. By understanding your options, you can make informed choices and keep your food fresh for as long as possible.
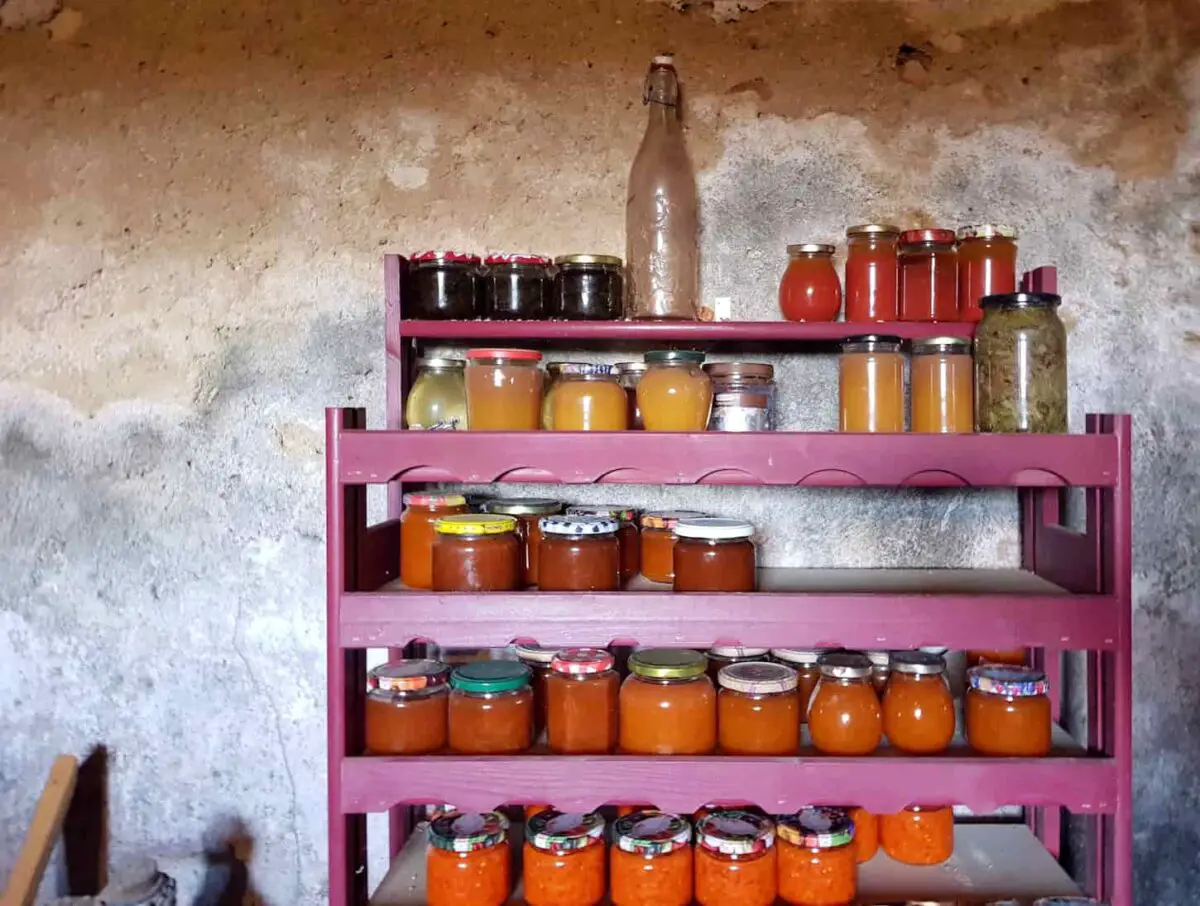
Canning Methods
Preserving food through canning is a fantastic way to enjoy your favorite fruits, vegetables, jams, and pickles year-round. Here, we will discuss the two primary canning methods: pressure and water bath canning.
We’ve got some great canning guides and many more in the works. You can see all of our canning articles at this link.
Pressure Canning
Pressure canning is ideal for preserving low-acid foods like vegetables, meats, and poultry. The process involves using a pressure canner to heat the contents of glass jars at high temperatures, which destroys bacteria and creates a vacuum seal.
Before starting, gather your essential tools, including a pressure canner, canning rack, glass jars, lids, and a jar lifter.
- First, prepare your food according to your chosen recipe, fill the jars, and seal them with lids.
- Next, place the jars onto the canning rack inside the pressure canner, and follow the manufacturer’s instructions to process them correctly.
While pressure canning can seem intimidating, it is a highly effective method for preserving food.
Check the National Institute of Food and Agriculture’s Complete Guide to Home Canning for detailed instructions and safety guidelines.
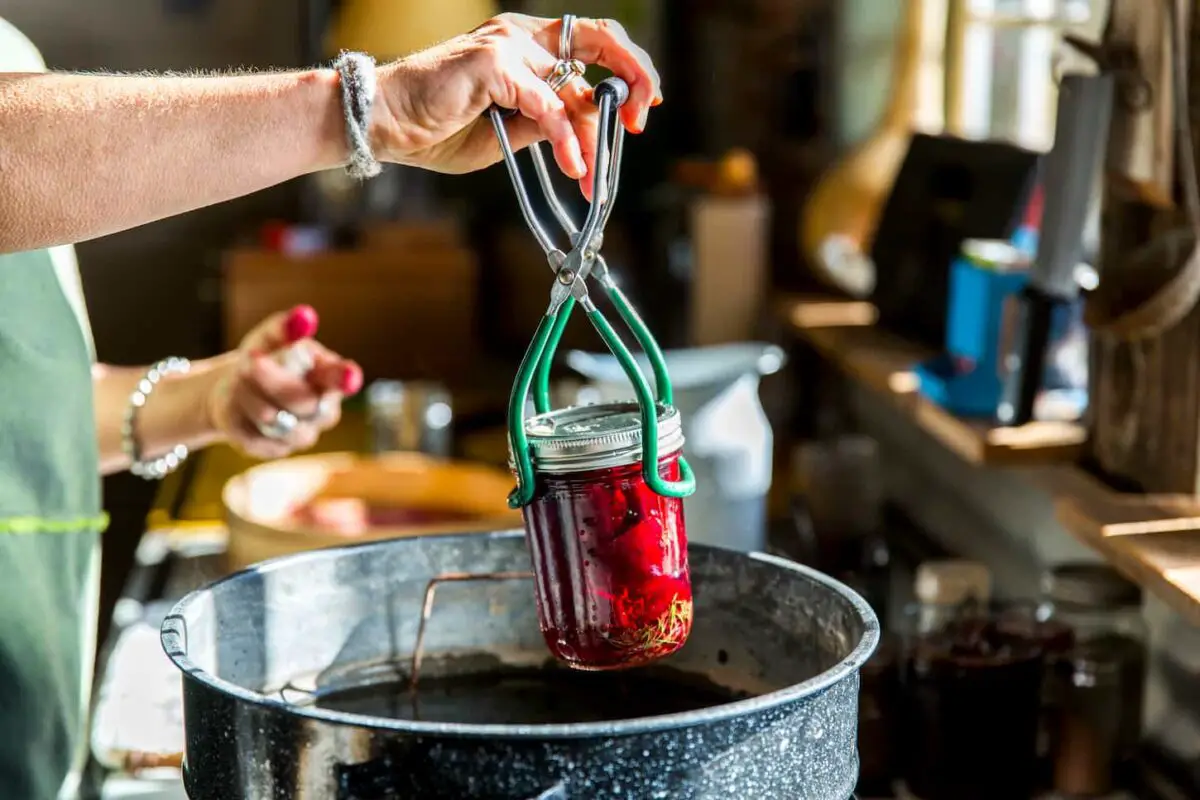
Water Bath Canning
Water bath canning is suitable for preserving high-acid foods such as fruits, jams, pickles, and acidified tomatoes. This method involves placing sealed jars into boiling water and processing them for a specified time.
- First, prepare your food following a tested recipe, and fill the glass jars with the mixture.
- Place the lids and bands on the jars, and put them into a large pot with a canning rack at the bottom.
- Fill the pot with water, ensuring it covers the jars by at least 1-2 inches.
- Bring the water to a rolling boil and process for the recommended time based on your recipe.
- Once the processing time is complete, use a jar lifter to remove the jars and allow them to cool carefully.
For more information and guidance on water bath canning, visit the National Center for Home Food Preservation.
Always use tested recipes and follow canning guidelines to ensure safe, delicious, preserved foods throughout the year!
Freezing Techniques
Freezing is a convenient and efficient method to preserve various types of food, such as fruits, vegetables, meats, fish, soups, sauces, bread, and cakes. It helps you make the most of seasonal foods, reduce food waste, and save electricity by optimizing your freezer use.
Click this link to browse our articles on freezing food for storage.
Blanching Before Freezing
It’s a good idea to blanch fruits and vegetables before freezing them. Blanching is a quick process of boiling or steaming the produce, then plunging them in cold water. This technique helps retain their color, flavor, and nutritional value while slowing down enzyme activity, which can spoil the food over time.
You can read more specifics about the science of freezing foods at UMN Extension, but here’s a simple blanching process:
- Wash and trim your fruits or vegetables.
- Boil a pot of water and prepare a bowl of ice water.
- Place the produce in the boiling water for the recommended blanching time (usually a few minutes).
- Immediately transfer the produce to the ice water to stop the cooking process.
- Once cooled, drain and pat dry before freezing.
Freezing Prepared Foods
From soups and sauces to cakes and bread, freezing prepared foods is a fantastic way of saving time and reducing food waste. Follow these steps to ensure optimal quality and freshness when freezing prepared foods:
- Ensure the food is at room temperature or colder before freezing.
- Wrap and seal the food tightly in foil, plastic wrap, or airtight containers. This minimizes exposure to air and helps prevent freezer burn.
- Label your containers with the contents and date to keep track of the frozen items.
- Be mindful of your freezer’s capacity: freeze only the amount that will freeze within 24 hours, usually 2-3 pounds of food per cubic foot of freezer space.
Enjoy the convenience and benefits of freezing various foods to savor their flavors and nutrients year-round.
Drying and Dehydrating
Drying and dehydrating are excellent methods to preserve various foods, including fruits, vegetables, herbs, meats, and berries. These techniques prevent food spoilage by reducing the moisture content, inhibiting the growth of bacteria and mold.
Here’s a link to all of our dehydrating articles.
Air Drying
Air drying is a simple and natural method to dehydrate food. To get started, select fresh and high-quality produce. Then, wash and cut the food if necessary, and place it on a clean surface, such as a rack, mat, or screen. The best screens for air drying are stainless steel, Teflon-coated fiberglass, and food-safe plastic.
Be sure to space the food items apart, allowing air to circulate around them. Keep them in a well-ventilated area, away from direct sunlight and humidity. Small fruits and herbs may take a few days to air dry, whereas large fruits and vegetables might require a week or more.
Oven Drying
Oven drying is another popular method to dehydrate food. To oven dry, preheat your oven to a low temperature (between 130°F and 150°F). Place the prepared food items on a baking sheet lined with parchment paper or a wire rack.
Please note that not all ovens can be set at that low temperature; every oven I’ve ever owned can’t go lower than 200°F. If your oven can’t go below 200°F, oven drying won’t work well. You’ll want to get a dehydrator.
The University of Minnesota Extension notes that oven drying takes 2 to 3 times longer than a dehydrator. Be patient and check the food periodically to ensure it does not over-dry or burn.
Using a Dehydrator
Dehydrators are specialized appliances designed to dry food effectively and efficiently. To use a dehydrator, arrange the prepared food items on the trays without overlapping. Dehydrators offer precise temperature control, ensuring your food maintains its nutritional value while drying uniformly.
The drying temperature for most foods is typically between 115 and 155°F, depending on the food. Drying times may vary from 4 to 10 hours, depending on the food type and size of the pieces.
Your dehydrator’s manual should give you specific guidelines on temperature and expected timelines for each food type.
For best results, avoid drying strong-smelling vegetables at the same time as milder-smelling varieties to prevent flavor transfer.
If you’d like to focus on reading about dehydrating equipment, we’ve gotcha covered. Click this link to read what we’ve got on dehydrators.
Fermenting Food
Fermenting is an ancient method of preserving food that is still widely used today. You can extend their shelf life and enjoy various health benefits by fermenting vegetables, fruits, and dairy products.
Lacto-Fermentation
Lacto-fermentation is a process that uses naturally occurring lactic acid bacteria to preserve and enhance the nutritional properties of vegetables and fruits. This fermentation type can help improve your produce’s taste, texture, and nutritional content. Some popular lacto-fermented foods include sauerkraut, kimchi, and pickles.
Lacto-fermentation is relatively light on requirements. All you need to get started is fresh produce, salt, and a clean jar (to store your fermented creation). The salt helps to draw out moisture and create an environment where beneficial bacteria can thrive while inhibiting the growth of harmful bacteria.
As a result, Lacto-fermented foods can boost your digestive health and immune system (source: Healthline).
Dairy Fermentation
Similarly, dairy fermentation uses beneficial bacteria to transform milk or cream into yogurt, kefir, and other cultured dairy products. These fermented dairy foods have a longer shelf life and contain probiotics that help improve gut health and digestion.
Yogurt and kefir are excellent examples of fermented dairy products you can easily make at home.
- For yogurt, you’ll need milk and a yogurt starter culture, which contains the live bacteria needed for fermentation.
- For kefir, add kefir grains to milk and let it ferment at room temperature until it reaches your desired consistency.
Dairy fermentation offers a delicious and healthy way to enjoy milk products while supporting your overall well-being by boosting your digestive health and immune system.
Pickling and Preserving in Oil
Preserving food is essential for extending its shelf life and maintaining its flavors. This section will discuss two popular methods: pickling and preserving in oil.
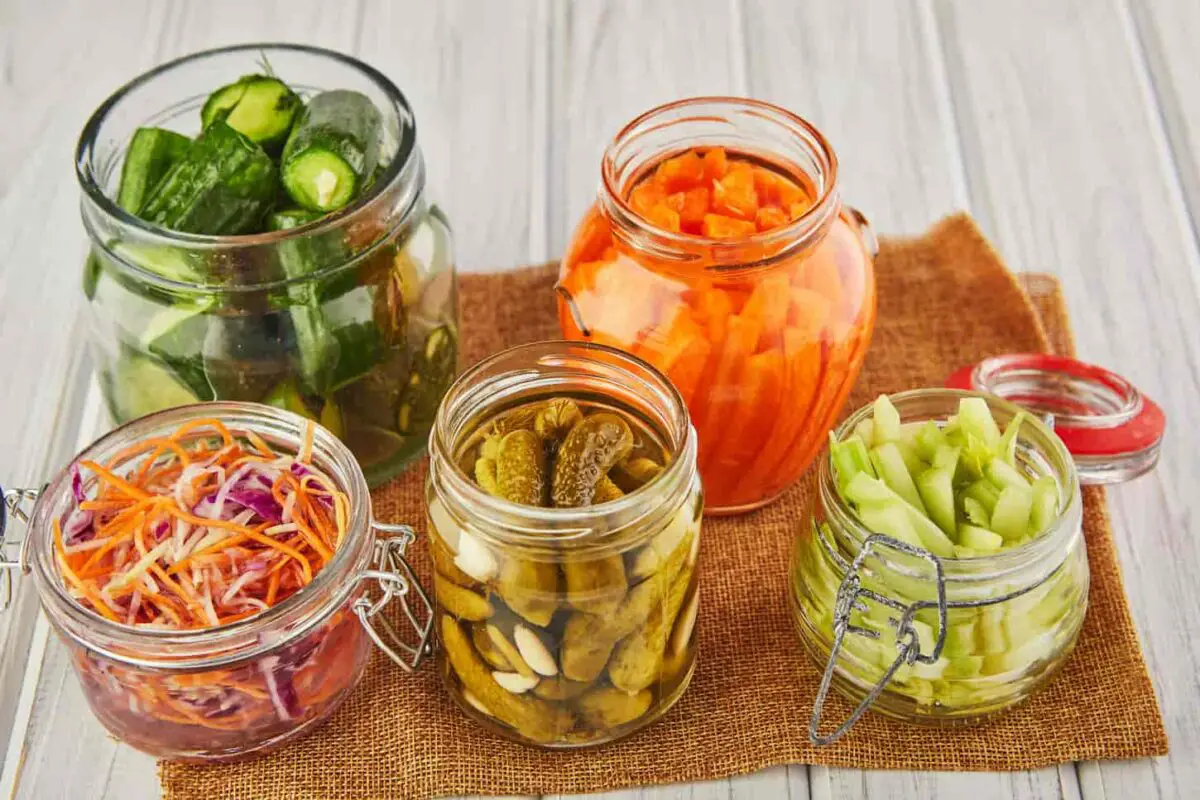
Pickling with Vinegar and Spices
Pickling is a food preservation method that involves immersing food in a vinegar-based solution, often combined with spices, to create a distinctive flavor. The acidity of the vinegar helps prevent spoilage by inhibiting the growth of bacteria. This method is particularly popular with cucumbers, turning them into delicious pickles.
To pickle food, you should start by selecting fresh, high-quality ingredients.
- Prepare your cucumbers or other vegetables by washing them thoroughly and cutting them into desired shapes.
- Next, choose the type of vinegar you want to use. Wine vinegar, apple vinegar, or flavored vinegar can be used for this process.
- Combine the vinegar with water, sugar, salt, and spices to create the pickling solution.
- Finally, place your vegetables into sterilized jars and pour the mixture over them, ensuring they are fully submerged.
- Seal the jars and store them in a cool, dark place for the desired pickling time.
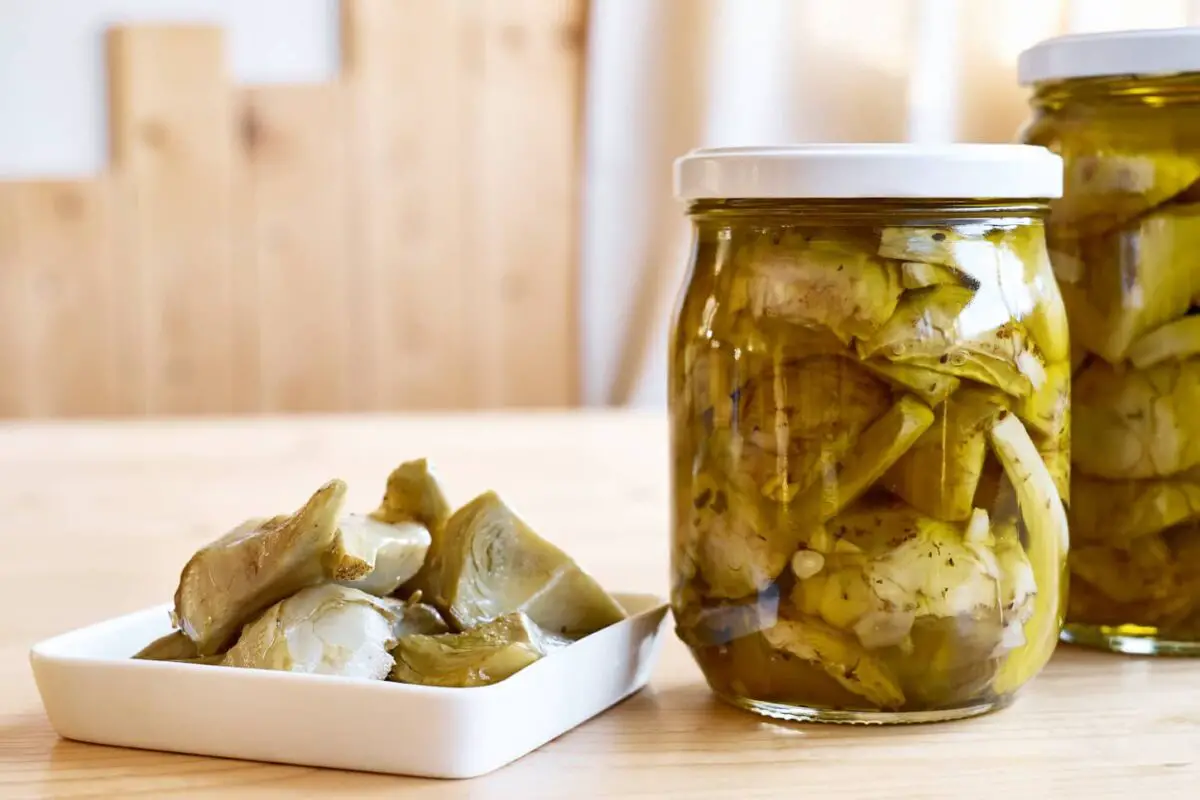
Preserving in Oil
Another preservation method is preserving food in oil, which creates a barrier that prevents the growth of bacteria. This technique is commonly used for sun-dried tomatoes, garlic, and preserved lemons.
To preserve food in oil, start by selecting fresh, high-quality ingredients. Clean and prepare your food items, and choose the type of oil you want to use. Olive oil is a popular choice for its flavor and health benefits.
- Place the food into sterilized jars and pour the oil over them, ensuring the items are fully covered.
- A layer of herbs or spices can also be added for additional flavor.
- Seal the jars and store them in a cool, dark place to allow the flavors to develop.
Both pickling and preserving food in oil are excellent ways to extend the shelf life and enjoy a variety of flavors. Try each method to experience their unique taste sensations to your favorite foods.
Preserving with Salt and Sugar
In this section, we’ll explore how you can use salt and sugar to preserve various types of food, including meats and fruits. Both salt and sugar are natural preservatives that have been used for centuries to extend the shelf life of food products. Let’s dive into some techniques you can apply in your own kitchen.
Making Jerky
Jerky is a popular preserved meat snack that relies on salt and dehydration to extend its shelf life. To make your own jerky, start by selecting a lean cut of meat, such as beef, turkey, or venison. Trim any visible fat, as it can spoil over time.
Next, create a salt-based marinade to flavor your meat and begin the preservation process. Combine salt with other seasonings, such as soy sauce, Worcestershire sauce, or spices, and allow your meat to marinate for several hours or overnight for full flavor absorption.
Once marinated, you’ll need to dry the meat. Lay the meat slices evenly on a dehydrator or oven rack and set the temperature to around 145°F (63°C). The drying process can take anywhere from 4 to 12 hours, depending on the thickness of the meat and the type of dehydrator or oven you use. Your jerky is ready when it’s dry and slightly pliable.
Get our complete how-to here for a more detailed jerky recipe.
Preserving Fruits with Sugar
For preserving fruits, sugar is commonly used to maintain their natural sweetness while inhibiting the growth of bacteria. You can use several methods to preserve your favorite fruits with sugar.
One popular technique is to make a simple syrup using equal parts sugar and water. Heat the mixture until the sugar dissolves, and then add your fruit to the syrup. Simmer the fruit until it’s cooked through but still holds its shape.
- Jam: Combine chopped fruits with sugar and cook slowly until the fruit is tender and the mixture thickens. Once cooled, store the jam in sterilized jars.
- Fruit preserves: Cook larger pieces of fruit with sugar until they’re soft and covered in a thick syrup. Store the fruit and syrup in sterilized jars, making sure the fruit is fully submerged in the syrup.
- Candied fruit: Cook small pieces of fruit in a sugar syrup until translucent, then roll them in granulated sugar and let dry on a wire rack.
For jams, preserves, and other preserved fruits, you may also choose to can them beyond just preserving them with fruit. That will give them the longest possible shelf life.
Using salt and sugar to preserve your foods, you can enjoy the delicious taste of meats and fruits all year round while reducing food waste.
Freeze-Drying Foods for Storage
Freeze-drying food is a method of preserving food that involves extracting moisture from frozen food by transforming ice directly into vapor, known as sublimation. This process retains most of the food’s nutritional value and color, making it a popular choice for long-term storage.
If you want the specifics, here are our freeze-drying articles, otherwise we’ll get you started with the basics.
To get started with freeze-drying, follow these simple steps:
- Spread the food on a tray or plate without clumping it together. Make sure the food pieces are separated to ensure even drying.
- Freeze the food completely in your freezer. For best results, set the temperature at the lowest setting.
- Once frozen, place the food into a freeze-drying machine or chamber, which will remove the moisture from the food while keeping it cold.
- After the freeze-drying process is complete, check it for dryness. Snap a few pieces in half to check for moisture. You may also want to try a few.
- Store the food in airtight containers or vacuum-sealed bags to protect it from moisture and air.
Freeze-dried food can last up to 25 years, maintaining its quality and nutritional value in a shelf-stable manner without needing power or strict temperature control. This makes it an excellent option for emergency food storage, outdoor activities, or as a convenient snack for busy individuals.
Remember that the initial investment in a freeze-drying system can be expensive and require substantial counter space. However, the benefits of preserving food through freeze-drying, such as retained flavor and nutritional value, often outweigh the cost for many individuals.
When choosing items to freeze-dry, consider selecting foods with high water content and healthy nutrients, like fruits and vegetables. You can also preserve complete meals, milk, or even ice cream, allowing for diverse meal options in your long-term food storage plan. Not all foods will freeze dry, so consult our complete list of foods that do (and don’t) freeze dry.
If you’d like to read more about freeze dryers first, we’ve got a whole slew of articles, tutorials, and guides to get you going with your freeze dryer.
Root Cellaring and Food Storage
Root cellaring is essential for homesteaders looking to preserve their harvest for months. It is an ancient technique that takes advantage of the earth’s natural cooling and insulating properties and steady humidity levels, providing a stable environment for fruits and vegetables.
Here is our complete collection of articles on food storage.
Proper Storage Conditions
When setting up your root cellar or cold storage space, you must maintain the right temperature and humidity for each specific type of produce.
- It’s typically ideal for storing onions, carrots, potatoes, and beets at temperatures between 32°F and 45°F with humidity levels around 95%.
- On the other hand, avocados and pumpkins prefer slightly warmer temperatures of 50°F to 55°F.
Good air circulation prevents mold and rot in your stored produce.
Remember to keep items that release ethylene gas, such as apples or ripe bananas, separate from ethylene-sensitive produce to avoid over-ripening and spoilage.
Storage Containers
Using appropriate storage containers helps maintain the quality of your stored produce. Here are a few options to consider:
- Wooden crates or boxes: These provide excellent air circulation and can be easily stacked.
- Wire or plastic mesh baskets: These are perfect for well-ventilated storage and are easy to clean.
- Clay pots: These can help regulate humidity and protect against pests, making them suitable for storing carrots, beetroot, and other root vegetables.
Labeling
After placing your produce in the right storage containers, it’s essential to label them clearly. Using masking tape and a marker, write the item’s name, storage date, and other relevant information on the container.
This way, you can easily track and manage your stored produce without any guesswork for proper FIFO (first in, first out) storage to rotate your food storage. Additionally, keeping a cutting board nearby can help you cut or prepare the produce when needed.

Cooking and Meal Preparation with Food Storage
Preserving food is not just about storing it for a longer time; it’s also about making the best use of preserved foods in your everyday cooking. This section will explore using preserved foods in recipes, meal planning, and meal prep.
Want to see our favorite recipes? These use a combination of food storage and fresh produce from your garden.
Using Preserved Foods in Recipes
You can create delicious dishes using preserved produce, vegetables, and fruits. Incorporate canned veggies into stews and soups, or make tasty smoothies with frozen fruit. You can also use preserved jams and sauces as flavorings, marinades, or toppings for different dishes.
Here are some simple ideas to use your preserved foods:
- Blend frozen fruits for a refreshing smoothie or use it in baked goods like muffins.
- Add preserved veggies and your favorite sauce to create flavorful stir-fries.
- Use canned tomato sauce or salsa in various pasta dishes or casseroles.
Meal Planning and Prep
Meal planning is an excellent way to maximize your preserved foods while staying on a budget. Begin by inventorying your preserved foods and considering the meals you can create.
Take the time to plan your meals around the preserved foods you want to use, ensuring your dishes have a mix of fresh and preserved ingredients. This will also provide a nutritional balance and help prevent food waste.
Once you have established your weekly meals, it’s time for meal prep. With preserved foods at your disposal, you’ll find that meal prep becomes more manageable and quicker. For example, use pre-cut frozen vegetables in your dishes instead of spending time chopping and prepping fresh veggies.
By following these tips and incorporating preserved foods in your cooking and meal planning, you can save time and money, making it a sustainable and budget-friendly approach to cooking delicious meals.
Key Takeaways
Preserving food is a great way to enjoy healthier, more delicious food that you grew yourself (or got at a local farmer’s market) year-round. It’s a healthier, happier way to live while eating organic goodness.
Make sure you do what you can to enjoy great food by learning to preserve it today. We’ve got all sorts of tutorials, how-tos, and guides here on this site for you so you can be a pro in no time.
Resources
Learning from your own experience is essential, but learning from others is also intelligent. These are the sources used in this article and our research to be more informed as homesteaders.
- Apd, D. C. (2020, August 20). What Is Fermentation? The Lowdown on Fermented Foods. Healthline. https://www.healthline.com/nutrition/fermentation
- Birkett, R. (2023). How to ferment vegetables. BBC Good Food. https://www.bbcgoodfood.com/howto/guide/beginners-guide-fermented-foods
- National Center for Home Food Preservation. (n.d.). https://nchfp.uga.edu/#gsc.tab=0
- Rodgers, B. (2019, September 7). Food Preservation Using Oil – How To and Practical Tips. Prepper’s Will. https://prepperswill.com/food-preservation-using-oil/
- The science of freezing foods. (n.d.). UMN Extension. https://extension.umn.edu/preserving-and-preparing/science-freezing-foods
- USDA’s Complete Guide to Home Canning. (2021, September 6). National Institute of Food and Agriculture. https://www.nifa.usda.gov/about-nifa/blogs/usdas-complete-guide-home-canning