Having clean, fresh water available in a waterer is so crucial to a baby chick’s health. Without this clean water, the chick could get very sick. Unfortunately, baby chicks are cute but clumsy creatures and they manage to make their water filthy in a matter of minutes. Keeping their water clean can be very time-consuming if you do not have the right equipment. So, how do you keep baby chick’s water clean?
To keep baby chick’s water clean, clean the waterer regularly, swap the bedding material, elevate the waterer above the litter to reduce crud getting kicked into it, and graduate your chicks to an enclosed watering system as soon as their beaks are strong enough to work a watering nipple.
Baby chicks’ water can be kept clean through various methods, but why is it essential for them to have fresh, clean water provided for them regularly? And can algae in the water be a problem? But most importantly, how do we get rid of it? Let’s find out.

How To Keep Chicks Water Clean
Keeping baby chicks’ water clean can be a frustrating challenge as the chicks do not make it easy. If you do not have the right chicken-friendly equipment, this may mean that you are cleaning their waterers multiple times a day. And while you’re going to want to check on your chicks multiple times each day anyway, it can get frustrating to clean out their water every visit.
Baby chicks will kick just about anything into their water. They’ll kick bedding, food, and their own poop into the water, making the water dirty. Some chicks will even poop right in their water. This dirty water can lead to various issues later on (and I’ll talk about why chicks need clean water later on in this article). So, how can we use to keep the chicks’ water clean? Here’s the methodology.
- Clean the waterer regularly. No matter what watering system you’re using, it’s going to need to be cleaned on a regular basis. Depending on the system you’re using, “regularly” will mean different amounts of time.
- Consider a different bedding material. The #1 culprit in dirty chick water is the bedding getting kicked into the water. So if that’s your main issue, then you may want to consider rethinking the litter material you’re using with your chicks. However, if you’re liking your bedding material but not the mess, then we’ve got options.
- Elevate the waterer and contain the mess. There are a lot of ways to do this, which is awesome. The goal is simply to make the watering station taller – and diminish the likelihood of there being a mess. The way you do this will depend on what your brooder looks like, what you’ve got on hand, and if you’re willing to invest in buying extra things to help. It’s totally fine to use what you’ve got on hand. For our last batch of chicks, I elevated their water by using a piece of a wire rack shelving unit. I just put that down on their bedding and put the water on top of it. It kept a lot of bedding out of their waterer until I was able to graduate them to a closed watering system.
- Graduate your chicks to an enclosed watering system as soon as they’re strong enough to work it. Some things I’ve read say that chicks’ beaks can’t handle watering nipples until they’re at least a couple of weeks old. I’ve also seen YouTube videos of chicks drinking from watering nipples just fine. I err on the safer side of things because we prefer a horizontal nipple to the vertical one. Once our chicks are a few weeks old, we switch them to a horizontal watering nipple and an enclosed water system.
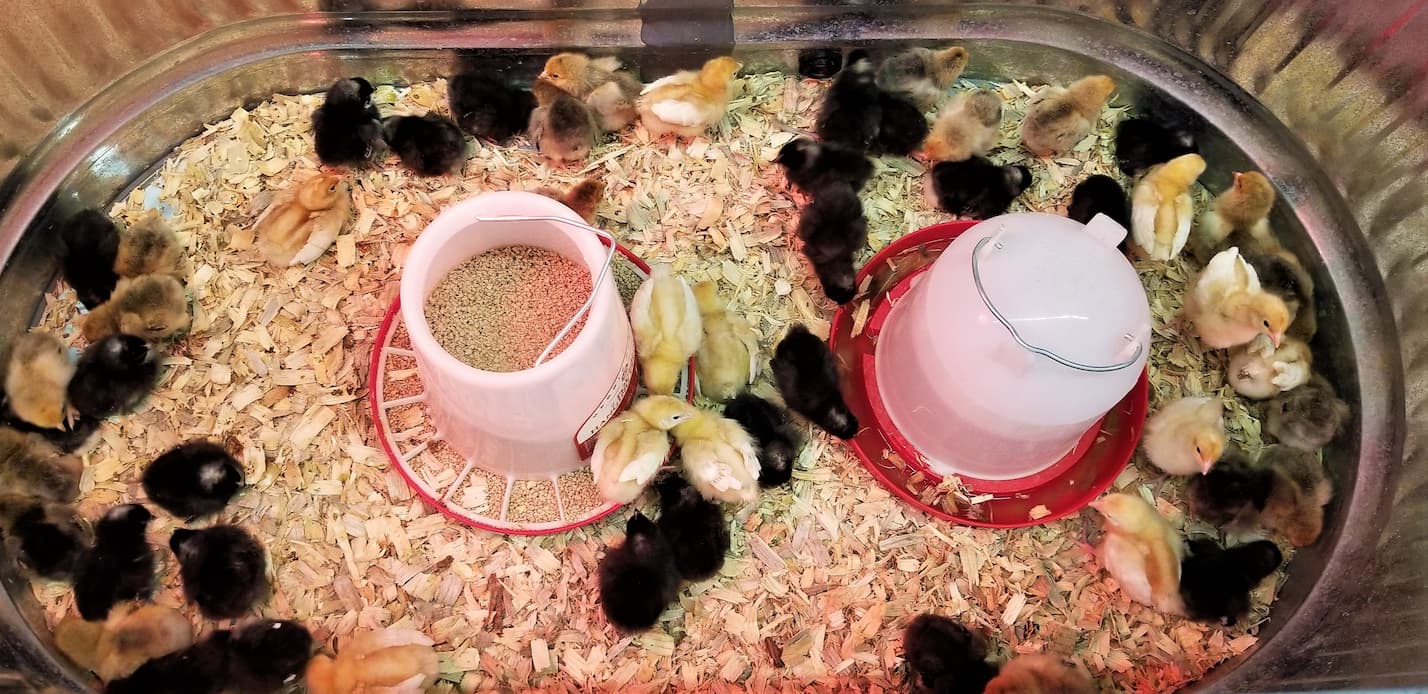
Here’s a picture of our chicks in their plastic tub brooder. You can see the waterer on the right-hand side. It’s already getting pine shavings in it. This is a picture from before I elevated the waterer. At this point, I was cleaning out the water anywhere from 2-6 times per day. Most of those times, “cleaning it out” simply meant scooping out the pine shavings into the trash.

Now, if you’re going to elevate the watering system, please keep this in mind: baby chicks can’t climb well. So you’ll need to give them a ramp or just mound the bedding up towards the water so that they can reach it without any trouble. As your chicks get older, they’ll get better at climbing and jumping. So it won’t be a forever issue – but it is something to remember for the smallest of baby chicks.
You’ll also want to help your chicks up the first couple of times – or just put them on it. That way, they’ll get used to the change faster and be less likely to get dehydrated.
More Tips on Keeping Brooder Water Clean
As I said earlier, the bedding getting into the water is one of the biggest problems. So here are some more tips and tricks on keeping the bedding out of the chicks’ water.
If the problem is that the bedding is being kicked into the water by your chicks, you can change the bedding to something that is less likely to be kicked into the water. You can consider using sand as a bedding material. Just be sure to only use construction-grade sand as other sand may be too fine and can lead to respiratory problems for your chicks.
You should only consider changing the bedding to sand once the baby chicks are at least a week old. If the bedding is too slippery during the first few days, then this can lead to a condition called spraddle or splay leg. From what I’ve read, this is a treatable condition; however, it is best to avoid it from the beginning.
Some chick owners swear that you have to use a kitchen towel or a shelf liner. I’ve never used those – we’ve always used pine shavings without any problem. However, we did make sure to have a good layer of pine shavings, especially since we were using a plastic tub as our brooder. While we were changing the bedding and the plastic tub was accessible, the chicks definitely had a harder time walking around. So don’t let them sprawl around – give them something easier to use as their floor.
Another method you can try to keep your baby chicks’ water clean is to raise the waterer up a bit above the bedding – here are some more tips on that.
To do this, you can build a frame out of chicken wire or untreated wood pieces. These will also aid in the poop problem in the chicks’ water as they cannot climb into the water. You can bend the chicken wire into a little platform and place the waterer on top of this platform. Just ensure that the chicken wire platform is not too high and that the baby chicks can still reach the water comfortably.
Make sure you use chicken wire with tiny holes in it so that the baby chicks will not get stuck in the wire as the baby chicks are very curious and will try to play with the chicken wire. You don’t want them getting so stuck or tired that they fall asleep in weird positions – or in their water where they’ll drown.
If you want to use untreated wood pieces, then you should get a piece of wood that is bigger than the base of your waterer but not too much larger as the chicks still need to reach it. Then hollow out the center of the piece of wood so that the base of the waterer sits flush with the top of the wood.
This will essentially create a wooden base for your waterer that lifts the water off the bedding. Just ensure that the baby chicks can still reach the water without difficulty.
If none of these methods suit your brood box, then you can also invest in a hanging waterer. This is like a hamster waterer that clips onto the side of the box. It is just a lot bigger, so it can hold enough water for the baby chicks. Sometimes you can find a similar nipple attachment for a plastic bottle, so you do not need to buy the whole hanging waterer.
And in case you were wondering what our chick’s water looks like? Here you go. Here’s what it looked like for our first batch of chicks. The open waterer needed regular cleaning – can you see all the wood chips in there already?

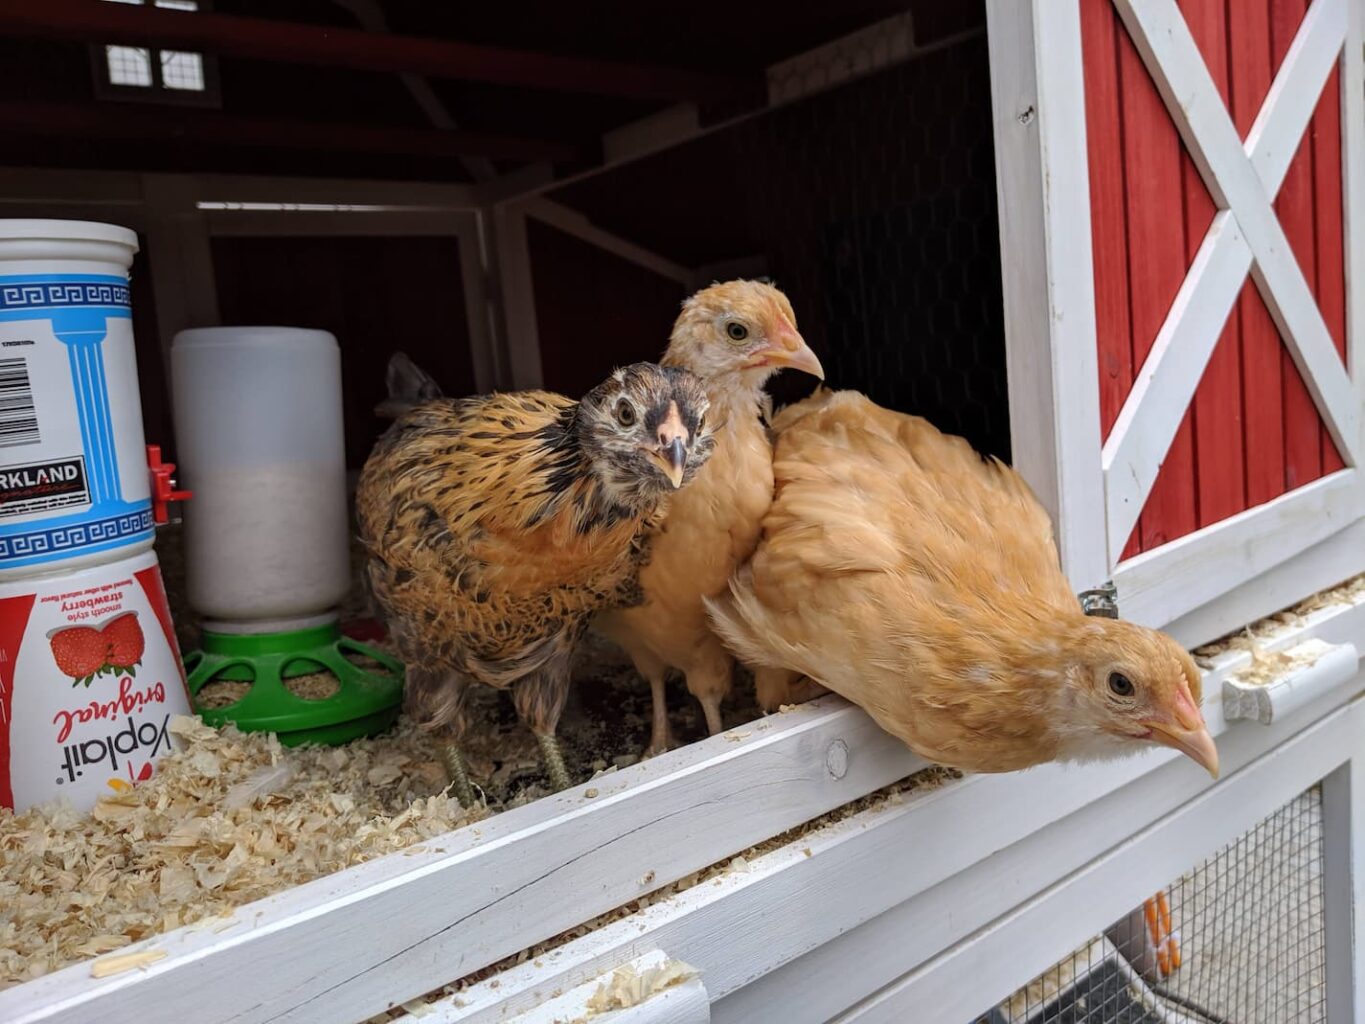
As our chicks got a little bit bigger, we graduated them to a homemade watering system made from sanitized yogurt containers. The bottom container’s full of rocks to keep it stable. This system is tons easier to keep clean!

If you’re going to make your own watering system, these are the watering nipples I use and recommend (click here to see the current pricing on Amazon). You can use your own yogurt containers or buy a bucket. We used the yogurt-sized containers as a stop-gap while the chicks needed something small to keep in their brooder. A 5-gallon bucket would have taken up too much space in their chick space!
How To Fix Algae Problems In Chicks Water
One thing that can be a significant issue in baby chicks’ water is algae. This is because the brood box is usually kept warm, and the water is not a moving body of water; this makes an excellent spot for algae to form.
Algae can be a problem for baby chicks as certain algae can cause illness in chicks, and it may deter chicks from drinking the water as they may not like the taste. A good and simple way to resolve this algae problem is to place a little bit of apple cider vinegar into the baby chicks’ waterer.
As a bonus, apple cider vinegar is good for the digestive system of baby chicks. For this, you will need to use organic, unpasteurized apple cider vinegar. Otherwise, it will not work in the prevention of algae.
From what I’ve read in chicken forums and in various books, you should dilute one tablespoon of apple cider vinegar to every four cups of water in the baby chicks’ waterer. Remember that vinegar will erode metal waterers, so if you want to use this method, then you should stick to plastic waterers.
If you have a metal waterer and you have an algae problem with it, the only way to stop the algae from forming is to clean the waterer with every refill and ensure that you refill it at regular intervals to stop the algae.
Because we use a metal watering nipple, we don’t use apple cider vinegar. I’m probably being overly cautious, as the bucket itself is plastic. However, I just clean it once a week and use tap water – and we rarely have any issues with algae. You can read more about keeping chicken’s water from turning green (thanks to the algae) in my article here: How to Keep Chicken’s Water from Turning Green.
Why Chicks Need Clean Water and Clean Water Dishes
Water is essential to every living thing, and chicks need water to help many aspects of their body to function correctly. If they do not have clean water, then many of these bodily systems will fail, and the chick could die.
It is quite easy to take clean water for granted as most chicken owners have multiple other things to be concerned about; however, this is a mistake. Clean water is considered the most essential nutrient for all living things, including baby chicks.
Water is the biggest constituent of the body; in general, water represents almost 70% of the total body’s weight. This is why access to clean and healthy water for your chicks is very important, as lack of clean water can cause the baby chicks to dehydrate and their bodily systems to shut down.
Baby chicks’ bodies use clean water in various ways. Clean water is used in almost every part of the chick’s metabolism. Clean water helps the chicks to regulate their body’s temperature, as well as helps in food digestion and eliminating bodily waste.
Clean water consumption and food consumption go hand in hand. If the baby chicks’ water consumption is reduced due to dirty water, then their food intake will reduce too. So, if clean water is not provided, then the chicks will not get the amount of food that they require to grow into healthy adult chickens.
If clean water is not provided for baby chicks on a daily basis, then this could also cause diseases to form and spread among the chicks. Baby chicks will walk through their water, causing bedding to collect in their water, and they will also poop in their water.
This can cause bacteria and other microorganisms to grow in the water, and if the chicks drink too much of this dirty water, they will get sick as baby chicks are more fragile to poor water quality and bacteria than adult chickens. Algae is also a problem if you do not clean the water container regularly; this can also cause the baby chicks to get sick.
Final Thoughts on Chicks, Clean Water, and Cleanliness
Keeping baby chicks’ water clean can be a challenge; luckily, there are many options at our disposal that can aid in this task. The most important aspect is that the baby chicks have fresh, clean water provided for them at least twice a day.
However, given that I live in a technical desert, I like to make sure our chicks have clean water on demand all day long. After all, clean water is one of the most important factors in making sure that chicks (and chickens) don’t get dehydrated.
Hang in there though, as your chickens grow, it will begin to get easier to keep their water clean, and it will become less and less of a chore.
