Fear not if you want to dehydrate food but can’t afford a dehydrator. There are many designs for homemade dehydrators, and they’re pretty easy to build or DIY. In this article, we’ll walk you through two DIY builds: one for a purely electric dehydrator and another for a solar-powered dehydrator with a fan (to speed up the process), though you can certain build it without the fan.
How to build a homemade dehydrator:
- Build or buy the trays first
- Design the construction around the trays
- Build the upper half
- Drill holes for the heater and the fan (if used)
- Attach the base (a repurposed lamp base), the heating coil, and the fan
- Attach the door
- Clean it once you are done
How to build a solar-powered dehydrator:
- Consider a conversion instead of a new-build
- Design a DIY option using similar steps to the homemade dehydrator, though the base will differ
- Design the base to be wider to collect additional sunlight
- An electric or battery-operated fan can be added to the design if desired
- Build the solar-powered dehydrator and test it
There’s also a tutorial on a basic solar dehydrator you can build in about 15 minutes. Read on to get the entire design and learn a few useful things about operating homemade dehydrators.
How Can I Make a Dehydrator at Home?
To build a dehydrator, we will need the following:
- Trays
- Plenty of plywood (which we will cut later)
- A drill and bolts
- Tray holders
- A circular saw (preferably a fixed one)
- A small fan (no more than 4 inches in diameter)
- A heating coil that can screw onto a lamp base
- A lamp base (made of porcelain or other material that will not melt)
- A small glass door with rubber ends
- Hinges
- Screening strips
Factory-made dehydrators will most definitely be better at drying food than regular dehydrators. However, they come at a cost, and if we want to avoid that and we’re not afraid of a bit of DIY work, this is the ideal alternative.
After all, a dehydrator is just a hot box with a lot of air flowing through it. You need to ensure it doesn’t get too hot, though. Dehydrating won’t happen above around 140°F; that’s when you get into proper cooking.
Preparation
Please read the guide completely before starting the project.
You will have to do some of your own planning, measuring, and thinking through all of this. I have not built my own at-home dehydrator, nor do I recommend you do so. Learning how to properly manage the temperature with a converted lamp base (with a heating element) is doable, but it will require some knowledge and confidence in dealing with electricity.
If you lack confidence or aren’t 100% sure about this project, please don’t build a DIY electric dehydrator. Instead, try a solar-powered dehydrator (start with a conversion project) or buy a dehydrator from a trusted brand. I’ve got a section on which brands to trust in this article: What Is the Best Way to Dehydrate Food?
Step 1: Get trays (build, buy, or repurpose)
Unless there is already an empty cabinet ready to be turned into a dehydrator, we will be building it around the trays. If you do have a cabinet already in mind to be repurposed, that’s great. You’ll need to find trays that work with the cabinet.
In general, get the trays first. You can repurpose old trays, build your own, or buy some.
- For example, stainless steel cooling racks could work well if you opt to repurpose them.
- Or regular dehydrator trays will do, and they’ll be slightly smaller than the width and depth of the dehydrator.
Avoid any galvanized metal as it can oxidize dehydrated foods.
Step 2: Take measurements and design the construction
Now that we know how deep and wide the dehydrator needs to be, we can turn our dehydrator into a reality. The first thing to do is measure it appropriately.
We want to have at least one inch of free space on each side – if the trays are 13 inches wide, for example, the inner edges of the dehydrator need to be 15 inches wide (one inch on each side).
The empty space is necessary for the tray holders, which come in different sizes but choose the one-inch holders.
The trays should go all the way to the back wall of the dehydrator. There should be a few inches of open space on the front (towards the door).
Next – the entire unit shouldn’t be taller than 50 inches since we can’t effectively heat food in that big of a space. Although we technically could buy a powerful enough heat coil, professionals should only use powerful heat coils to avoid fires.
Install the lamp base (into which the heating coil will connect) at the bottom of the cabinet. There should be at least 20 inches of free space between the base and the first tray. This is because you’re going to need room for both the heating element and the lamp base, as well as space for the heat to rise.
Finally, there should be free space between the base and the floor. The sides (left, right, and back) should carry the weight of the construction.
We didn’t use specific measurements for this project as that depends on the size of the trays used or the cabinet we might have at home that we’re turning into a dehydrator.
So, since we said a lot of things in this step (as it’s the most difficult one), let’s recap the most important points:
- The dehydrator should be no bigger than about 50 inches tall – we can’t safely heat up large dehydrators
- The inner width of the unit should be 2 inches wider than the dehydration trays
- There should be at least 20 inches of free space between the bottom of the dehydrator and the first tray
- The sides should be holding the construction up – the base shouldn’t be touching the floor
Step 3: Build the upper half
We’ll start with the top half as we can easily disassemble it if we make a mistake. Measure the trays one last time to make sure they fit. Do they fit? Great, now build the upper half without the door.
All you have to do is connect three sides and the roof of the dehydrator. Everything aside from the door should be wooden. Don’t build the base yet.
Now that all sides except the base and the door are connected, drill in the tray holders. They’re easy to install, and all we have to do is drill them in but ensure they’re leveled.
There should be at least 3 inches of free space between each tray so everything can ventilate properly.
Once we do that, try out the trays and make sure the construction holds. If there’s a problem, now is the time to fix it.
Step 4: Drill holes for ventilation
We’ll have to drill a few holes for this dehydrator, so make sure to have the hole attachment for the drill. Depending on the size of the dehydrator, we should be able to drill 2 or 3 holes near the roof, above the topmost tray, for ventilation.
These holes will allow the moisture to leave, thus dehydrating the food.
Cover the holes with screening strips or fine mesh that allow air circulation, but stop particles from entering and contaminating the food.
We’ll also have to drill a hole under the lowest tray for the fan. Depending on where it will plug in, we can make the hole on any of the three sides.
Finally, we have to drill the hole for the lamp base. Before doing that, place the wooden base at the bottom of the dehydrator – it should fit perfectly. If everything’s okay, drill a hole in the bottom of the base and put the lamp base on top.
Attach the lamp base so it doesn’t move around.
Step 5: Attach the base, the fan, and the heating coil
Now, all that’s left to do is attach the fan to the hole under the bottom tray and plug it into a socket to ensure everything’s working fine.
If it’s good, attach the heating coil to the lamp and test it the same way. Provided it works fine, attach the base to the rest of the construction.
Stand it up and make sure the dehydrator is stable and all the devices are working fine. Now, add the trays to get a better idea of what it’ll look like.
Step 6: Attach the hinges and the door
All that remains is to drill the hinges into the sides and install the door. The door is the only non-wooden part of the construction. Make sure it closes right, not letting heat escape.
Step 7: Clean and test before using
It might sound silly, but don’t forget to clean the dehydrator before turning it on for the first time for a test.
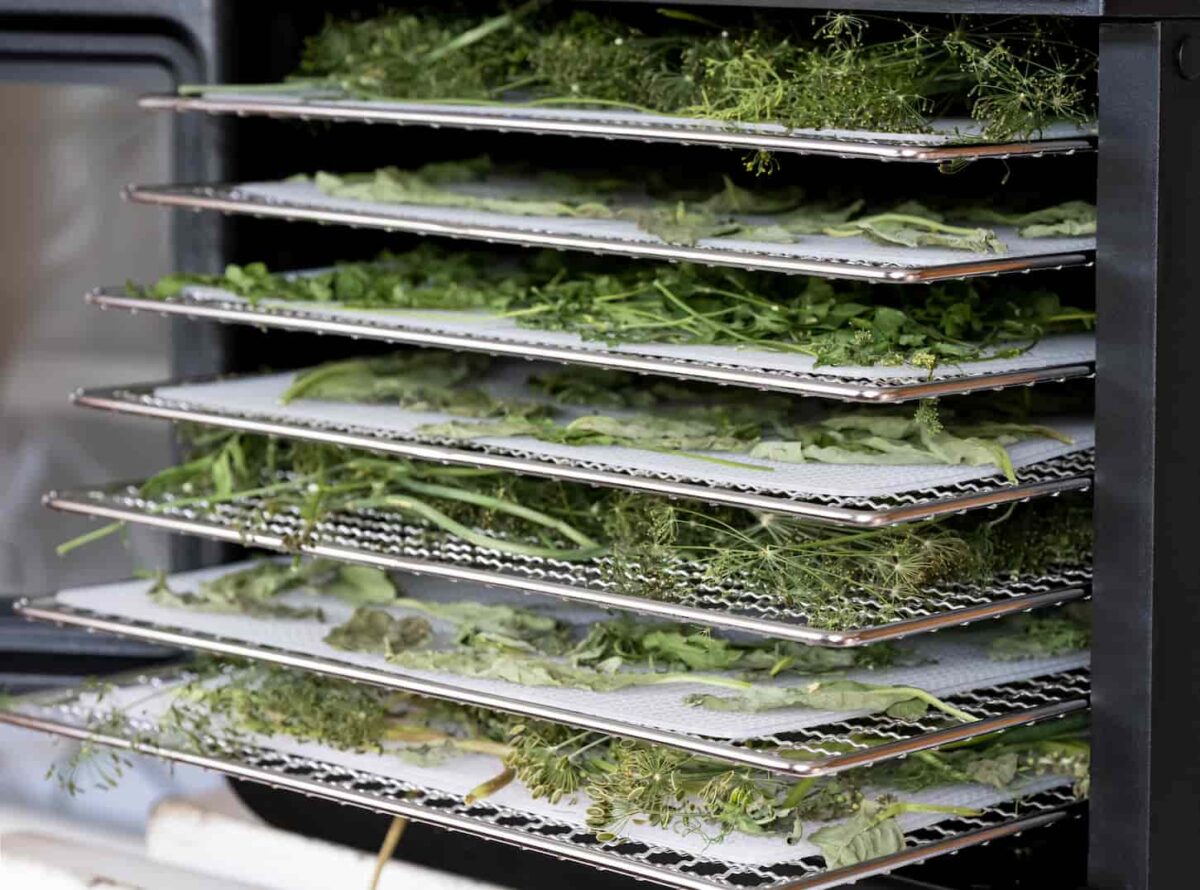
When using a homemade dehydrator, don’t expect the same drying times we would get with a factory-made dehydrator. Although it’ll work fine, it will also be slower.
Run the dehydrator for a bit with a thermometer in it to test it. You want to ensure it doesn’t get too hot to dehydrate properly and that all of the build materials perform as expected before you use the thing. Once it passes the test run, try a test run with loaded trays.

Solar Power Dehydrator Tutorial
Dehydrators that run on solar power are much easier to build as we don’t need a heater. However, we can only use them if it’s very hot in the area. Here’s how to build one in two ways. We can either build one from scratch or convert something (like a BBQ) into a solar-powered dehydrator.
To build a solar power dehydrator, we will need the following:
- Plywood
- Trays
- Tray holders
- A drill and bolts
- A glass door
- Hinges
- Screening strips
- A small fan
To convert a container into a solar-powered oven, we may need some or all the following materials:
- A BBQ or container
- A foil-based reflective shield
- Aluminum foil
- Saran warp
- Trays for holding the food
- A glass or food-grade plastic cover
Preparation
Please read the whole solar dehydrator guide completely before starting the project.
You will have to do some of your own planning, measuring, and thinking through all of this. I have built solar cookers and dehydrators in the past. They’re fairly easy to do if you do a conversion project. They are far more advanced if you’re building a dedicated solar dehydrator.
If you are new to dehydrators or DIY projects, please start with a conversion project – or take the easier route and go buy a dehydrator from a trusted brand. I’ve got a section on which brands to start with in this article: What Is the Best Way to Dehydrate Food?
Step 1: Make a plan
First, decide if you’re going to do a conversion project or a new-build. Here are a couple of images to get you thinking about what that difference means.
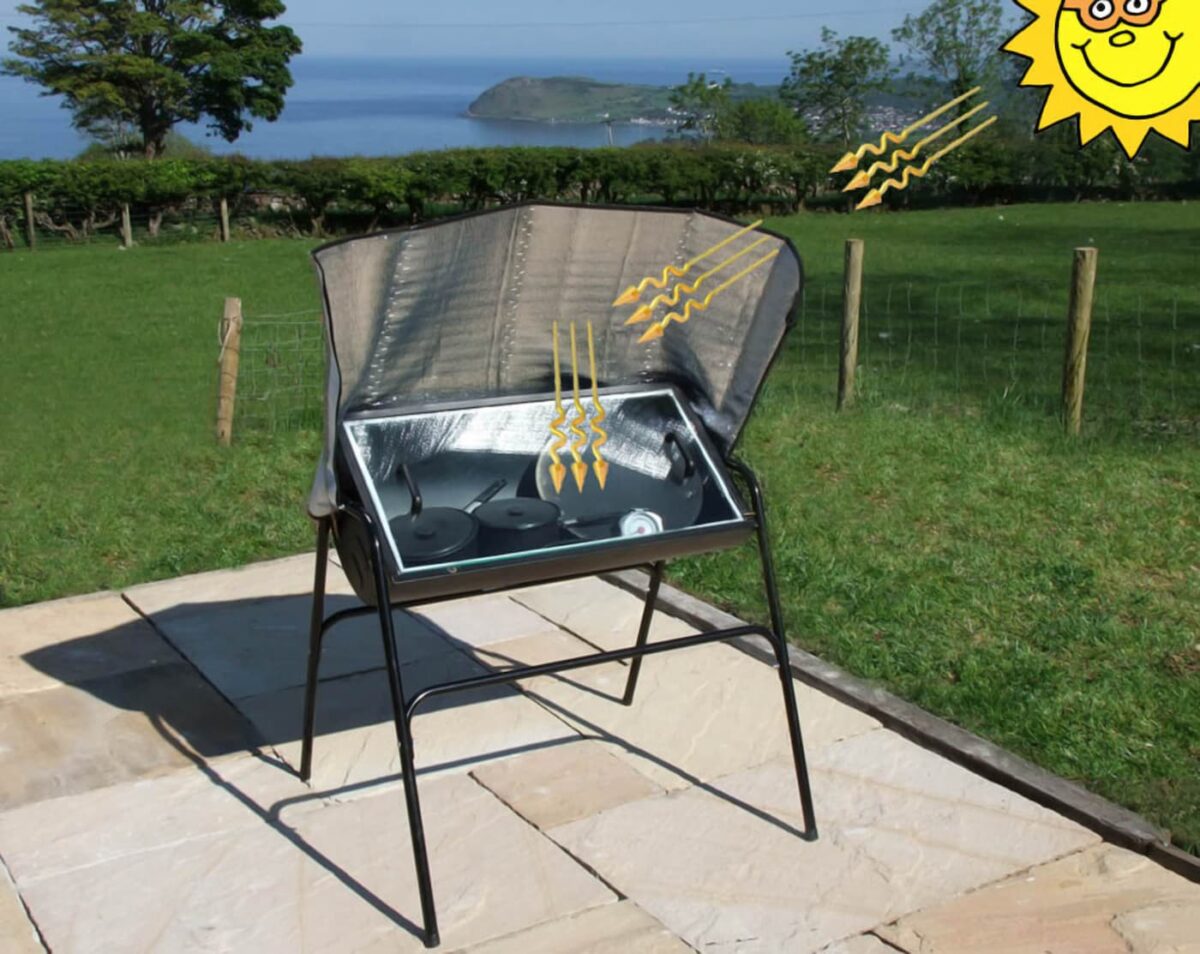
Converted Solar Dehydrator
Here is a picture of a converted BBQ grill into a solar-powered device. Technically, it’s a cooker. However, if you used trays instead of pots, it could very easily become a dehydrator.
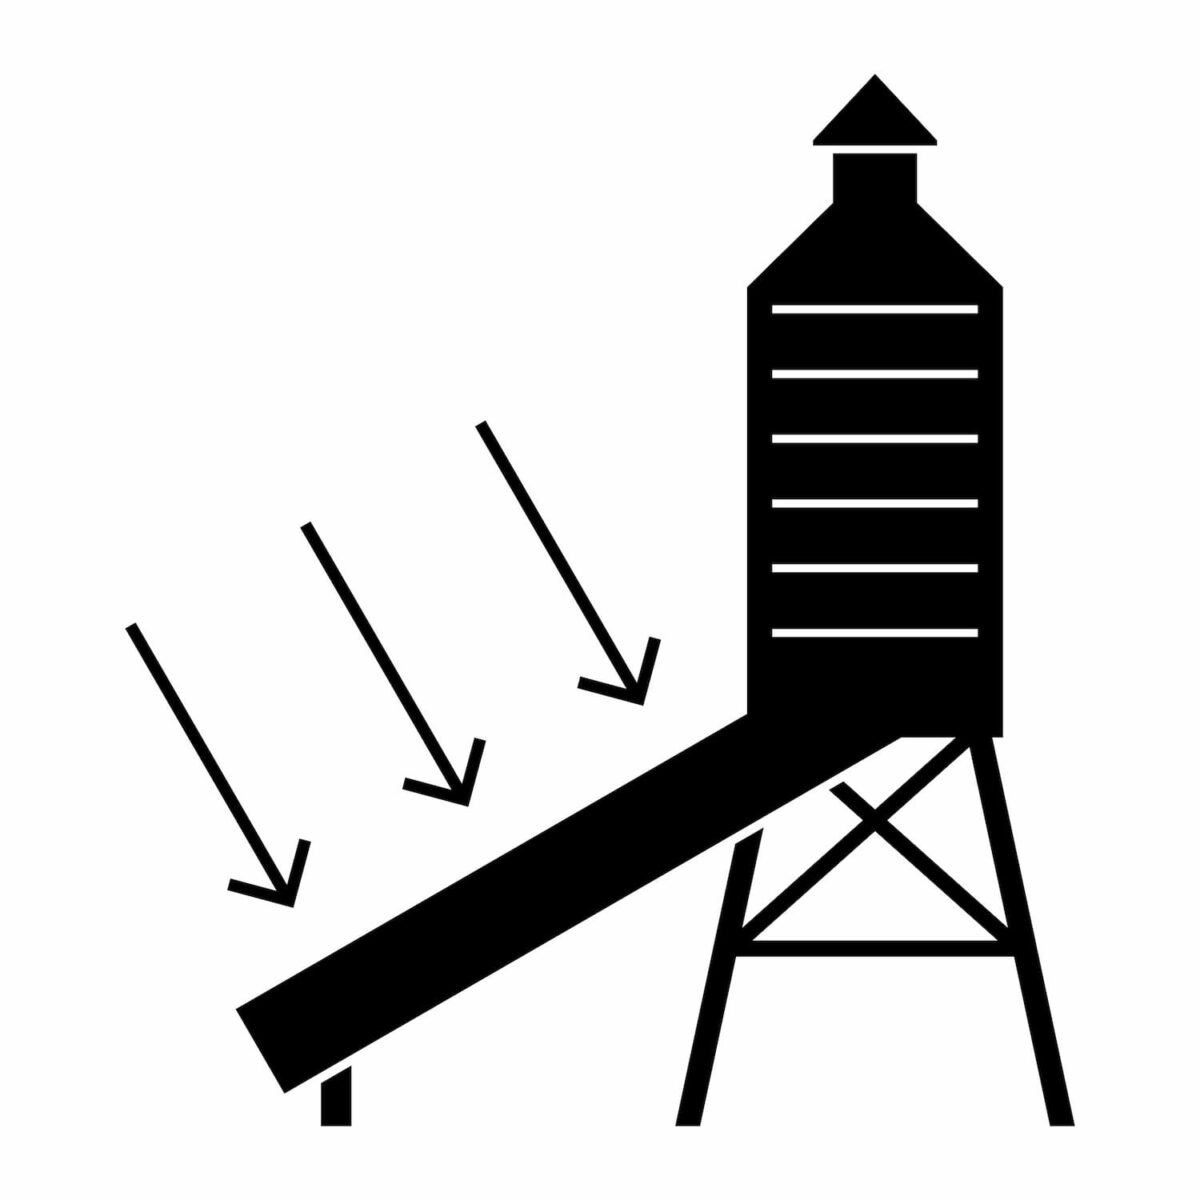
DIY Solar Dehydrator
Here is a basic diagram of what a solar dehydrator could look like. You’ll need a good-sized base to catch and control the sunlight to run the dehydrator.
The steps below suggest using a base that’s 3X as wide as the top so that you’ve got 2X the top width to collect and control the sunlight (and heat) into the dehydrator.
There are generally 3 types of solar dehydrator plans I can think of: a conversion, a basic build, and a fancy build. I’ll cover them each some before diving into the rest of the steps.
Plan #1: Convert something into a solar dehydrator
For a conversion, start by deciding what you want to convert. This could be an old BBQ, a metal cabinet, or a wood frame.
From there, a conversion can be as simple as building a base lined with tin foil or adding a foil-lined reflector to the device. If the container isn’t covered, you may also want to use saran warp, food-grade plexiglass, or glass to help contain all of the heat.
In the example picture above, the old BBQ grill has a glass lid to help keep the heat in while letting the sunlight in.
Once you’ve got the basic conversion set up, you can add in additional elements (like a fan or a thermometer) as your DIY skills allow. Feel free to check our other tutorials on this page for ideas.
Plan #2: Build a basic, low-cost solar dehydrator
If I were going to build a dehydrator, this is the option I’d pick. Here’s what I’d do and about how much it would cost. It would last several uses, but it wouldn’t be a great permanent option.
- Get several stackable cooling racks (we’ve already got several of this collapsible kind).
- Get a large box (so the trays will fit). Cut holes out of the sides to let sunlight in. Cover the holes with saran wrap.
- Leave the top of the box open.
- Line the bottom of the box with aluminum foil.
- Line the top flaps of the box with more aluminum foil.
- Put the trays (with food) inside of the solar dehydrator outside.
- Point the aluminum foil-lined flaps to the sun. Tape them in place if needed.
- Cover the top opening with more saran wrap (albeit loosely, to allow for some ventilation).
- Check on the food periodically. Move the flaps as needed.
We already have the stackable cooking racks, and we have some large boxes on hand because we do a lot of homeschool related projects. So all told, I could make this kind of a solar dehydrator (it could also work as a solar cooker) for free.
It wouldn’t be the most amazing solar dehydrator. It probably wouldn’t last super long, either. Ones I’ve made in the past have been good for several uses at best. However, they are low cost to free to make, easy to make, and can be made quickly.
If you’d like something a little fancier and more durable, let’s get into the DIY or new-build solar dehydrator tutorial.
Plan #3: Build a DIY solar dehydrator (more durable or fancier)
Our last option is to build a durable, DIY, brand-spanking new solar dehydrator from scratch (or nearly from scratch, if we decide to repurpose some items). We can incorporate steps or ideas from conversions or basic builds if we want to anywhere along the way. But it’s time to get into the DIY build steps.
Step 2: Plan, measure, and cut everything
Just like with our previous design – it’s best to adapt the construction to the trays. However, if you’ve got a container you’re repurposing, that’s fine. Get trays that will work with that container.
This construction, however, shouldn’t be a rectangle with two pairs of same-length sides.
Instead, the base should be longer than the roof – this is the optimal way to get as much sunshine as possible in the dehydrator.
For example – if the roof is 10×10 inches (basically a perfectly square rectangle), the base should be 10 (same in width) x 30 inches (different in length). Adapt the sides of the construction to the top and the bottom.
Step 3: Install tray holders, the fan, and ventilation holes
Once we have assembled the construction itself, we can install the tray holder and make sure the trays fit. If something’s wrong with them, now is the time to fix it.
We’ll also need to install the fan – just like the previous design, drill a hole and install it under the bottom tray.
The final part of this step is to drill a few holes above the top tray and cover the holes with screening strips. This will allow moisture to leave the dehydrator.
Step 4: Install hinges and the door
Finally, we’re finishing our solar dehydrator by installing the hinges and the glass door. Wash it from the inside, and use it whenever it’s sunny.
The glass door will allow the box to heat up, but it also creates the greenhouse effect – it doesn’t allow heat to dissipate. The fan will slowly circulate the air, while the small holes on top will allow the moisture to escape.
If the small ventilation holes are too big, consider covering them with a screen or mesh of some kind to prevent bugs from entering the solar dehydrator. Not that the bugs would likely live long; they’d dehydrate, too. But nobody wants dehydrated bugs on their dehydrated food.
Other DIY dehydrator steps
There are a few things to keep in mind with DIY dehydrators, no matter which design we choose.
All materials inside should be resistant to high temperatures – the temperature inside a dehydrator can get to about 140°F (degrees Fahrenheit). We don’t want to use anything that will melt into our food.
Install an oven thermometer to keep track of the temperature.
- To lower the temperature inside a solar dehydrator, all we have to do is take it into the shade and open the door for about 20 seconds, and let it cool down a bit.
- To raise the temperature inside the solar dehydrator, reposition it, so it’s more fully in the sun.
Homemade dehydrators aren’t as reliable as factory-made dehydrators, so keep an eye on your dehydrator when using it. You should check on it probably at least every hour or so to make sure the temperature is good and that it’s still properly positioned in the sunlight.
What Can I Use if I Don’t Have a Dehydrator?
The best alternatives to a dehydrator, aside from building your own dehydrator, are to use the oven, to smoke the food, or air-dry the food. We can also dry it in a microwave, but this is severely limited and not recommended.
Take a look at our article about dehydrating food without a dehydrator to learn more.
Next Steps
Now that you know more about building your own dehydrator (whether electrical, solar, or otherwise), you can dehydrate your own food.
If building your own dehdyrator sounds too hard, or you’d rather save up for a dedicated dehydrator of the highest quality, we use and recommend the Excalibur line of dehydrators – and this is the exact model we own.
From here, make sure you check out our master guide to dehydrating: What Is the Best Way to Dehydrate Food? That way, you can get all the dehydrating info you want.
Resources
Learning from your own experience is essential, but learning from others is also intelligent. These are the sources used in this article and our research to be more informed as homesteaders.
- Naitor, Sergio. Solar Dryer. 30 May 2019, www.academia.edu/39312859/Solar_Dryer.
