Freeze dryers are pretty useful pieces of equipment, but when you first get one they can be a little confusing to set up and use! Here’s our handy walkthrough guide to everything you need to know about using your Harvest Right Freeze Dryer.
Setting up a Harvest Right freeze dryer can be done in as little as a few minutes (for placing the unit) up to several hours, depending on what’s being run during the testing of the chamber. Following all of these steps is crucial to making sure that the unit is functional and will work properly for years.
Ready to set up your freeze dryer? Let’s do this.
How do you Set up a Freeze Dryer?
So let’s imagine that you’ve just bought yourself a brand new freeze dryer but, having never owned one, you don’t know what to do next. Don’t worry, we’ve got your back! Here’s how to set up your dryer and run a quick check to see that it’s good to go.
This is a super-comprehensive list with quite a lot of small steps, but if you’re like me you’ll enjoy them – it’s kind of fun imagining this as like powering up the Death Star in Star Wars! In reality, it’s nowhere near as dramatic, and you’ll find your dryer super easy and intuitive to use.
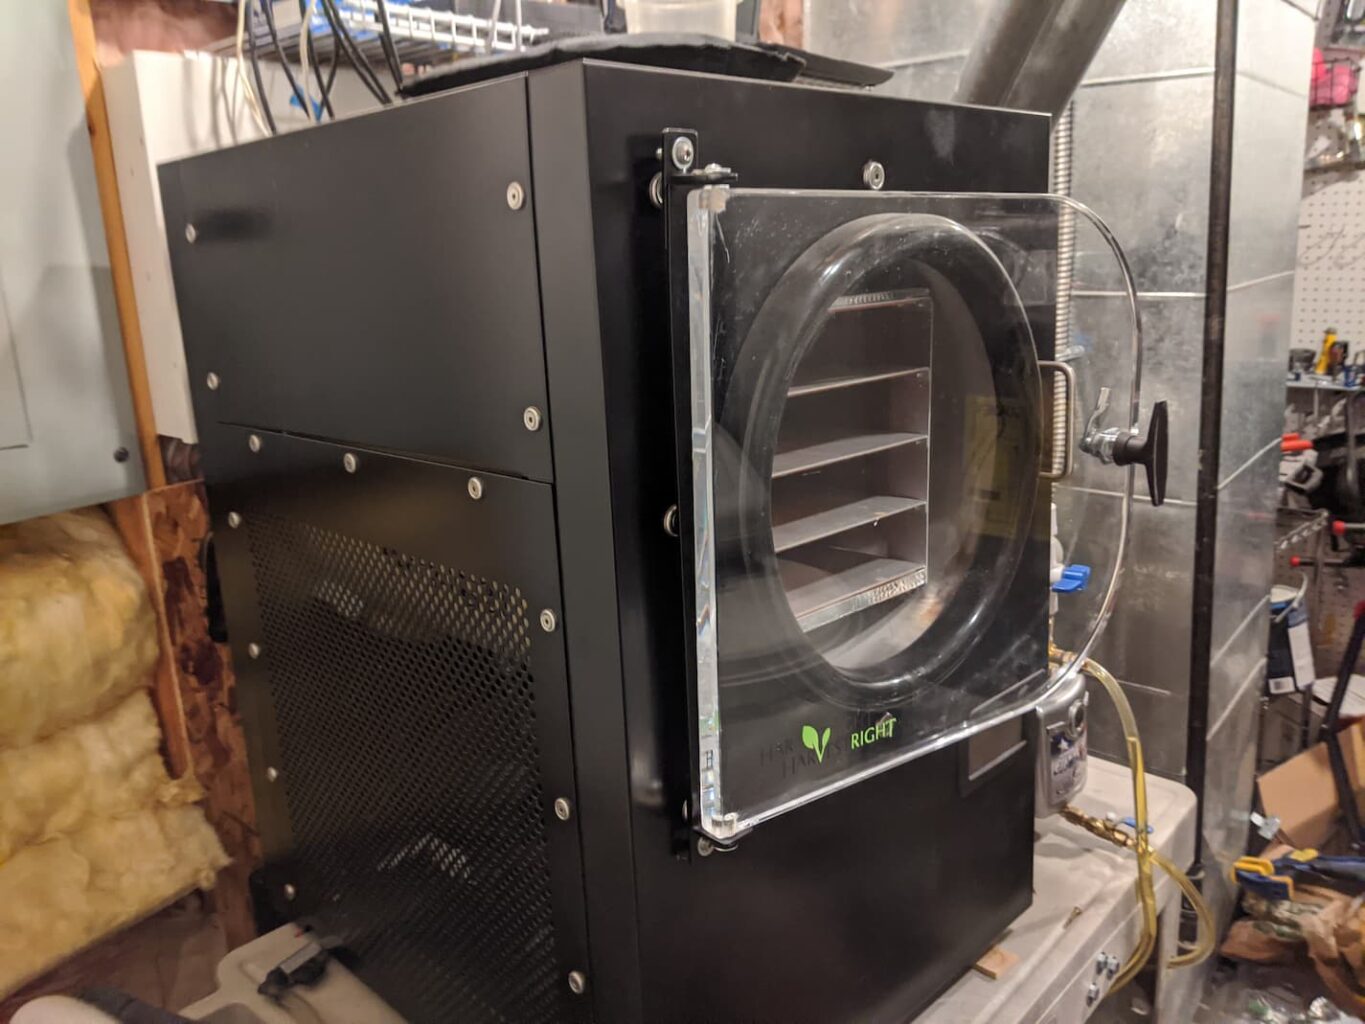
Step #1: Choose where to place your dryer
The first thing that you need to do is select a good place for your dryer. It needs to be somewhere with a level surface, and where its vents are not blocked by anything. Freeze dryers come in a huge range of sizes. Depending on how big yours is, a kitchen surface may be suitable, or you may need to put it somewhere with more space.
It’s recommended that before it’s turned on, you let the dryer rest for about 24 hours, just like you would with a fridge or other cooling appliances. This is to allow the coolant in the pipes to settle.
It’s also important to put your dryer in a cool place. Right next to the clothes dryer isn’t ideal! Although it’s safe except in extreme temperatures, operating your dryer in warmer environments can drastically increase the time it takes to process a batch of food by as much as double.
Step #2: Check the door
The gasket is the rubber seal between the door and the inside of the dryer. Have a quick check of this to make sure that it’s clean and there are no gaps between it and the door.
You also need to check the inside of the door. This just needs to be a quick check to make sure that the surface is clean. It’s more than likely that it will be, but in case of any dirt just wipe it down with a cotton cloth and water. Don’t use any cleaning products, the water should be enough and will keep your dryer in good shape.
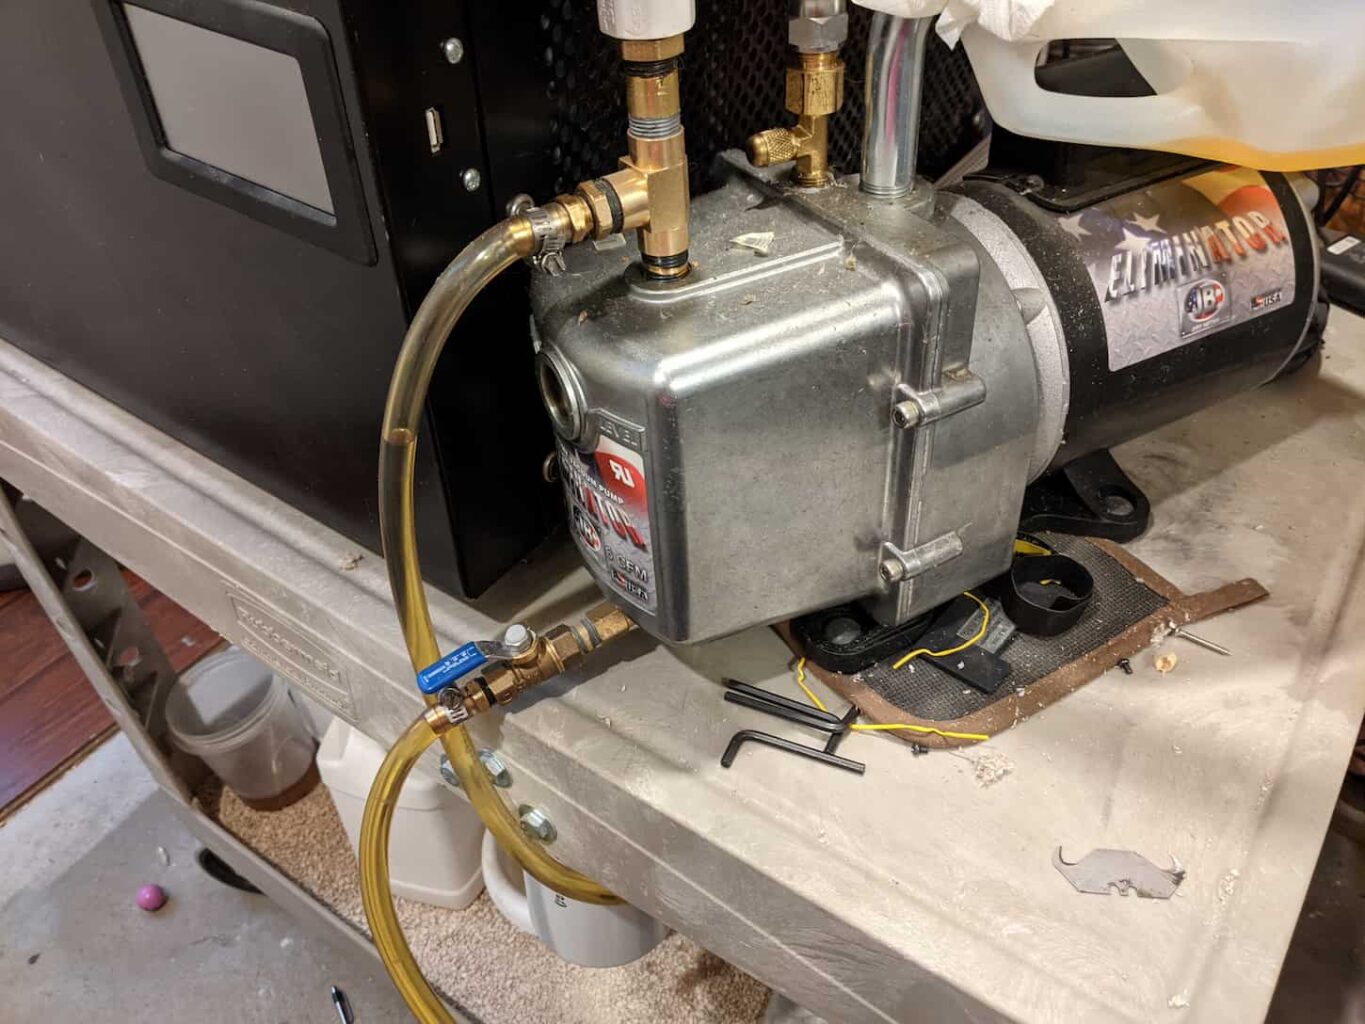
Step #3: Check and set up the vacuum pump
Now, there are multiple vacuum pump options available these days. If you’ve chosen an oil-free pump then congratulations as you can skip this step! They’re basically plug-and-go.
But if you’ve got the more basic, oil-based vacuum pump like we do? Then you’ve got to prime the pump with oil.
To do this, remove the red cap on the vacuum pump. Pour in oil until it reaches the center of the glass display, then replace the cap.
Step #4: Connect the hose to the freeze drier
This is pretty simple — just screw in the hose in the connection on the dryer and pump. Hand tightening is enough and using tools to tighten further risks damage to the dryer.
Harvest Right recommends not using any tape on the connections as it can cause problems for the O ring, which will alter the tightness of the seal.
Want to see more about our oil filtration setup? It’s automatic – and almost magic. You can check out my video walkthrough of it by clicking this link to go see it on YouTube.
Step #5: Plug in the power cord and turn on the dryer
O means off, I means on (and the button is on the back of the pump). Once you turn it on, you’ll see the interface light up.
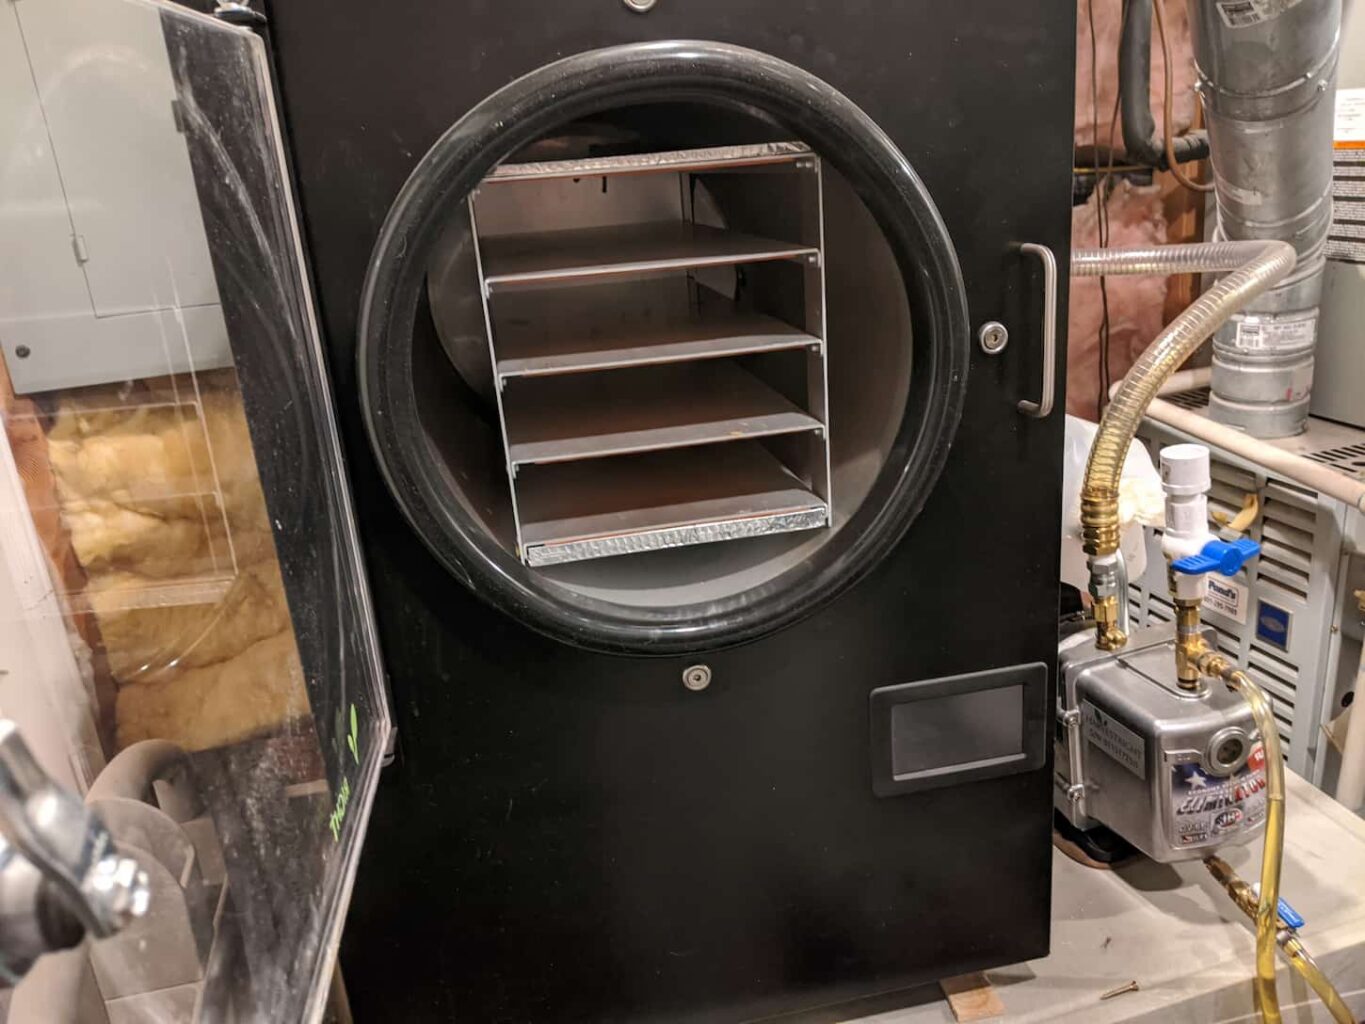
Step #6: Insert the insulator pad into the door
This is a black pad that goes between the door and shelves. It should fit pretty sweetly between the gasket and the shelves (but don’t let it get caught in the door).
Step #7: Shut the door
Sounds easy! But pay attention to the door handle. You just need to latch the door and then turn the handle to the right as much as you can to seal it tightly. Be careful not to push it too hard and break it though!
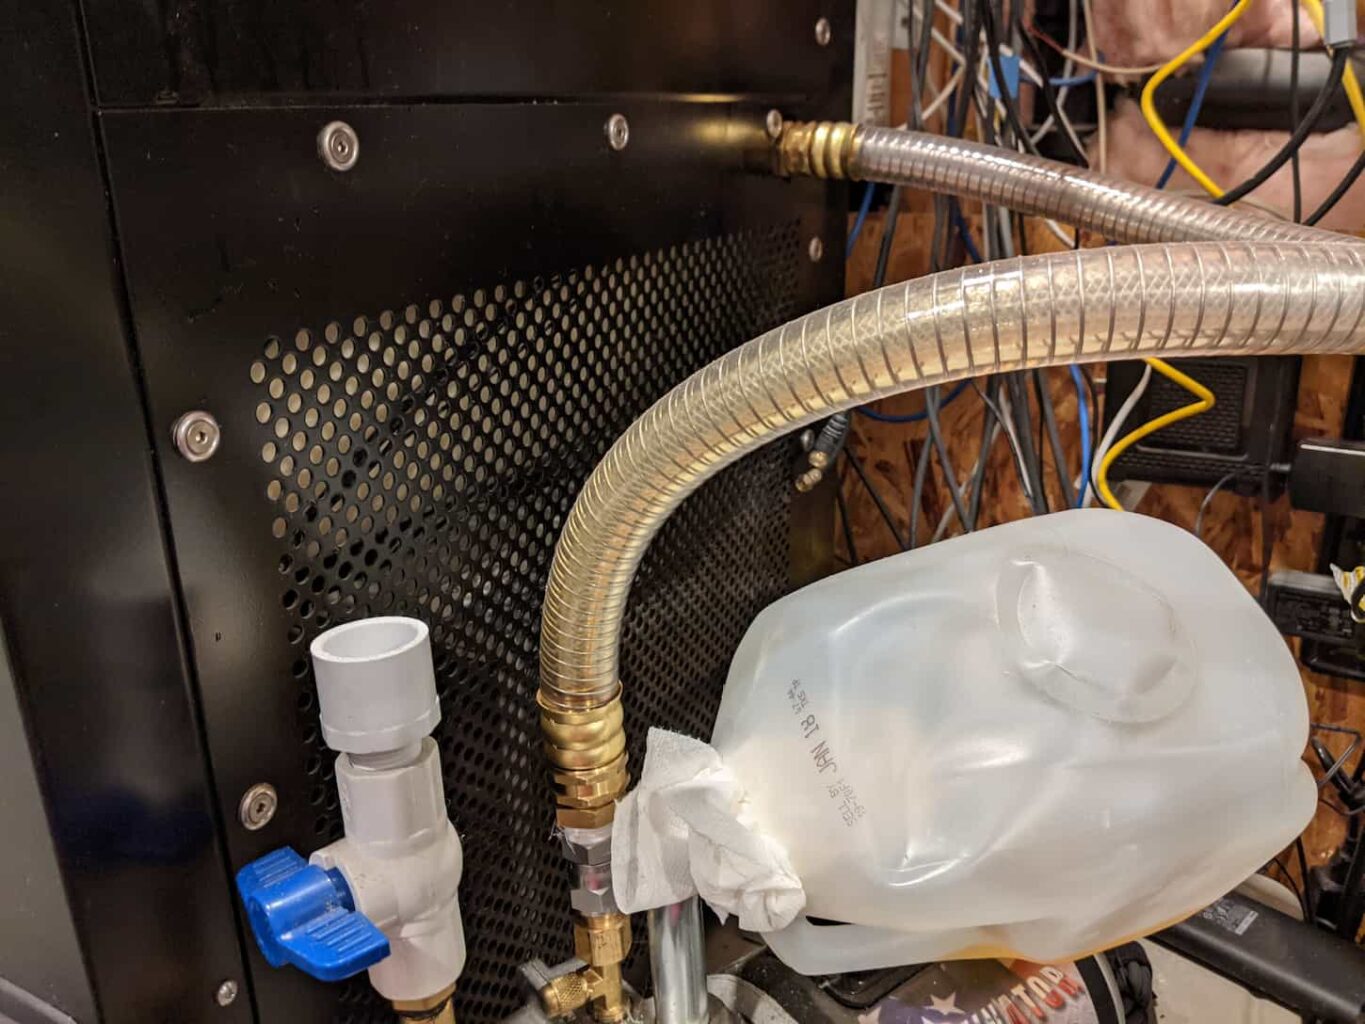
Step #8: Close the drain valve, and put the open end in a bucket or drain
Your freeze dryer is going to extract most of the water content (up to 99%!) of your food, which has to go somewhere. It’s best to collect this water in a bucket or even directly into the drain to avoid making a mess.
Step #9: Check the door fully seals against the gasket with the pump turned on
The pump creates a vacuum within the dryer, which should help the door seal nicely and snugly. If there are any parts of the gasket that don’t seal properly have a quick check why, as it may be that something small is obstructing it.
Step #10: Double-check
No harm in being absolutely certain everything’s in good shape!
Step #11: Turn on the dryer for a test run
It’s crucial that for the test run the dryer is completely dry inside. If it is, you’re ready to check it’s working! From its interface, you can select the ‘functional test’ setting and press the ‘on’ icon to begin. Leave the dryer to work for 30 minutes, after which the pressure should be below 500 mTorr.
If the reading is below 500 mTorr, then you can press ‘done’ on the dryer happy with the knowledge that everything’s shipshape! If not, check that the door seals properly, the hose connections are tightened, and the drain valve is closed. Any problems creating the vacuum are most likely caused by some small gaps in the seals.
If all of these things seem fine but it’s still not working properly, then call the Harvest Right customer support helpline (800-865-5584). They are a super helpful bunch of people.
Step #12: The first batch
Before you get stuck into freeze-drying as much as your heart desires, there’s one final recommended step – to freeze-dry a batch of moist bread. That’ll help you be 100% sure that it works, as the bread should be dry after (at which point you’ll probably just want to throw it away). It’ll also help you remove the slight smell of a freshly manufactured freeze dryer!
What is the Process of Freeze-Drying?
Freeze drying is the process of drying food in a vacuum at a low temperature to remove water content without damaging its structures. It allows food to be preserved for a long time safely.
The fact that the drying occurs inside a vacuum allows the dryer to sublimate water from the food (evaporate ice crystals while skipping the middle water step). This offers multiple benefits, not least that up to 99% of the water content can be removed, that the tastes and textures of the foods remain relatively consistent with that of the undried food, and that the freeze-dried food is extremely light.
There are quite a lot of benefits of freeze-drying, and while it would be a lot to get into in this article, why not check out some of our other Backyard Homestead HQ resources? These answer some key questions, including (but not limited to!);
- Can You Freeze-Dry Aged Beef?
- How to Freeze Dry Bell Peppers: 5 Simple Steps!
- 77 Foods You Can Freeze Dry and 17 You Cannot: Complete Guide
- Freeze Drying vs Canning: What You Need to Know
How do you Freeze-Dry for Beginners?
Now that your dryer is set up, let’s think about how to dry some food! Fortunately, with a Harvest Right Freeze Dryer, this is a pretty simple process thanks to the interface screen. Here’s a simple summary of all you need to know to get drying;
Step #1: Prepare your food on the trays (more about how to do this below!)
Seriously. This is kind of involved, so hang tight. Let’s cover the other steps first – and then when I explain this later, it’ll make total sense as to why it’s done the way it is.
Step #2: Press ‘START’
After a few seconds, the dryer will ask you to select whether the food is pre-frozen or not. Respond accordingly. The ‘pre-frozen’ setting just cools the dryer already so that it doesn’t defrost foods that are already frozen (it will take about 30 minutes to get down to temperature).
Note: if you’ve got the older software, your machine will have to be watched to get to the right temperature. It still takes about 30 minutes, but we use -80 degrees Fahrenheit as our “yeah, it’s cold enough now” mark.
Step #3: Load the trays and start the load
Once this is done, the dryer will tell you to load the trays and close the drain valve. Place the trays and insulator pad in the dryer, and close the door securely for a tight seal (just as in the preparation steps above). Then press continue.
Step #4: Kick back and relax!
The drying process generally takes up to 15 hours, depending on whether the food is pre-frozen and its water content, amongst other factors.
Step #5: Remove the food and store it for later
Always end your freeze dryer on the warming part of the freeze-dry cycle.
Once the dryer’s finished, it’ll make a beep to let you know. At this point, you should take the drain valve out of the bucket or wherever it’s put the excess water. Check if it’s dry if not when the vacuum is opened up it will suck all the water you just removed straight back in!
After the drain valve vents are opened the vacuum will be broken and you can open the dryer. Check that all the food is dry, then package it in sealed containers or bags (more detail about this below).
The trays can be extremely cold, so be cautious. Use oven gloves or pads (or the ‘warm trays’ setting on the dryer).
Pro tip: if you set the freeze dryer to end on the warm part of the cycle,(instead of cold), then you’ll be able to grab the trays without needing hot pads. You’ll also reduce the risk of condensation ruining your freshly freeze-dried foods!
Once you’ve taken the food out of the freeze-dryer, test snap a few pieces of food. If it’s at all moist (or doesn’t dry snap), then put the food back in for another cycle or two.
If it snaps great, then store it in a Ziploc bag to store for a couple of days. I like to put it into a gallon-sized Ziploc baggie and store it in a dark, cool, dry area for a few days. Doing this lets me test it to make sure it’s truly free of all condensation and moisture – that way, you aren’t putting food that’ll spoil into the more expensive Mylar bags.
Once the food has proven it’s plenty safe to store, then I’ll store it in a Mylar bag with an oxygen absorber. Don’t forget to seal the bag! We actually seal it twice – just in case one seal fails.
Step #6: Remove excess water to prep for future loads
Getting rid of all of the ice and water from your dryer is the final step, which gets your dryer ready for the next batch.
How Do You Prepare Food for Freeze-Drying?
It’s quite simple to prepare a sample for freeze-drying. Food just needs to be placed on the dryer tray, usually in a single layer so it’s not stacked too high to be put into the freeze-dryer. The simplicity of preparing food is a key benefit of freeze-drying.
The key thing is to not overfill the tray. Foods shouldn’t be more than half an inch thick. The thicker they are, the longer they’ll take to dry.
There’s some nuance to this that can speed up the drying process. Many people prefer to pre-freeze foods, which speeds things up enormously (particularly as a household freezer can hold far more food than a freeze dryer). Getting through batches quicker is handy as smaller freeze dryers can only handle a certain amount of food at one time.
Plus, that way you’ve got your fresh, delicious food frozen and stored in the meantime. You’ll be able to process a lot more food more quickly – without any of it going to waste while you’re waiting on the freeze-dryer to do its thing.
How Do You Store Food Once it’s Freeze-Dried?
To store freeze-dried foods, you need to put them in an oxygen-free and moisture-free environment to keep them fresh. Jars, sealed bags, and boxes can all be suitable containers when prepared and used properly.
It’s crucial that freeze-dried food goes into an airtight container because otherwise, it will reabsorb moisture from the air. A popular storage choice for foods is vacuum-sealed plastic or mylar storage bags, with added oxygen absorbers that can extend the shelf lives of food drastically.
Vacuum sealed bags are particularly popular for commercial applications such as hiking, military, and even astronaut foods. They are the lightest and most efficient way to use valuable storage space, and weight and space are the primary concerns of this kind of freeze-drying enthusiast.
If you’re not on a space station but just in a kitchen (making no assumptions here!), then there are other options available to you.
This is particularly true if you’re planning on eating food in the next few weeks rather than packing it down for the zombie apocalypse. Resealable jars, cans, and containers work great, just as long as you check that they are completely dry first. This is a great way to store freeze-dried snacks in your kitchen, for example, or to just keep some things ready for a hiking trip in the next couple of weeks.
Key Takeaways on Setting Up a Freeze Dryer
Setting up your freeze-dryer for the first time is an amazing feeling. It’s been a few years since we first set ours up, but I still remember the feeling of giddiness I had that we’d be able to store foods we actually like in our food storage.
Because as amazing as those done-for-you meal kits are, there are very few of them that my children will currently eat. And I can’t blame them – many of them aren’t my favorite thing to eat, either.
But that’s okay. Because now that we’ve got our freeze dryer set up and going? We can eat what we want, store what we want, and it’ll last for a long, long time.
Now that you’re ready to set up your freeze dryer, make sure you read this article next – it’ll show you the 77 foods that will definitely freeze-dry (that we’ve proven work) and 17 that won’t work – no matter how much you wish they would. It’s a handy resource, so make sure you give it a read next!
Resources
Learning from your own experience is essential, but learning from others is also intelligent. These are the sources used in this article and our research to be more informed as homesteaders.
