Berries are one of the best treats there are. There are many different varieties, and they all offer various types of nutrients which are good not only for your health but also for your body. Berries are fabulous for jams, shakes, pies, and other types of desserts. But what do we need to know about berries? Everything.
Berries plants are perennials that require sun, rich soil, space, mulch, and regular care to grow delicious, edible fruit. This fruit can be harvested once or regularly, depending on the variety. Berry plants are a great addition to any garden if they get the right care.
Ready to learn more about berries and how to care for them every step of the way? Let’s do this. Keep reading and I’ll share everything I’ve learned through experience and research. We’ll start by going over some basic, all-berry types of information. Then, we’ll go into the specifics.
To make this giant article less intimidating, it’s broken down with jump links (like a clickable table of contents) so you can either read the whole thing or just go to the parts you need.
Table of Contents
- How Do You Plant Berries?
- Seasonal Prep and Care of Berries
- Berry Illnesses and Diseases – with the List of Symptoms and Treatments
- Pruning Berries (all types) General Guidelines
- How Much Sun Do Berries Require? Can They Grow in the Shade?
- How Long is the Harvest for Berries?
- Blackberries
- Blueberries
- Elderberry
- Goji berry
- Huckleberry
- Mulberry
- Raspberries
- Strawberries
- Tayberries
- Frequently Asked Questions about Berries
But before we get into the specific varieties, here’s some general information about all berries that’s good to know as a starting place.
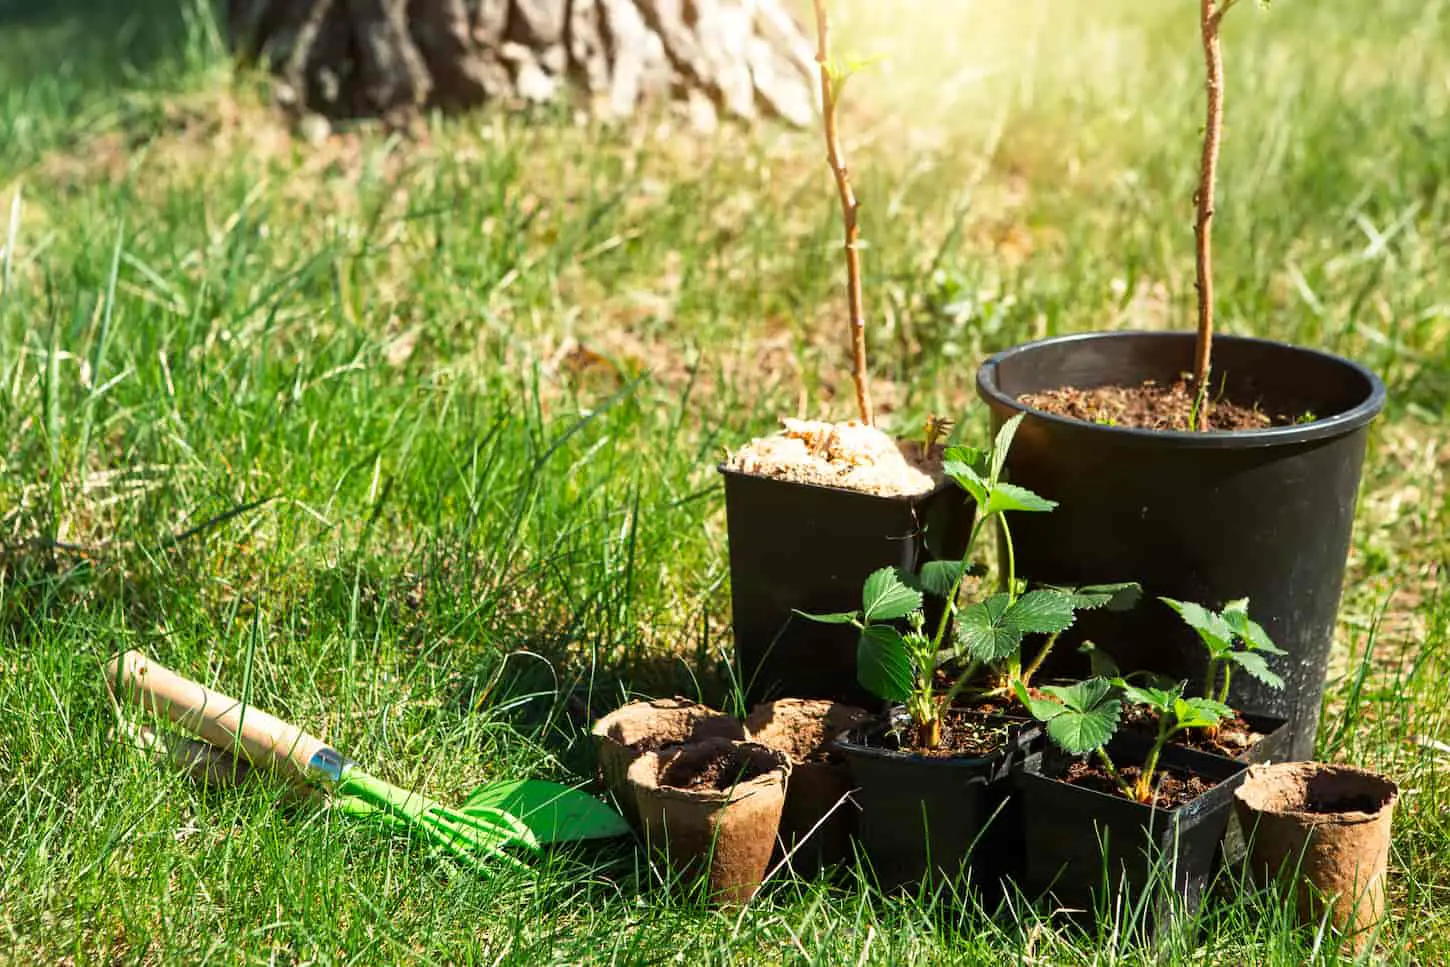
How Do You Plant Berries?
Berries generally need full sun, and the soil needs to be rich and fertile. Space berry plants about 2 to 3 feet apart. Plant berry starters with the crown about the same height as it was in the pot. Add compost to help protect and fertilize berries.
Choose berries that can survive the climate of the area. A good nursery is the best place to go for information about what type of berry is right for the location’s climate.
If you have a green thumb and a few varieties of favorite berries, then here is a complete guide on how you can start planting, growing, caring for, and harvesting berries.
Seasonal Prep and Care: Caring for all Berries
During the changing seasons, your berries will need extra care. Here are some tips for good care of berries during the different seasons:
- Spring – This is the best season for planting. Remove any old mulch – it will encourage new growth and better production. Pruning is a good idea for some varieties.
- Summer – This season is usually the time when berries grow and produce the most fruit. To help the plants grow, remove all weeds. Water them regularly to help them beat the summer heat.
- Fall – This is the season where leaves and berries fall the most. Always keep the area clean so that the area isn’t attractive to pests that will attack the plants later and make them die or rot.
- Winter – This is the hardest season for most types of berries. Prevent roots from freezing by adding mulch. Add at least 2–3 inches of mulch to protect the plant, so they will stay warm and survive the winter. Some types of berries can be pruned in winter, but most are pruned during the spring.
Berry Illnesses and Diseases – with the List of Symptoms and Treatments
Berry plants can be both infected and affected by various diseases caused by bacteria, fungi, or pests (including insects). This list of berry-related issues is by no means exhaustive, but it does show the most common issues.
Anthracnose (Colletotrichum acutatum)
This disease affects berries with thorns. The first sign of infection is when spots appear on the leaves. They are circular with a light gray center and a reddish-purple border. The spots will turn brown, then become dry and scabby.
- Chemicals can be used to protect the plants, or defense can also be done naturally.
- Destroy any wild brambles, and make sure the soil is well-drained.
- Pull the weeds, make sure to have good spacing between plants, and destroy the canes after harvest.
Crown Gall (Agrobacterium tumefaciens)
This disease is caused by wart-like growths on the roots and the crowns of berries. Crown Galls are present in the soil or the planting stock. If your plant becomes infected; everything will turn weak, and dry, and the berries won’t develop properly.
- Always inspect for any signs of galls on the roots and the crowns of the berry plants.
- Avoid places that were previously planted with grapes, fruit trees, or brambles.
- Do not plant again in place where there is a history of galls.
Black Rot (Guignardia bidwellii)
This is one of the most common diseases in berries. Circular light brown spots will start to appear and then spread all over the plant. The berries will shrivel, then wrinkle away.
- Use fungicides to protect your berries.
- Use a sterilized knife to remove affected areas and destroy the affected berries.
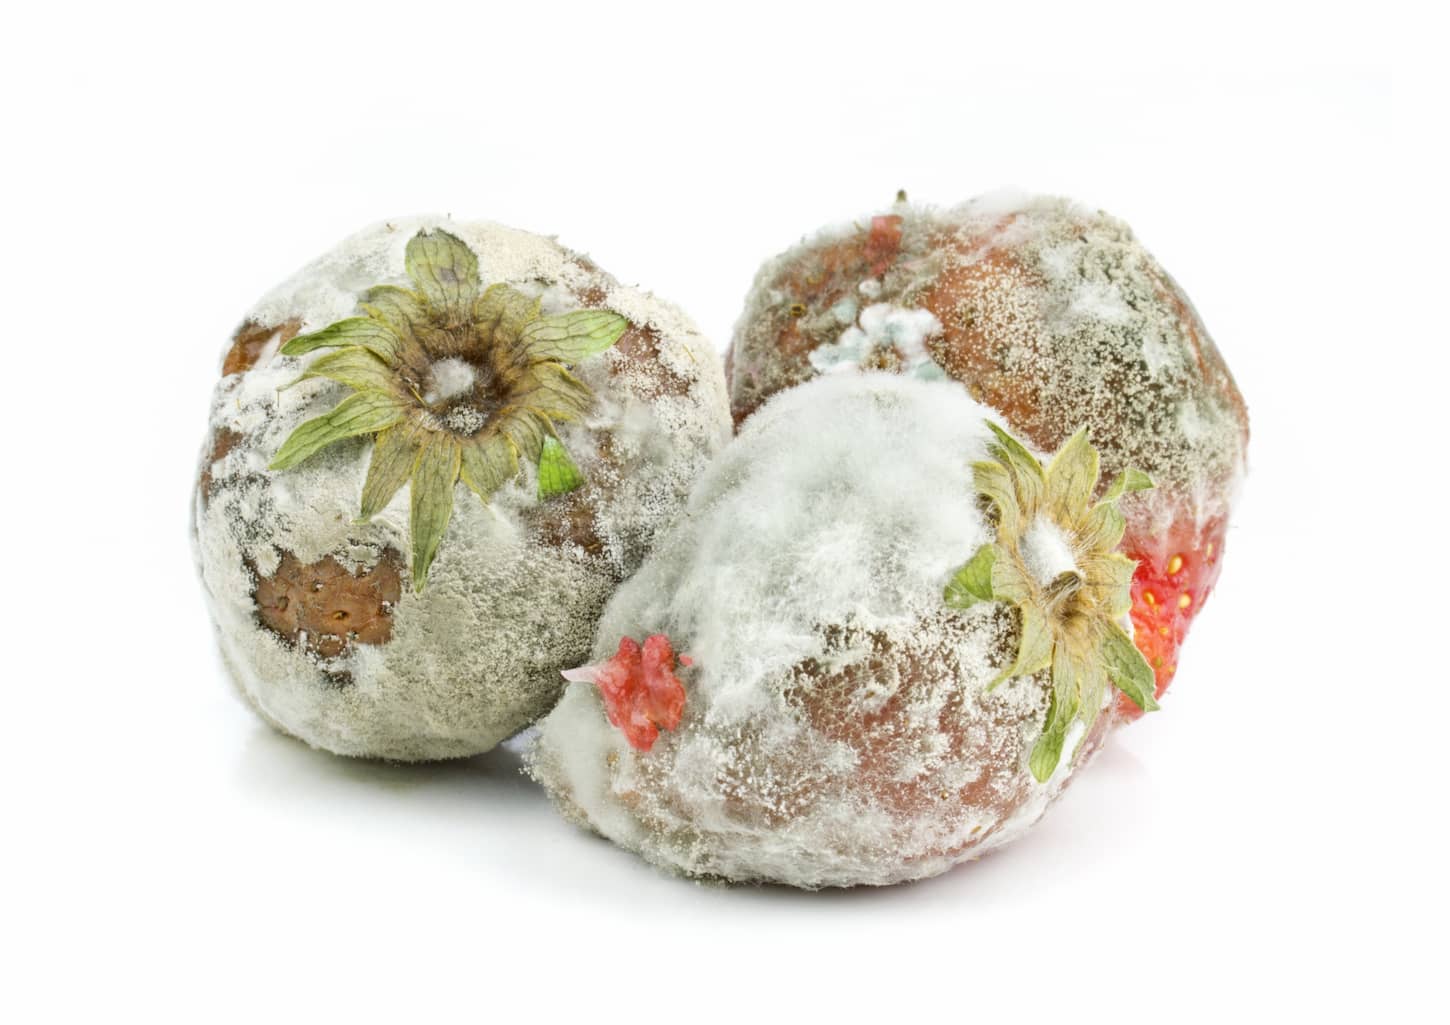
Gray Mold (Botrytis cinerea)
Gray mold can kill your berry plants. Infected plants will become covered with gray and dusty fungi. Berries won’t show symptoms until after harvest.
- Avoid excessive application of nitrogen fertilizers to your berries.
- Handle each berry carefully to avoid bruising,
- Pick the berries in the morning during harvest season.
Insects
Insects spread disease and can damage the plants through things like eating leaves or berries. Look out for these types of insects:
- Borers
- Fruit worms
- Fruit-piercing moths
- Leaf-feeding caterpillars
- Snails, Beetles
- Mites
- Gal flies
- Fruit flies
Dormant oil sprays will help protect the plants by suffocating them. Having chickens can be another way to control pests naturally without using pesticides. Pesticides and insecticides are other options to control insects.
Pruning Berries (all types) General Guidelines
All types of berries need pruning from time to time; it makes the berry plants more manageable, and it’s much easier to collect the berries when the harvest season comes.
Each type of berry requires different pruning, but I’ve got a complete guide to pruning for you here: Pruning Berries: The Ultimate Guide.
How Much Sun Do Berries Require? Can They Grow in the Shade?
Most berries require full sun, or 6 to 8 hours of sunlight, while some varieties need partial sun or up to 8 hours of sun.
You can either read this article and check the various berry types for their sunlight requirements or read my article: How Much Sun And Shade Can Berries Tolerate? A Complete Guide. There’s a table there (alphabetized) that will show you exactly how much sunlight and shade each berry type requires.

How Long is the Harvest for Berries?
Berries are harvested during either a small window (for heritage varieties), several windows (ever-bearing), or for several weeks during a “harvest season.” This depends on the variety of the berry as well as the variety of the plant.
- Strawberry: Depending on the variety and location of the strawberry, the harvest begins in the first week of June and ends in July.
- Blueberry: The harvest period for blueberries lasts for 2 months. They are typically ready between June and August.
- Blackberry: Blackberries are usually ready to pick from July to August (3–4 Weeks).
- Raspberry: Crops usually last for a month, becoming ripe during July. Raspberries start to produce in their second year.
- Elderberry: These are ripe for 5–15 days. Once they are ripe, they are ready for harvest, the harvest season is usually from mid-August to mid-September.
- Goji berry: The harvest season usually starts in the summer and ends with the first frost. After winter, the leaves can be harvested for tea.
- Tayberry: Tayberries produce fruit once a year, from July to August.
- Mulberry: The harvest season for mulberries begins in mid-June through August (2 Months).
- Huckleberries: The first berries will start to produce when the plants are 3–6 years old. The flowers will bloom in April and May. It may take 10–15 years for this berry to reach maximum production.
Guide to Blackberries
Blackberries are commonly known as perennials, and they survive for many years.
There are three kinds of blackberries: erect thorny, erect thornless, and trailing thornless blackberries.
How to plant blackberries
Plant blackberries early in the spring when their canes are dormant for best results.
Location is very important for this type of berry. Select a spot where there is plenty of sunlight. The soil should be well-drained and slightly acidic to neutral (pH level of 5.5–7.0).
When digging the hole, make sure that it is one inch deeper than the planters that came from the nursery. Space them so that each plant is 5–8 feet apart so that they have plenty of room to grow.
Insert the plant into the hole and cover it with soil, then top it with mulch. Mulch helps the plant conserve moisture (blackberries require plenty of moisture).
How and when to fertilize blackberries
Blackberry plants need to be fertilized three times per year. Fertilize your blackberry plants 3-4 weeks after planting, then apply another round of fertilizer as soon as new growth appears.
Apply more fertilizer in the late fall before the first hard freeze. If the blackberry plants are already established, then fertilize them before they begin to grow in the spring.
How to fertilize berries:
- Use an all-purpose 10-10-10 or 16-16-8 fertilizer. Organic fertilizers like manure or compost can help improve the soil composition in your garden.
- Spread the fertilizer on top of the soil in each row of blackberries. Spread five pounds of your choice of fertilizer every 100 feet.
Blackberry water requirements
Make sure that each blackberry plant receives at least one inch of water per week and more if the weather is hot.
Blackberries need a good amount of water, though too much can flood them and attract snails. A drip irrigation system is really the way to go here.
How and when to transplant blackberry shoots
Transplant blackberry shoots in the winter or early spring when they are dormant for best results. Follow the steps below for how to transplant a blackberry shoot into its new home.
Identify the type of cane that needs to be transplanted.
- Floricanes (old and dead primocanes) are brownish and have a woody appearance, and should be removed.
- Primocanes are small and green. The canes that you should transplant are the primocanes since they will bear fruit the following year.
Make sure that the shoot that is going to be transplanted has a stem that is sturdy; it should be around 6–12 inches. Make a clean cut in the shoots that you are going to transplant,
Remove any old leaves and debris from the roots. Transfer the primocane into its new home. If it can’t be transferred right away, wrap it with moist newspaper or a towel.
Once done, water regularly until there are new signs of leaves sprouting. Pruning is very important for blackberries.
How much sun do blackberries need? Can they grow in shade?
Blackberries need at least eight hours of direct sunlight daily to be healthy and produce good berries. Blackberries can also grow in shade, but fruit production will negatively affect quality and quantity.
Blackberries, like other berries, can experience sun scaled (think berry sunburn) if they get too much sun during the heat of the day. If you live in an area with extreme temperatures, you may need to shade your blackberries to prevent sun-scald.
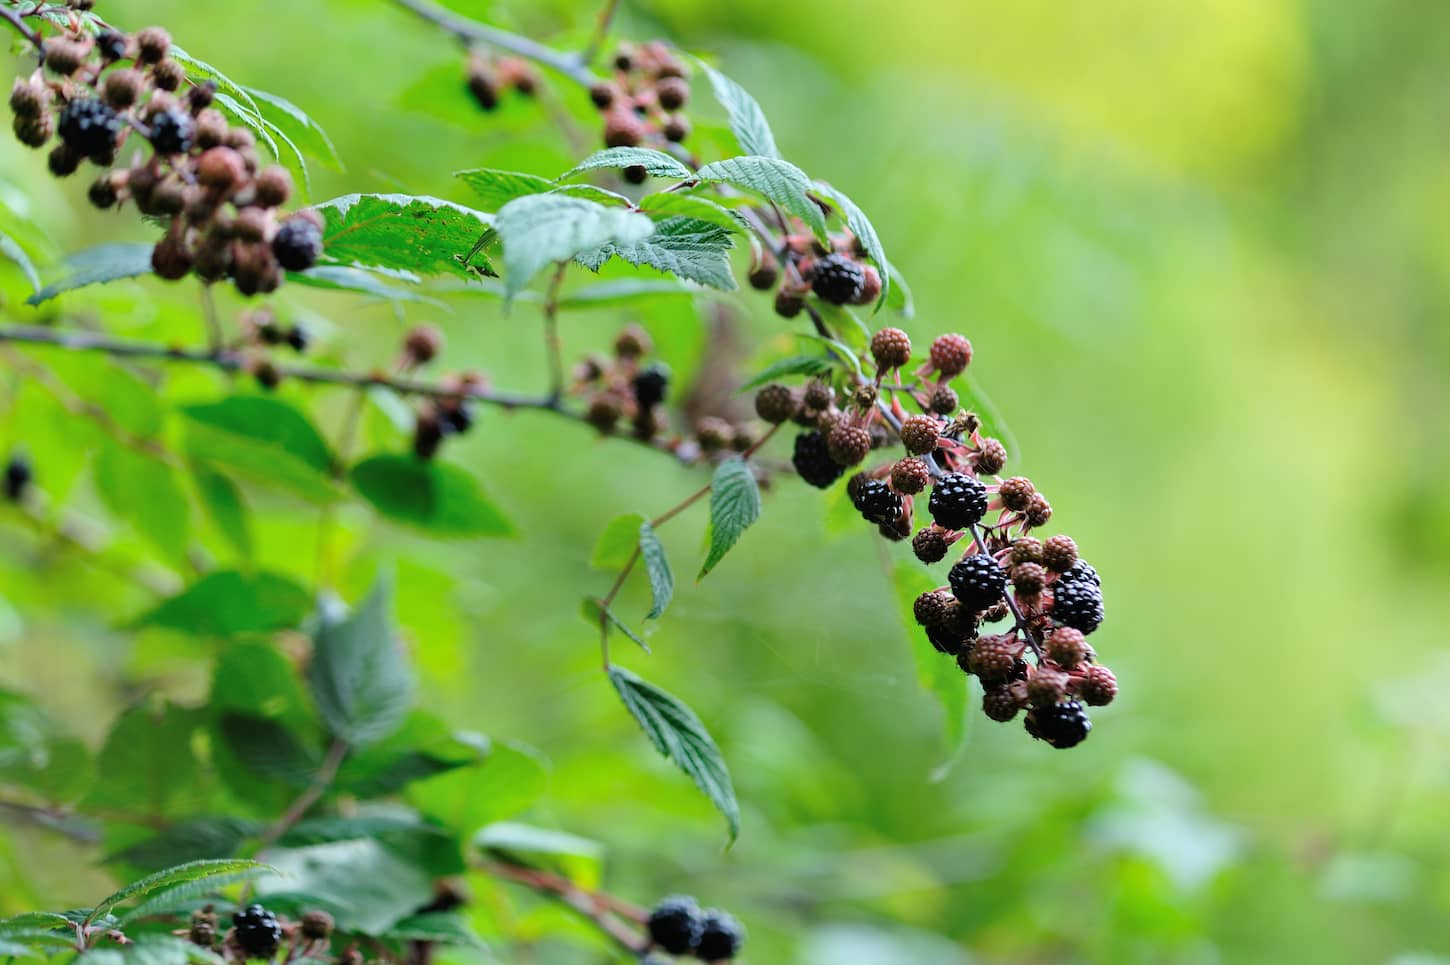
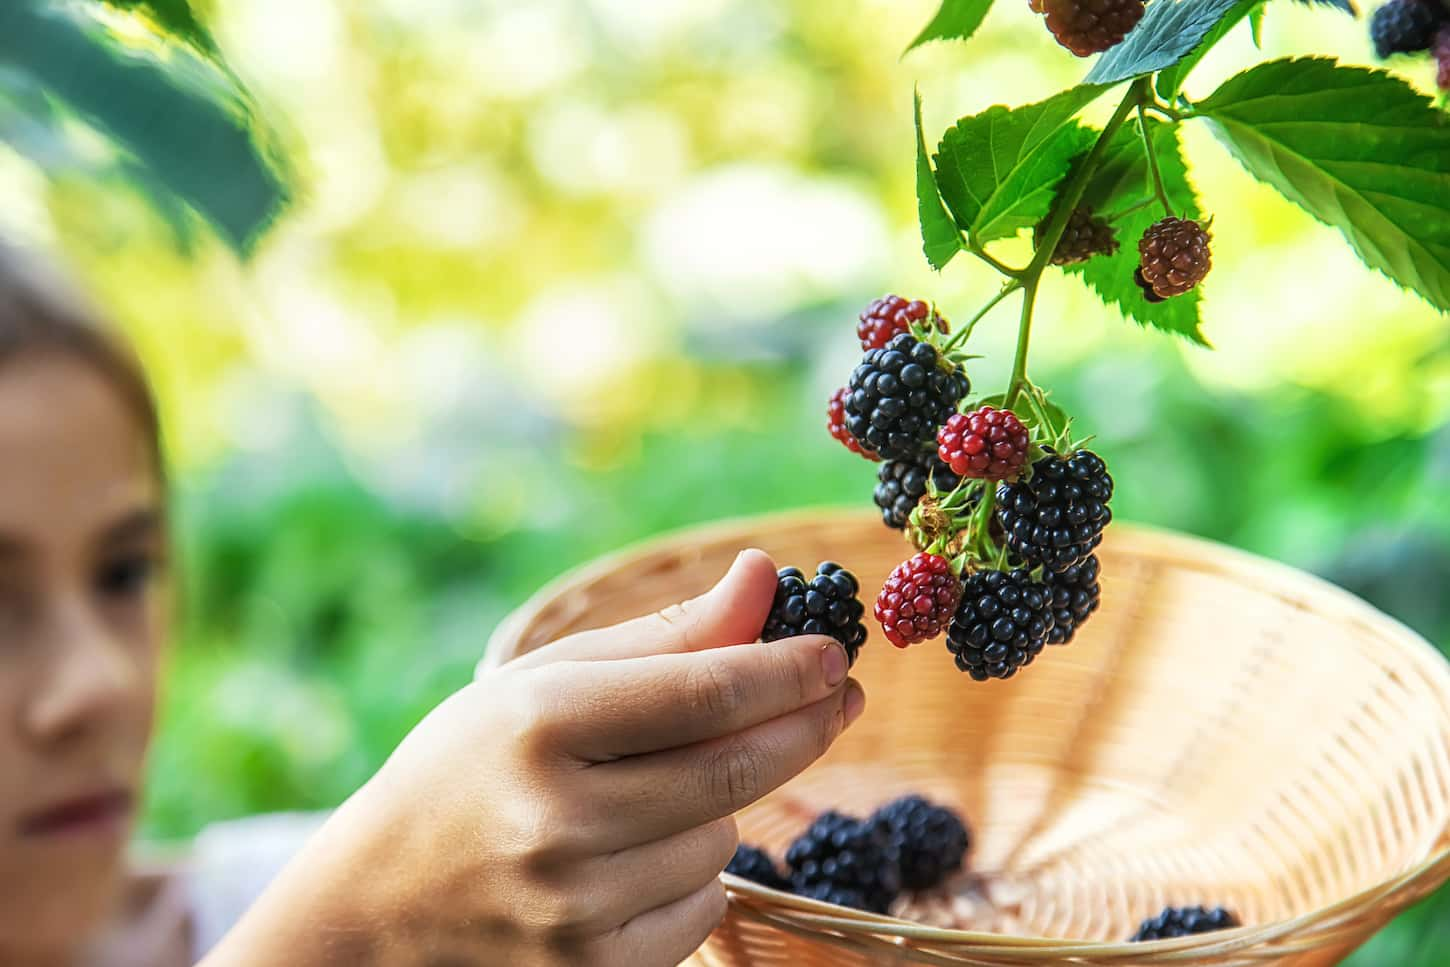
When are the blackberries ready to eat?
Blackberries are ready when they turn completely black, and they are firm to the touch. If they are immature, they will be too tart to eat. Slightly squishy blackberries are also ready to eat and can be sweeter than their firmer, earlier counterparts.
How long is the harvest?
A blackberry harvest from one plant usually lasts about two weeks; some varieties will need to be picked late in the spring and early summer. Other varieties need to be harvested late in the summer and early fall.
Blackberries that are grown in a warm climate will need to be picked earlier than varieties that are cultivated in colder locations.
Do blackberries need any special seasonal care?
Blackberries must be mulched and protected from harsh winter climates and too much sun. They can be cared for very similarly to raspberries. I’ve got a whole guide on blackberry winter care planned, but for now, please refer to the raspberry post for details.
Guide to Blueberries
Blueberries are high in nutrients, fiber, antioxidants, and vitamins. They are also very juicy and delicious. Blueberries are also considered one of the easiest ones to grow if you have the right soil conditions.
There are four varieties of blueberries: the highbush, lowbush, rabbiteye, and the hybrid half-high. The most planted blueberry is the highbush because of its taste and size in comparison with other varieties.
Here are the different types of highbush berries that you can choose from:
- Blueray, Bluecrop, Herbert, Jersey, or Meader will tolerate cold winter quite well.
- For larger blueberries, there are Berkeley, Bluecrop, Blueray, Coville, Darrow, or Herbert.
- For great flavor, the best choices are Blueray, Darrow, Herbert, Ivanhoe, Pioneer, Stanley, or Wareham.
- If you want something unique, then pink lemonade is a good choice.
How do you plant blueberries?
Plant blueberries in a place with full sunlight, preferably not next to a tree. Blueberries prefer rich, soft, acidic soil, though they can grow well in other soil types if they get compost.
The ideal season to plant blueberries is during fall and spring. However, in some areas, you can plant them all year round. It’s a good idea to check which zone you are in for optimal results.
Next, check the state of the soil – blueberries need acidic soil to thrive. The pH level must be between 4 to 5. Adding organic compost to the soil is ideal.
When digging holes for blueberries, depth, and width are important. Space blueberry bushes 4-5 feet away from each other.
Be careful not to plant the bush too deeply; when placed in the hole the root ball should be below the surface with the roots spread out. When finished, tightly pack in the hole with soil.
If the blueberry bush was purchased in a container and needs to be transferred, then carefully remove it from the pot, and lightly spread out the surface of the root ball. Place the plant into the hole about one-half-inch higher than the ground, packing the soil along the sides.
When to fertilize blueberries
Acidify the soil a month before you plant blueberries. This can be done by mixing a small amount of sulfur into the soil. When doing this organically, aged sawdust, peat moss, oak leaf mold, pine bark, pine needles, and compost can also be used as a good alternative.
Remember not to fertilize the blueberry bush right after it is planted – it should only be done after about one month. The recommended season to fertilize your blueberries is in early spring. This way it will give the roots plenty of time to absorb the fertilizer.
How to fertilize blueberries
Fertilize a blueberry plant by using 1/2 ounce of 10-10-10 fertilizer. Spread the fertilizer around the blueberry plant, keeping it about 6 to 12 inches away from the blueberry plant crown.
- Look for a fertilizer that is high in acid and contains ammonium sulfate or sulfur-coated urea. Never use fertilizers that contain calcium nitrate or chloride!
- Apply one ounce of 10-10-10 fertilizer to each bush one year after planting, and again in spring right before they start to bloom.
Water requirements
All blueberries need to be watered frequently. Blueberries need at least 1–2 inches of water per week.
Blueberries are very sensitive to drying out. They can recover from dry periods, but it takes them a good, long while to do so. And during that recovery period, they’ll be extra sensitive to water levels.
How and when to transplant shoots
Transplant blueberries when first planting or when blueberry bushes aren’t thriving. However, the timing is crucial for this. Only transplant blueberries when the plant is dormant. Transplanting can usually be done between early November to early March.
Here’s how to do that.
- Dig a hole that is about 10–15 inches deep, depending on the size of the bush. Make sure the soil is amended beforehand.
- Next, dig around at the base of the bush that is going to be transplanted. Clear the soil around the root ball, then transfer it immediately into the hole. If the bush can’t be transferred right away, wrap the roots with a plastic bag to retain moisture.
- Fill the hole with amended soil, then apply mulch on top. Water the blueberry bush once a week if there is no rainfall and every three days in hot weather.
How much sun do blueberries need? Can they grow in shade?
Blueberries need at least 6-8 hours of sunlight for best results. they can also tolerate shade, but sunlight is a necessity. It is best to plan on the full sun to be on the safe side.
The blueberries will need full sun for most of the day, but they will tolerate shade later in the day, towards evening.
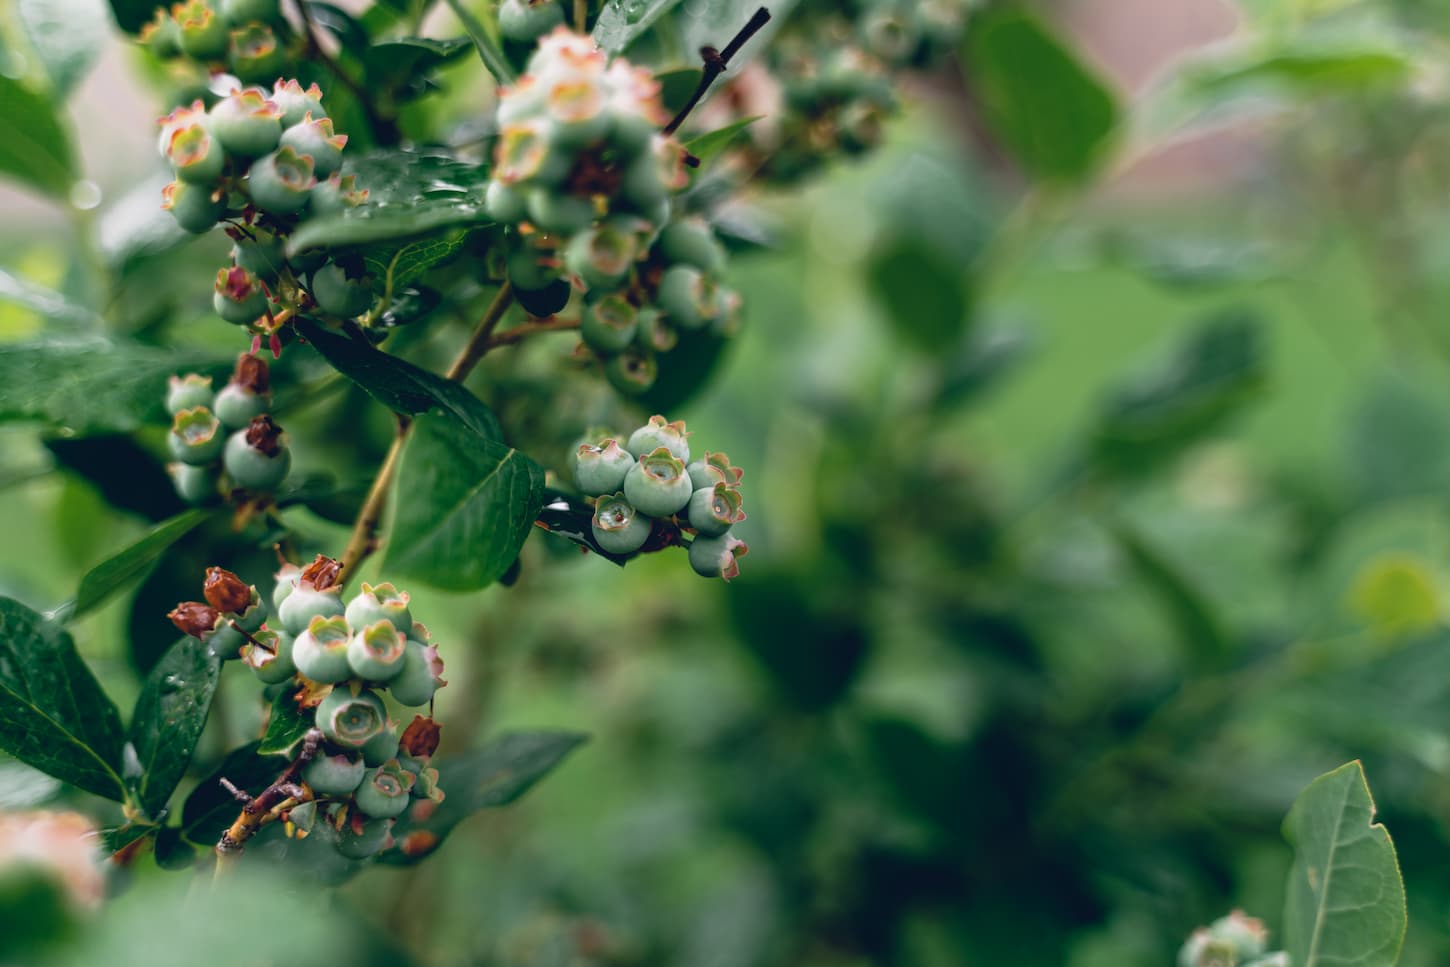
When are the blueberries ready to eat?
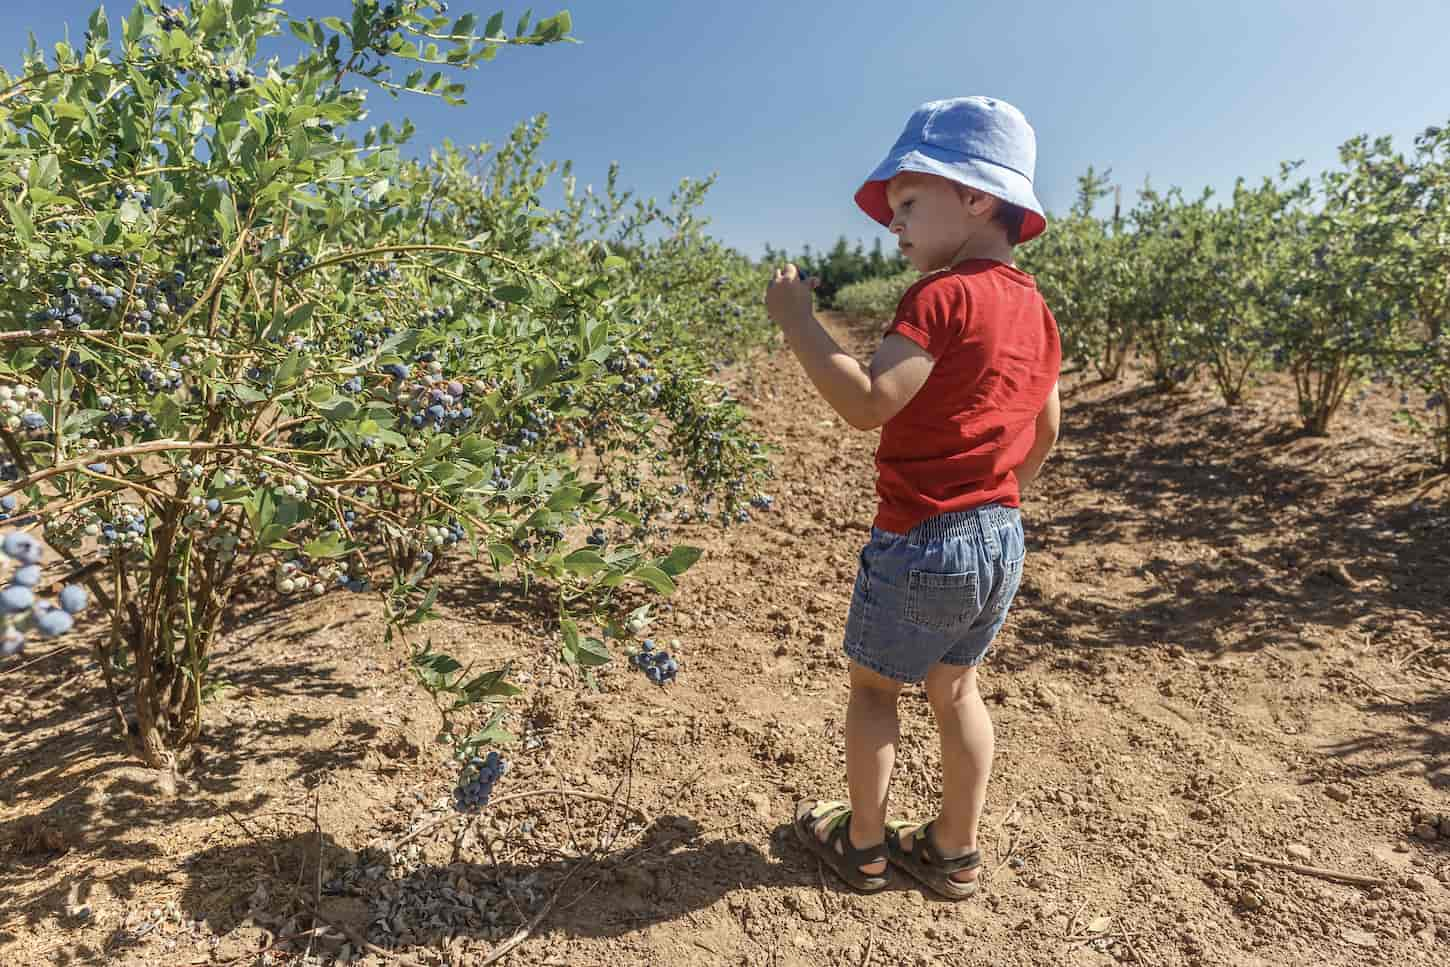
June and August are the best time to pick blueberries. If the blueberries are already blue, wait for at least a couple of days before harvesting them so that they’re a deeper blue.
Pro tip: if your garden attracts a lot of birds, then you’ll want to weigh the pros and cons of an earlier harvest versus using bird netting to keep your berries safe.
Some blueberry bushes take a few years to produce enough fruit to have a decent harvest. So, if you’re wanting a bumper crop of blueberries earlier than that, don’t go for a smaller plant. Instead, get and plant a 2- to 3-year-old blueberry bush. They could possibly be ready for harvest sooner, like in one to two years.
Do blueberries need any special seasonal care?
If your winters are cold and snowy, then your blueberry bush may benefit from being mulched and covered well to protect it from the wind.
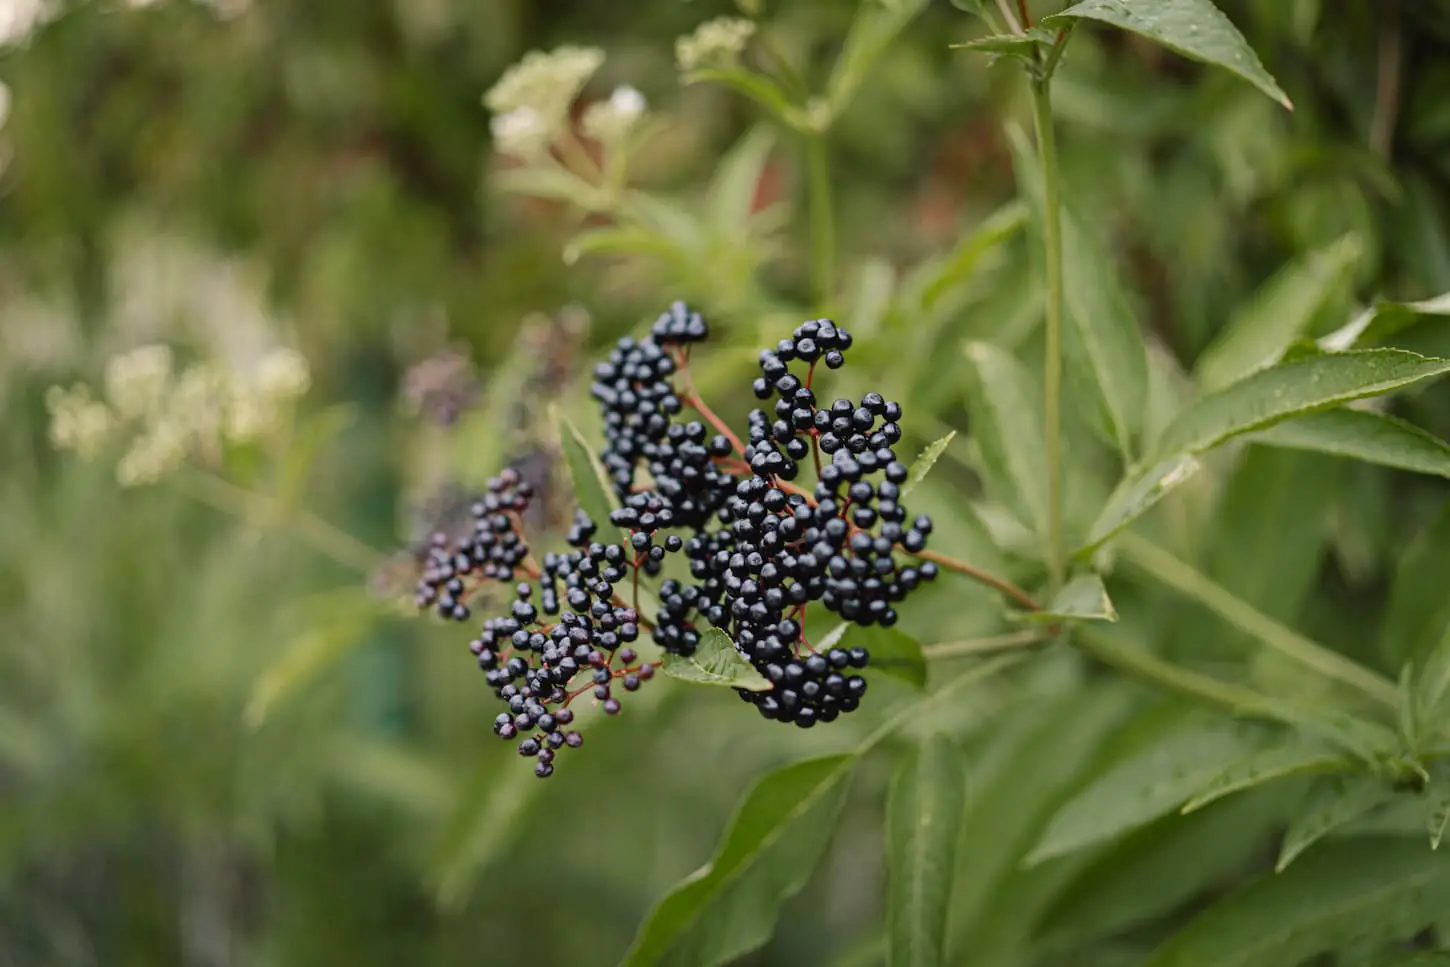
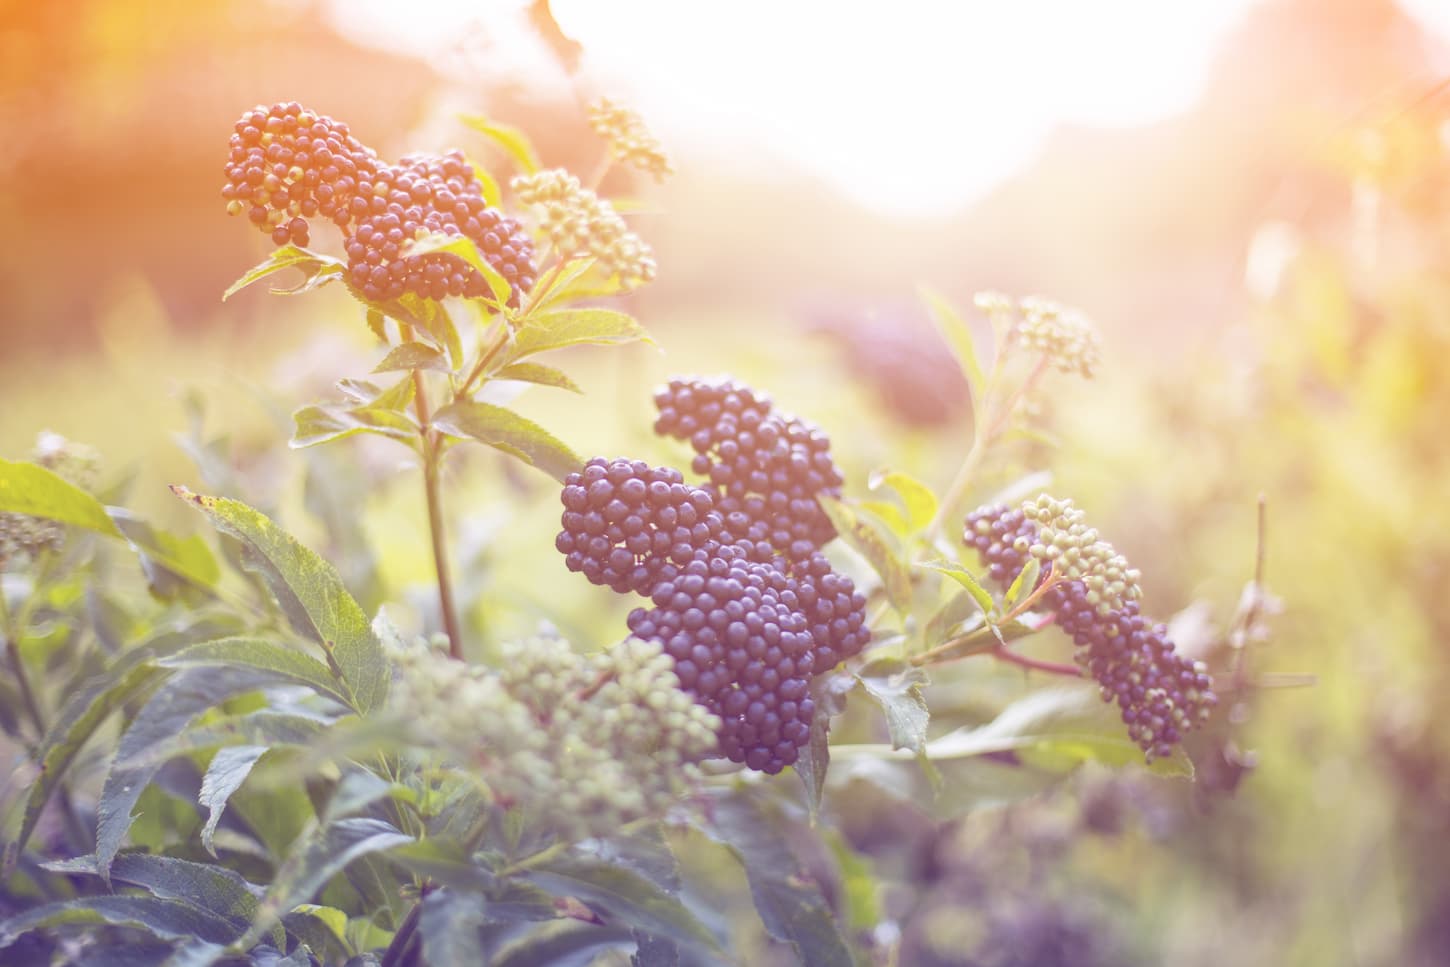
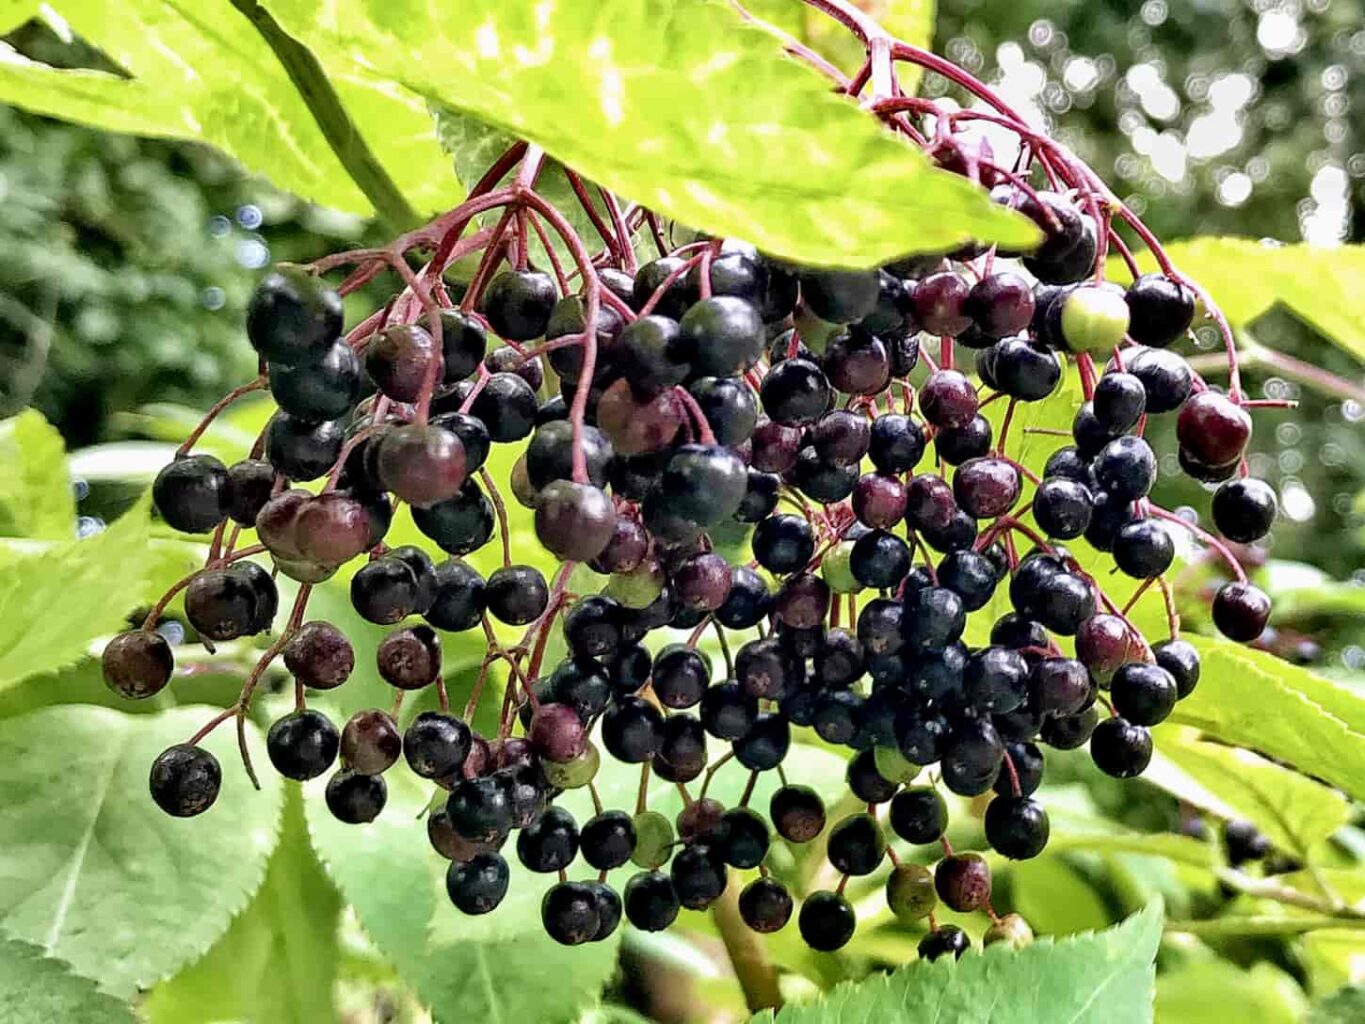
Guide to Elderberries
Elderberries are not only tasty but can also be used homeopathically for a variety of ailments and illnesses. The fruits and flowers are edible, and nourish the body with Vitamins A and C, Potassium, Phosphorus, Iron, and antioxidants.
However, the seeds, roots, stems, leaves, and unripe berries contain poison (Cyanogenic glycosides), so these types of berries must be cooked well before they are eaten.
How to plant elderberries
Elderberries need moist, fertile, and acidic soil (with a pH level of 5.5–6.5). They are fast-growing shrubs. Pick an area for growth that has easy access, so you can get to it easily whenever it needs maintenance.
Since the roots of elderberries are shallow, dig a hole that is deep enough for the roots to settle. Once done, place the plant in the hole.
If planting more than one elderberry shoot, make sure that there is enough space between the plants.
Fill the hole back up with soil, along with two to three inches of compost or wood chips. This will help conserve moisture in the soil, and the elderberries will be healthier.
When to fertilize elderberries
Elderberries don’t need fertilizers in their first year. They can get all the nutrients they need from decomposed organic matter in the soil where they are planted.
After the first year, here are the steps and tips that should be noted for fertilizing.
- The best time to fertilize the elderberry plants is during early spring. Aside from fertilizers, compost can be used for your elderberries.
- As the elderberry plants get older, apply 1/8 pounds to 1 pound of ammonium nitrate to each plant. Make sure to repeat it each year your elderberry grows.
Water requirements for elderberries
Elderberries are shallow-rooted and need to be well watered, especially in their first season of growing. This berry needs at least one inch of water per week, but too much water will kill the plant. Elderberries love water, but they can also tolerate drought.
How and when to transplant elderberry shoots
The best time to transplant elderberry shoots is during the fall, once their foliage has already died. Here are the steps on how to transplant elderberries:
- When the elderberries grow tall, then it is time to cut some shoots and transplant them to another spot. Cut the shoots so they are half of their current height.
- Dig out the roots, and then set the root ball into a burlap or a small pot. Next, dig a hole that is double the size of the root ball. Then mix some compost into it so that the plant will have a better chance of growing.
- Remove the burlap from the roots and set the plant into its new home. Cover it with soil, and water it thoroughly.
How much sun do elderberries need? Can they grow in shade?
Elderberries need at least eight hours of sunlight. However, don’t put them in a dry place where they can be scorched by the sun. This berry can also tolerate partial shade, but they still prefer a place where there is full sun.
When will you know when the elderberry fruit is ready to harvest and eat?
Elderberries can be harvested in their second season, from mid-August to mid-September. The elderberries are ready to be harvested when the color has already turned deep purple-black, and their appearance is already plump. Ripe elderberries are much heavier than unripe ones.
Do elderberry plants have any special seasonal care?
Elderberry plants may benefit from being mulched with compost before winter.

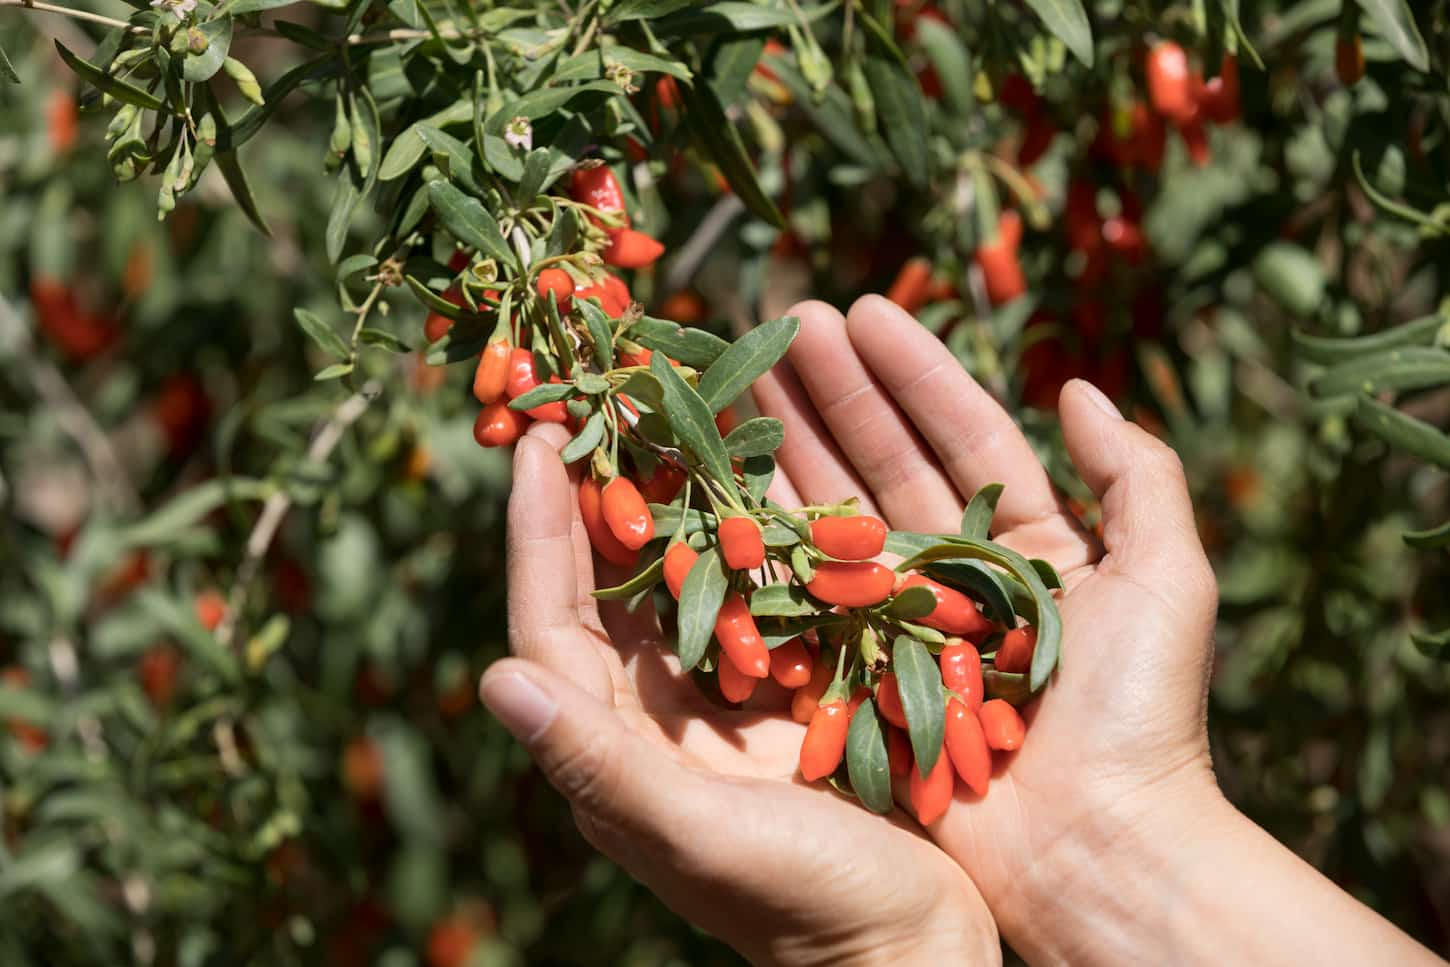
Guide to Goji berry
Goji berries belong to the nightshade family. They are also known as the wolfberry, boxthorn, or matrimony vine. They spring from bright purple, funnel-shaped berries to brilliant orange-red globular berries. These types of berries are sometimes dried out and used for medicinal purposes.
How do you plant goji berries?
This type of berry needs soil with a pH level of 6.5–8.0 that has been amended. Make sure that the spot where the berries will be planted has proper soil drainage, such as a raised garden bed.
Placing a trellis around the plants will help the berries grow in an upright position, and it will also make harvesting easier. The best time to plant goji berries is during the early spring when it is the tail-end of this plant’s dormant season.
Dig a hole twice the size of the root ball of the goji berries, then place the cane into the hole and make sure to spread out the roots. Cover it up with soil and gently pat the top portion.
Carefully tie the strongest canes into the wooden stakes then water them down. If planting more than one, make sure to space them five to seven feet apart.
When to fertilize goji berries
Fertilize the goji berries in early spring before any new growth begins. Apply fertilizer again around mid to late June, especially for the plants that are planted in a pot.
How to fertilize goji berries
The best fertilizer for goji berries is rose fertilizer or any fertilizer that is used for woody plants.
Three applications of fertilizer are needed for the goji berries. The first time is when buds start to appear, the second time when flowers start to bloom, and then the third is when the fruit starts to ripen.
Use 75–90 pounds of fertilizer per acre of goji berries. This is recommended for mature plants only.
Goji berry water requirements
Goji berries need to be watered once a day. Make sure that the water is fully absorbed – if not there is a chance that the roots will start to rot. Always remember to keep the soil moist, but not too wet. Once the goji berries are more established, then decrease the amount of water – bit by bit.
How and when to transplant goji berry shoots
Early spring is always the best time to transplant goji berries. Follow these simple steps below for how to transplant them.
- First, collect a goji berry sprig. It must be tender and around 4–6 inches long. Remove the leaves from the bottom, and then plant them into a nursery pot.
- Keep the soil moist and keep it in a humid environment. In about two weeks, the plant will have grown roots.
- After the goji berry roots have grown they can be planted in their new home. Dig a hole that is deep enough for the plant to grow. Once done, put the goji plant in the hole, then cover it with some soil and water it down.
How much sun does this berry need? Can they grow in shade?
Goji berries need at least eight hours of sunlight every day. They can also tolerate partial shade, but they still require full sun to grow well and produce good crops.
When will you know when the goji berry fruit is ready to harvest and eat?
Goji berries turn red very quickly; the taste is the best indicator of being ready to harvest. If the berry is still bitter, then wait a while longer before harvesting them.
Do goji berries need any special seasonal care?
Goji berries only grow in a few hardiness zones, so they won’t do well in colder zones above a 5 unless they’re in a greenhouse that is temperature-controlled.

Guide to Huckleberries
Huckleberries are a native plant in tropical regions, but they can also grow in cooler climates. This type of berry can grow up to 4 ft. tall, they produce white flowers which will then turn to purple berries. There are 12 different species of huckleberries, both native and non-native.
How do you plant huckleberries?
Look for a place with moist soil to plant this berry because huckleberries love moisture. They also prefer soil with a pH level of 4.3–5.2.
The fact that huckleberries have stems called rhizomes that grow underground and produce new shoots and root systems makes it unnecessary to cut them. Collect the rhizomes (they must be around 1–2 inches long) and plant them into a 1-gallon pot, then add peat moss all over the soil.
Grow them for 1–2 years, then transplant them into a space in your backyard afterward. Don’t forget to amend the soil by adding compost to it a month before you transplant this berry. Cover the hole with soil and gently pat the top of it, and then water thoroughly.
When to fertilize a huckleberry
The best time to apply fertilizer to the huckleberries is in May, June, and July. However, huckleberries do not require regular fertilizing, but they can still be done twice a year.
How to fertilize huckleberries
Feed the huckleberries with a 10-10-10 fertilizer or manure, granular fertilizer, or a slow-release fertilizer. Do not use feed fertilizers or weed fertilizers.
Before fertilizers can be applied to the huckleberries, wait for at least 2–3 weeks (after planting) before doing so. Apply the fertilizer at the base of the huckleberry plant and make sure to water it regularly.
Water requirements for huckleberries
Huckleberries need 1 inch of water per week during peak season. When they start to ripen, they need 4 inches of water per week. Keep the soil moist and water the whole plant evenly; insufficient water can lead to late production and smaller berries, and too much water leads to large and bland berries.
When and how to transplant a huckleberry
The best time to transplant huckleberries is when they have already entered the stage of dormancy, in late fall to late winter. Here are some steps for how to transplant this type of berry:
- Huckleberries grow from their rhizomes, so when removing them from the pot make sure to not disturb the roots too much. Do not prune the stems or the branches when you are transferring them.
- Dig a hole in the backyard where the huckleberries will be transplanted. After placing the plant in the hole, use peat moss-based soil to cover it, then pat the top portion to remove the air pockets, and water thoroughly.
How much sun does huckleberry need? Can they grow in shade?
Huckleberries need at least 4–6 hours of direct sunlight to be productive and produce fruit. Some varieties that grow in forest colonies can survive in shaded areas. They can grow much larger bushes and produce more berries in comparison to those that are exposed to sunlight.
When will you know when the fruit is ready to harvest and eat?
When huckleberries are ready, they turn shiny and black. When lightly squeezed, they are slightly soft. Unripe huckleberries are bitter to the taste.
Do huckleberry plants require any special seasonal care?
Huckleberries grow best in zones 7 to 9, so they can be sensitive to colder zones. They’ll either need to be well protected and mulched during the winter or to be brought indoors or into a greenhouse.
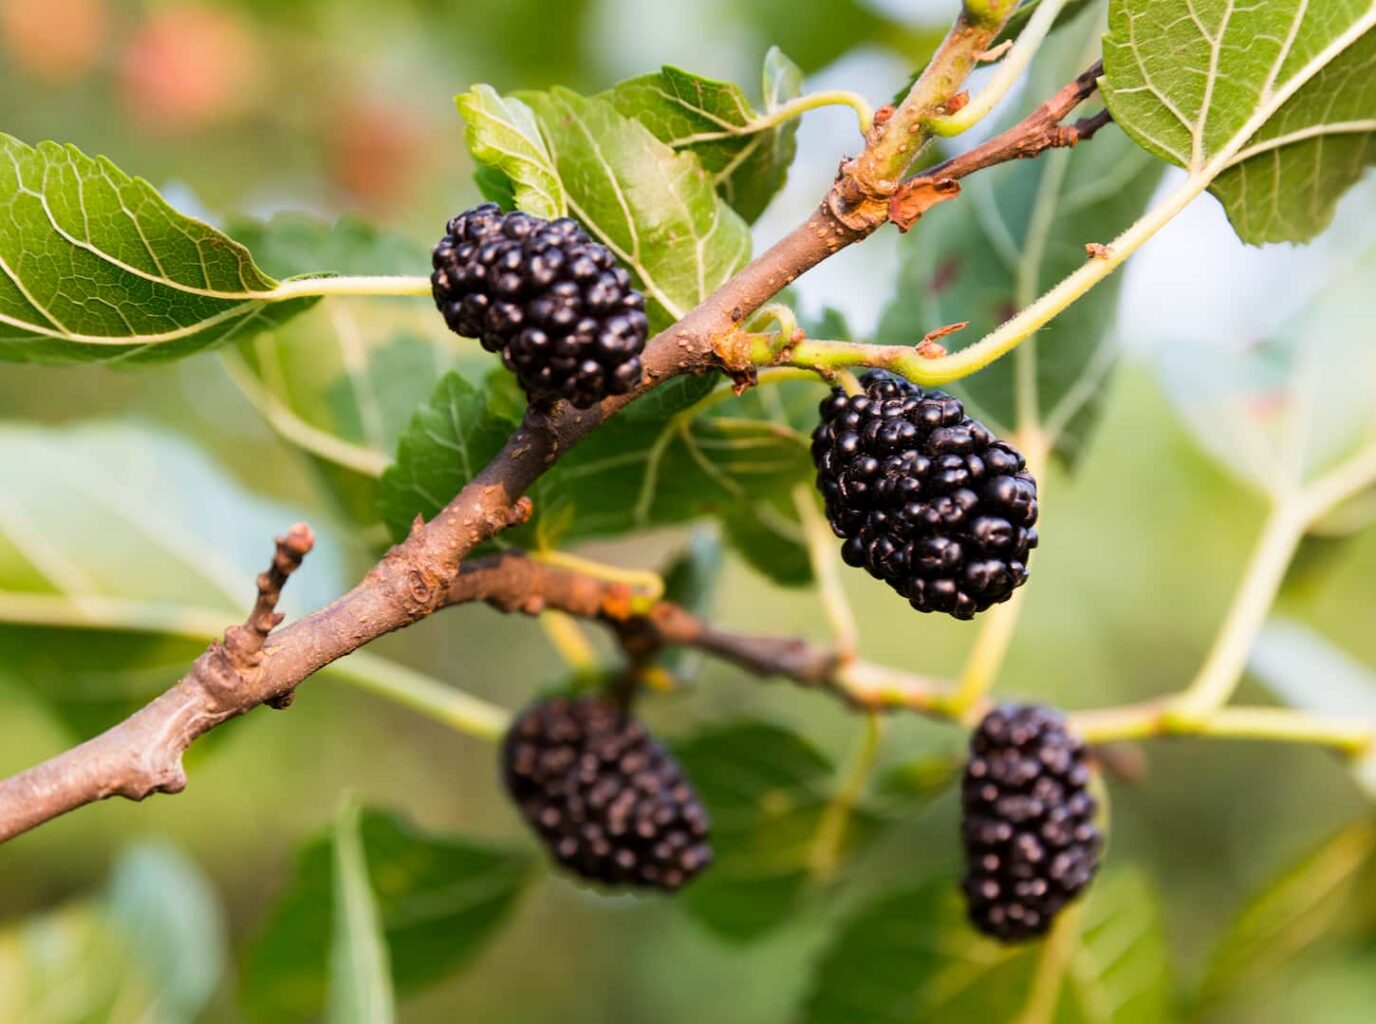
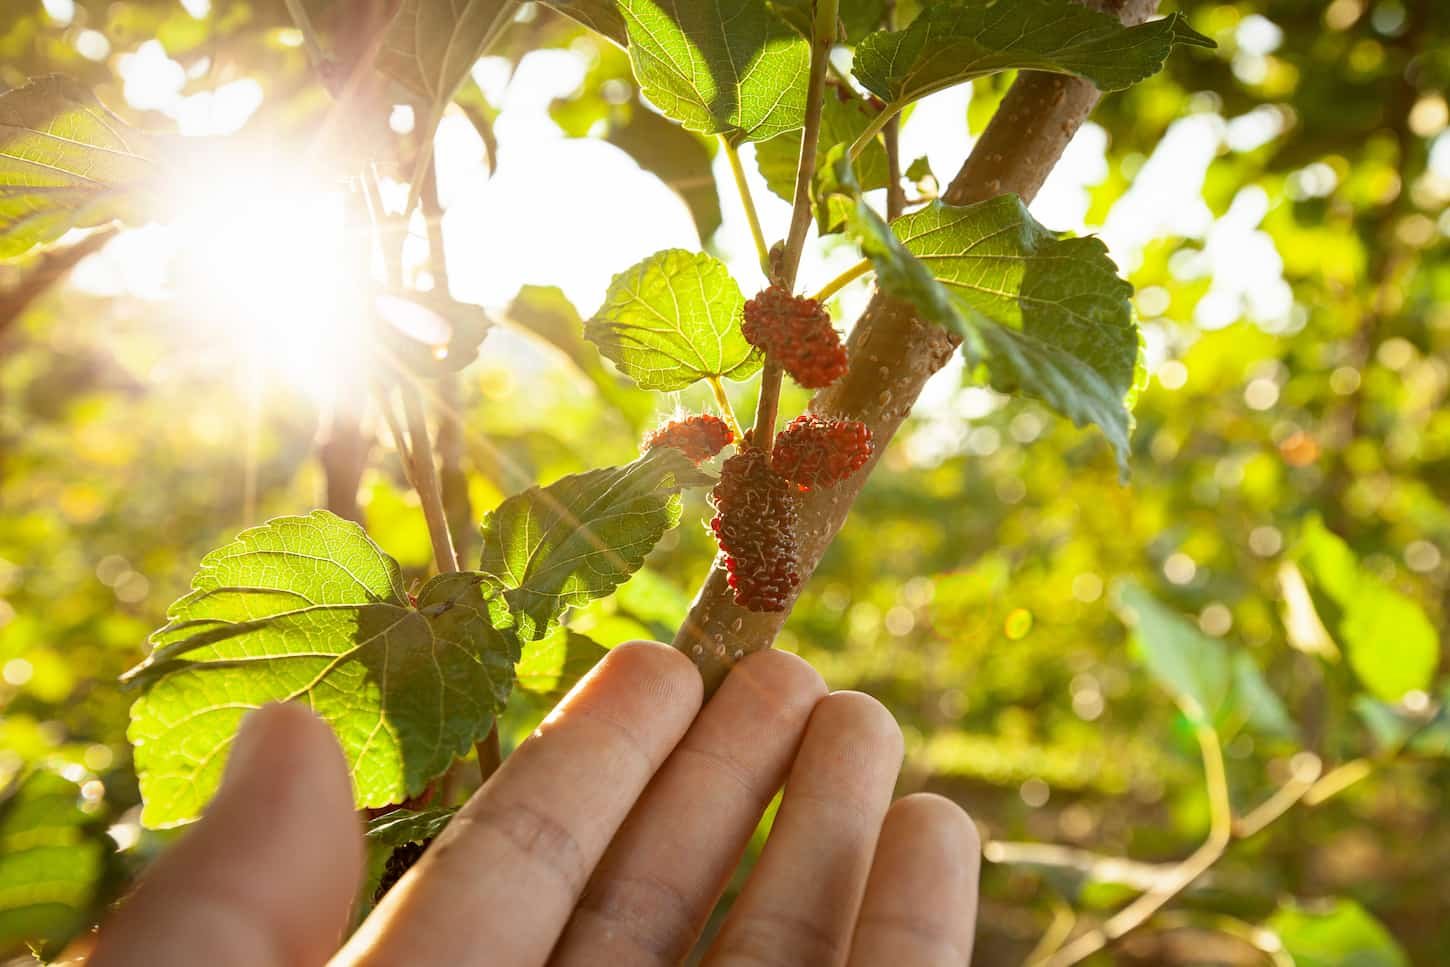
Guide to Mulberry
Mulberry plants grow into bushes, and some grow into large trees. In large spaces, a mulberry tree is worth considering. Unfortunately, this tree is banned in some areas due to the excessive amount of pollen they produce. In some cities it is not possible, so check the restrictions in the area.
Mulberries have three varieties – black mulberries, red mulberries, and white mulberries.
How do you plant mulberries?
First, look for a good place to plant mulberries. They need to be far away from septic systems or utility lines, as they may cause serious damage to them as they grow.
Dig a hole that is twice the size and the depth of the root ball of the plant. Remove the debris and weeds around the area where you are going to plant your tree.
Gently loosen up the roots and place them into the hole. Make sure that it is slightly higher than the surrounding soil. Once the plant has been put in, fill it with soil and gently pat it to make sure that there are no air pockets.
Water it down and it’s good to go! The best time to plant mulberries is during fall, but it can also be done in the spring as long as they are watered regularly.
When to fertilize a mulberry
Mulberries grow well without any fertilizer, but it still helps to fertilize them. You can fertilize your mulberry trees once a year – every spring.
How to fertilize a mulberry
First, choose the fertilizer that is going to be used. Choose from a 5-5-5 or a 10-10-10 fertilizer, whatever works best for the tree.
Spread a small amount of fertilizer, don’t overdo it as too much nitrogen can stop the berry production of the plant. Mulch and compost can also be used if that is preferred.
Water requirements for mulberries
Mulberry trees need at least 1 inch of water per week. Berries may drop prematurely during a drought, so make sure to water them on time. Irrigation can also be used for better results.
How and when to transplant mulberries
The best time to transplant mulberries is from mid-September to mid-October when the temperature is cool but before the ground freezes. It can also be done from mid-January to mid-February after the ground is workable.
Follow these steps for how to transplant mulberries.
- Use a sharp spade or a pruning saw to sever the roots and the taproot of your mulberry plant. Be careful so that it will not damage the entire plant. Its roots should be 27–30 inches and the trunk should be 22–24 inches.
- Once it is finally severed, place it in burlap and transfer it into its new home. Make sure that the hole that it is going to be transferred into is the same depth as it was before.
- Gently spread the roots and fill the hole back up with soil. Gently pat it to remove air pockets and water it thoroughly. Put some stakes around it to hold it upright.
- Apply a root stimulator at the time of planting, and repeat it monthly so it can grow strong and healthy. Make sure to water consistently.
- Watch and care for them as they grow.
How much sun does this berry need? Can they grow in shade?
Mulberries need at least 8 hours of sunlight; they can also grow in partial shade, but they prefer full sun. The white variety of mulberry is drought tolerant, and they prefer moist and well-drained areas.
When will you know when the mulberry fruit is ready to harvest and eat?
The berries are ready to harvest when they turn large and black. They will be very sweet to the taste. Lay a sheet or tarp under the tree and gently shake the branches of the mulberry tree – when the berries fall then they are ready for harvest.
Do mulberries have any special seasonal care?
Mulberries are fairly tolerant berry plants, growing in zones 5 to 10. Mulch them and cover them if needed.
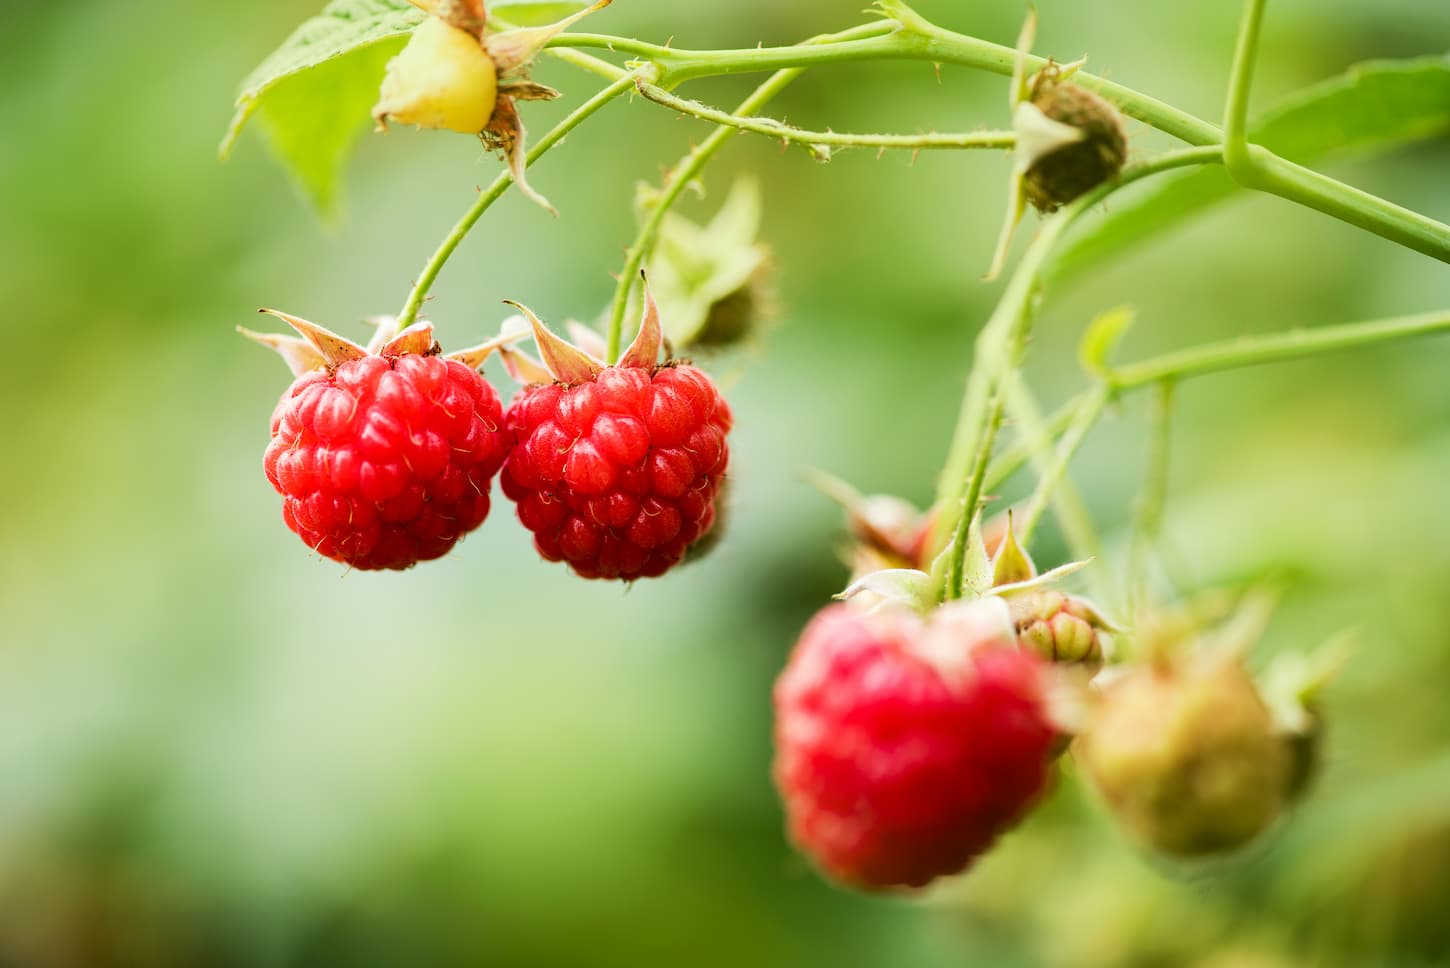
Guide to Raspberries
Raspberries are just like blackberries, and both plants belong to the Rubus genus family (Rose family). They both yield a lot of berries every season. Not only that, but they are also a good source of vitamins, manganese, and fiber.
There are two types of raspberries: The summer-fruiting raspberries and the ever-bearing raspberries. There are also blue raspberries (yes, they’re real).
Here are some more specific articles I’ve written about raspberry care.
- Do Raspberries Attract Bees? 10 Things to Know
- What Happens If You Don’t Prune Raspberries? What To Expect
How do you plant raspberries?
When planting raspberries, pick a spot where there is good air circulation, and not too much wind, and it must be a place where the soil can be drained properly.
Next, dig a hole that is big enough for the roots to properly spread. Choose a raspberry cane that is already one year old, and make sure to soak its roots first for one to two hours before planting it.
If you are planting multiple canes, make sure that they are 18 inches apart and that there are four feet in between rows. Once done, fill the holes back up with the soil and keep the crown one to two inches above the ground.
Once the canes are planted, cut the canes down to 9 inches tall to encourage new growth. It will look like a planted stick, but don’t worry because in 3 weeks or so there will be new growth. It would be a good idea to use a trellis or fence for some varieties in order to support them.
The perfect time to plant raspberries is in early spring because the ground will be thawed. In some areas, they can also be planted in late autumn to get a head start.
How and when to fertilize raspberries
Fertilizers should only be applied when the raspberry plant is already established. The plants should be fertilized during spring or while dormant, as summer and fall fertilizing can be dangerous to the plant.
There are some special cases, such as the fall-bearing raspberries – those can be fertilized and still survive.
- Spread 2 ounces of 10-10-10 fertilizer on the raspberry plant. Make sure to place it 3–4 inches away from the stem, since direct contact can burn the plants.
- Of course, compost, manure, or some mulch can be used. Compost and manure can help, especially when still in the first stage of planting the raspberry plants.
Water requirements for raspberries
Raspberries need at least one inch of water per week until after the harvest season. Don’t over-water because raspberries don’t like too much moisture. Totally dry places aren’t good either, so be careful when watering your raspberry plants.
How and when to transplant raspberries
The best time to transplant raspberry shoots is in early spring (before the leaves start to sprout) and in late fall (after all the leaves have fallen). It all depends on the variety of raspberries you’ve planted. Below are our simple steps on how you can transplant raspberries:
- The first thing that should be done is to prepare the hole where the raspberries will be transplanted. It is a good idea to add some compost before planting as well, approximately a month before.
- Choose the cane that you are going to transplant (choose the canes that have new growth), and then cut it down to 10 inches in height. Next, dig the roots of the cane and make sure to bring some of the original soil with it. That will help the roots adjust to their new home.
- Move the raspberry plant to its new location, spread out its roots, then gently cover it with some soil. Once done gently pat it, then water it down and you’re good to go.
There’s more to it than this, but this quick summary will get you going. Want a more detailed process? Great. I’ve got it ready for you right here: How, Why, and When to Move Raspberry Canes.

How much sun do raspberries need? Can they grow in shade?
Raspberries grow best in a sunny place; they need at least 6–8 hours of sunlight to grow and produce a good amount of fruit. They can also grow in a partially shaded place, but that will have a detrimental effect on fruit production.
Need more information and details on exceptions? You’re going to want to read my article on Can Raspberry Bushes Grow in the Shade? so you learn about how raspberries can actually get sunburned.
When are the raspberries ready to eat? How long is the harvest?
Depending on the variety, it will take the raspberries approximately 13 to 15 months after planting for the first harvest for summer-bearing raspberries to appear. Heritage or June-bearing varieties will be ready to harvest in late June into July, while ever-bearing varieties will typically have an early summer and fall harvest.
It will be obvious that the raspberries are ready to harvest because they will turn bright and will be the same in color. Check the fullness and roundness of the berries, it will determine if the berry is already ripped. If the raspberries’ green caps are still there, they are not ready yet.
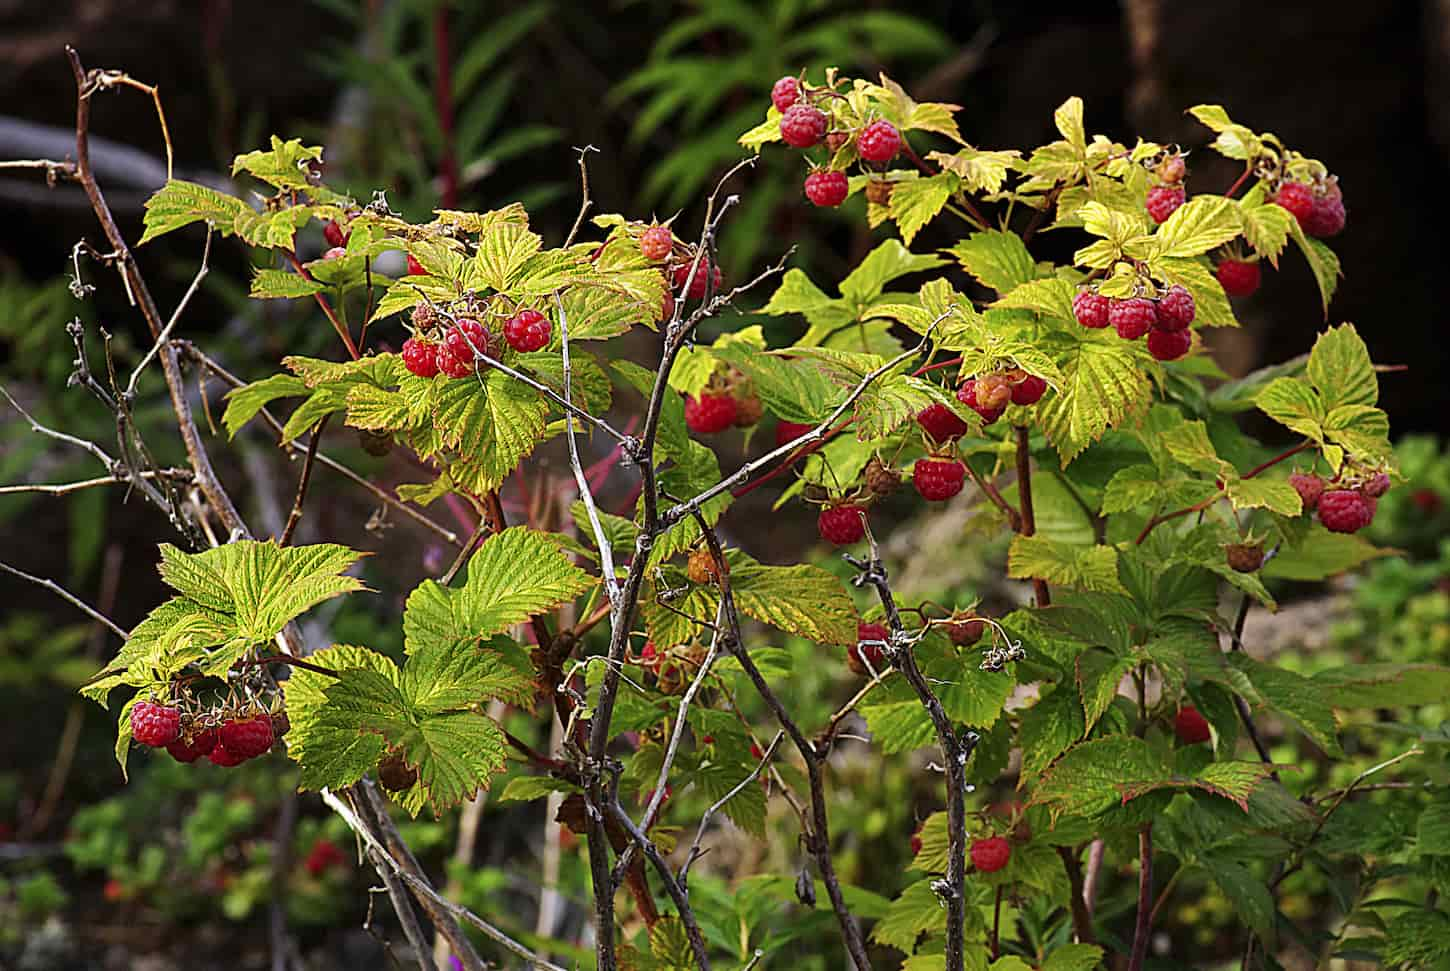
Do raspberries need any special seasonal care?
Raspberries do need to be mulched and protected in preparation for the winter. The wind is the real issue for raspberries, as it can damage the stems.
Read how to protect them in my guide here: How to Protect Raspberry Plants in Winter: A Step-by-Step Guide.
Do raspberries need to be pruned?
Raspberries need to be pruned to stay healthy. There’s a whole process depending on the variety, so be sure to read my article covering them all right here: Pruning Raspberries: The Complete Guide.
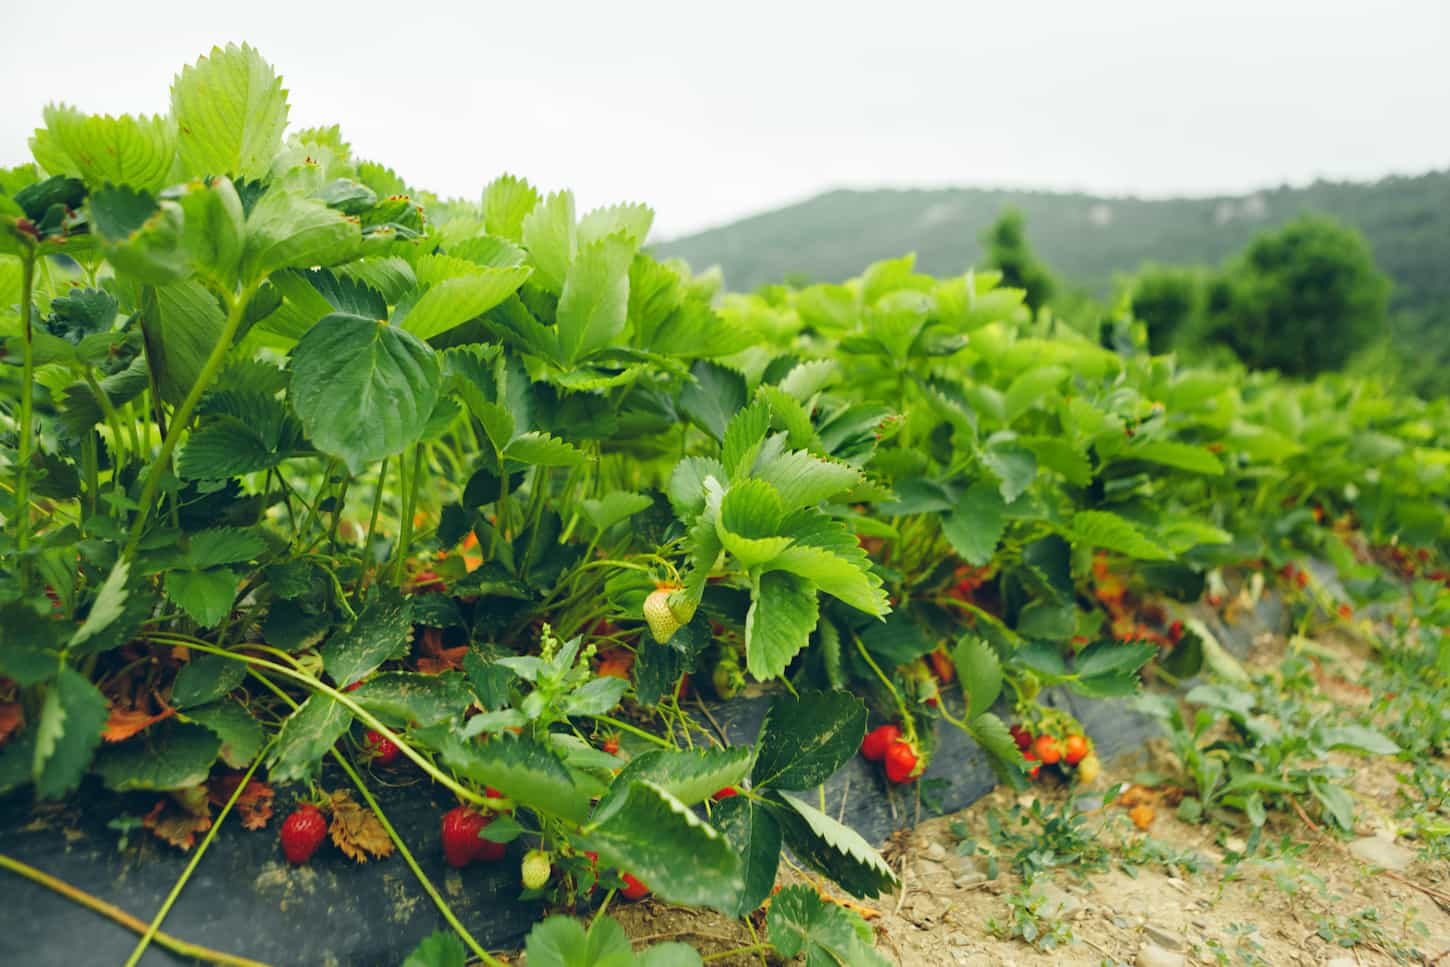
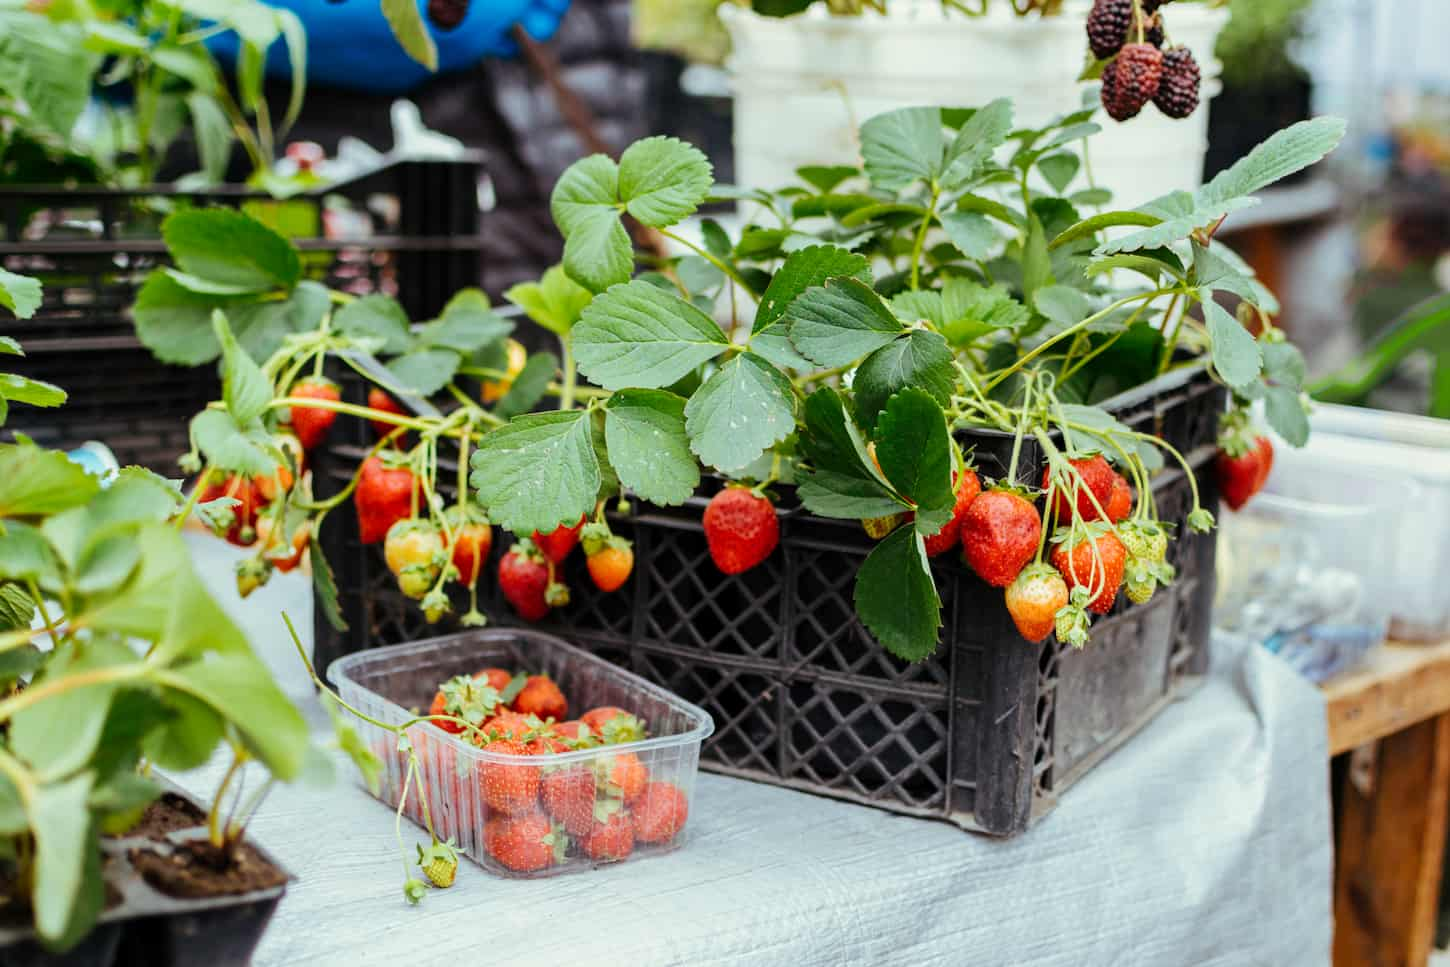
Guide to Strawberries
Strawberries are the perfect choice for a beginner. There are three main types of strawberries, June-Bearing, Everbearing, and Day-Neutral. Consider planting a couple of different varieties. The usual amount harvested per plant is one pint, which helps when deciding how many strawberries to plant.
How to plant strawberries
How you plant your strawberries will depend on the variety. Here is how you plant each of the three varieties: June-bearing, ever-bearing, and day-neutral.
- June-bearing strawberries: This variety of strawberries produces a large number of fruits once a year, usually in late spring or early summer.
- Ever-bearing strawberries: This variety of strawberries produces a crop twice a year.
- Day-Neutral: They are susceptible to temperature – if it’s above 75o F growth will come to an abrupt halt.
Here are some tips on how to plant strawberries.
- The best time to plant is in the spring and fall.
- It is a good idea to mix in some compost with the soil.
- Choose a planting spot that can receive as much sunlight as possible. The site should have soil that has been drained and evenly distributed moisture. A raised garden bed is perfect for this.
- When digging the hole, make sure that the crown of the plant will be right at the soil level.
- Make sure that the strawberries have at least 15–18 inches of space between them for best results.
Strawberries really fill in as they grow, so don’t feel bad about spacing them out a lot.
When to fertilize strawberries
Strawberries need a lot of nutrients to produce large, delicious berries. They don’t need fertilizer right away after planting, however. The best time to fertilize strawberries is one month after planting them, and one month after the first harvest.
How to fertilize strawberries
Choose a good fertilizer for strawberries. A fertilizer with a ratio of 10-10-10 (nitrogen, phosphorus, potassium) is a great choice. Organic fertilizers will also work well if growing organically.
Fertilize plants a month after planting. Use 1 pound of 10-10-10 fertilizer per 20-foot row of strawberries.
Fertilize the plants again when strawberries begin to appear. Use a 1/2 pound of 10-10-10 fertilizer per 20-foot row of strawberries. Use a rake to spread to gently spread out the fertilizer.
Water requirements for strawberries
The soil for strawberries should be kept moist, and not too dry or wet. Consistency with watering the plants is key to keeping the plants healthy and productive. Avoid watering the leaves and only water the base of the plants.
Strawberries need 1 to 1.5 inches of water each week. During the summer and warm weather, more water is needed to keep your berry plants from drying out. Berries in containers need daily watering.
How and when to transplant shoots
Generally, transplanting strawberries in the early spring is optimal for the best results. However, they can be transplanted anytime during the season if the soil is workable. Old plants can be removed so that a new strawberry patch can be started.
Choose the runner or shoots that are going to be transplanted and cut the connections they have with the host plant. Make sure to always use the proper tools (like a spade) when cutting them.
Place the shoots in a container and continue with the same process for the rest of your strawberry plant. Loosen up the soil, dig a hole, and place the shoots in their new home. Then gently fill the hole with some soil and pat it gently. Make sure to water the plant afterward.
Strawberry plants (or patches) should ideally be moved every few years so that you can rotate the crops unless you’re composting. Then, it’s possible to keep your patch in place, but you will need to stay on the lookout for strawberry-specific diseases or soil issues.
How much sun do strawberries need? Can they grow in the shade?
Strawberries need at least 8–10 hours of full sun each day, so choose an area with that in mind. Some varieties can be planted in the shade, however. There is a variety of strawberries called the Alpine strawberry that can handle a bit more shade.
Some strawberries can handle the shade. Even some full-sun strawberries will do well in some shade if they get the 8 to 10 hours of sun.
In fact, it’s possible to sunburn berries, so you don’t want your strawberries out in the sun for 12 to 16 hours per day.
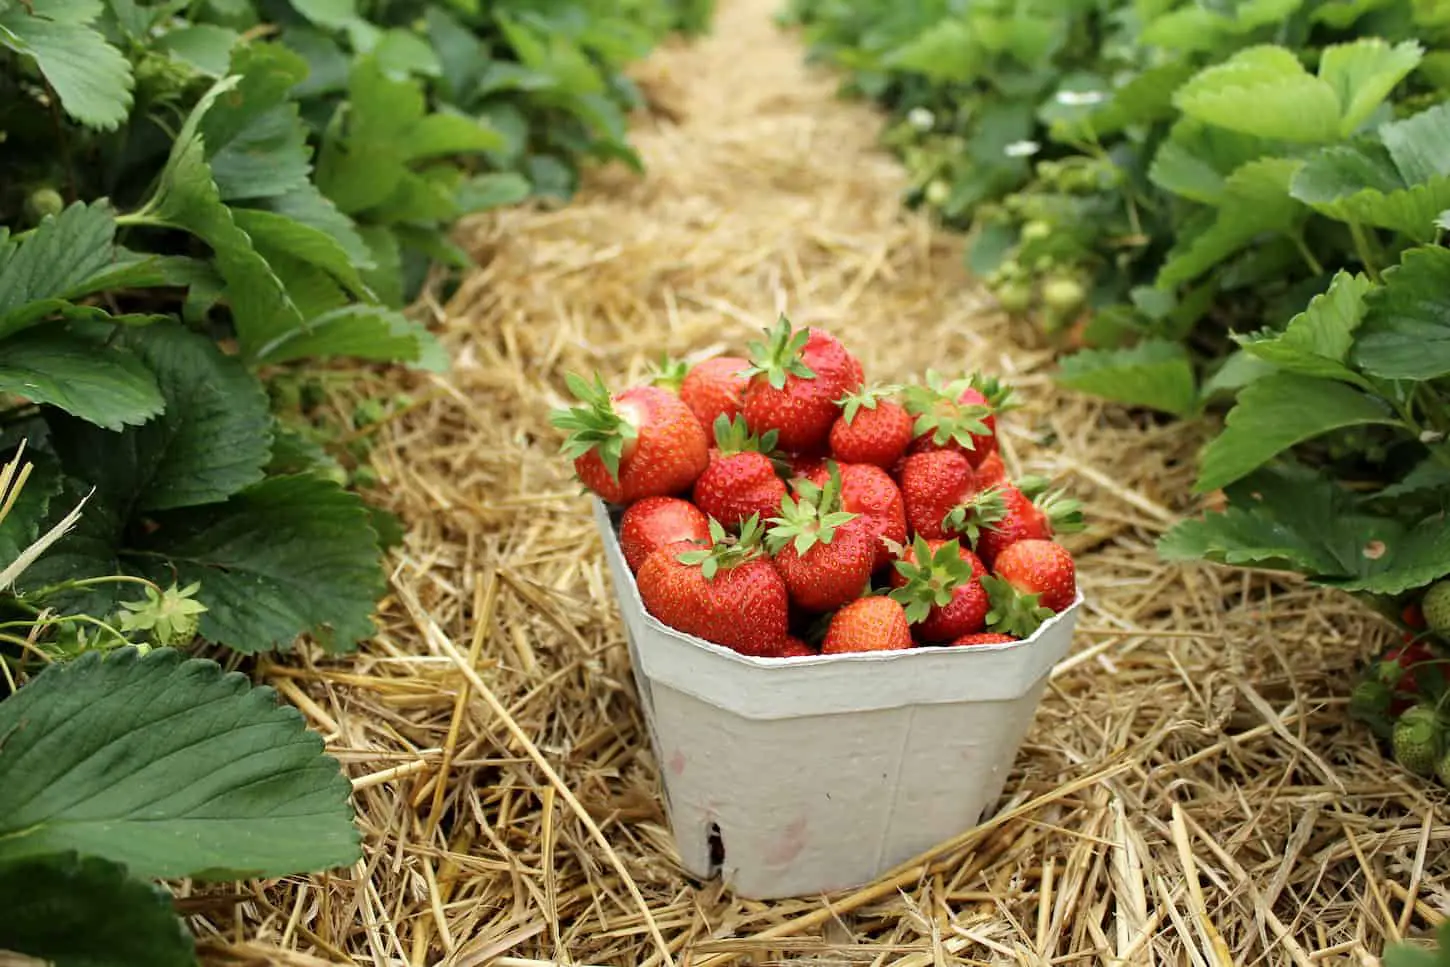
When will you know if a strawberry is ready to harvest and eat?
Strawberries are ready when their color changes from green to red. The berries will also feel soft when they are lightly squeezed. The best time to harvest strawberries is early in the morning because it can increase the strawberry’s flavor and scent.
Smaller strawberries that are grown at home are superior in sweetness and taste!
Pro tip: An important reason to harvest in the morning is so that other early birds (or real birds) don’t eat your harvest. This tip is for all berries, though!
Do strawberries need any special seasonal care?
Strawberries need to be mulched (and covered) in especially cold climates to survive the winter. Ideally, cover them with at least 1 to 2 inches of mulch to properly keep them safe from the cold and wind.
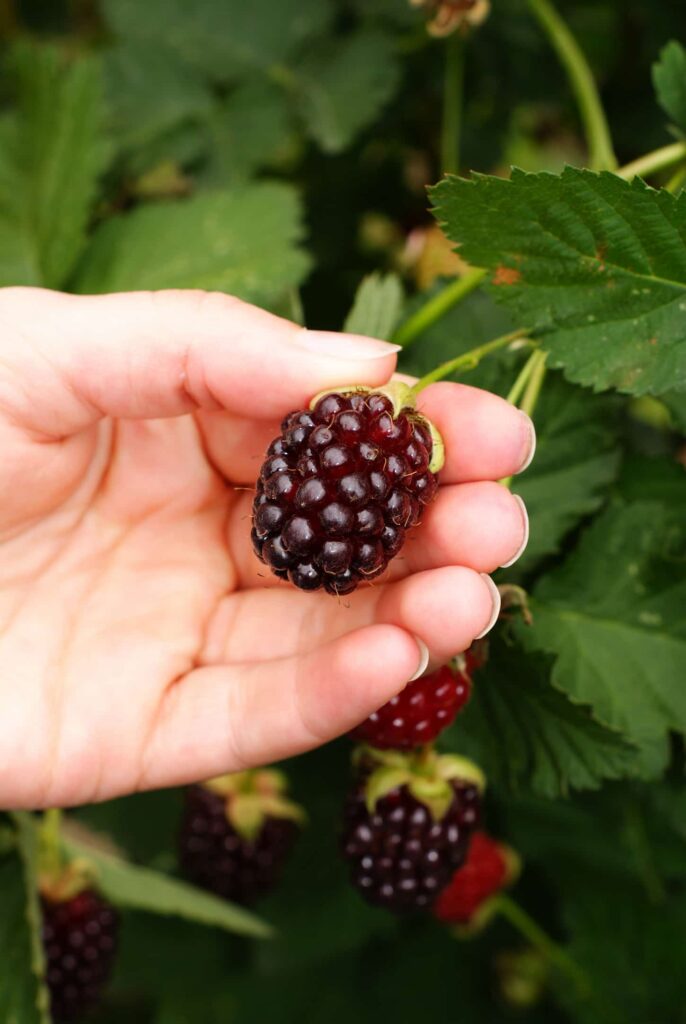
Guide to Tayberries
Tayberries are a hybrid plant; they are a cross between a blackberry and a raspberry. Tayberries are super easy to grow; there will be fewer concerns because this berry is barely affected by frost. This berry also shares the same health benefits that are in raspberries and blackberries.
How do you plant tayberries?
Tayberries aren’t too demanding when it comes to their environment; they can grow well in almost any type of soil. The only requirement needed for tayberries in well-drained soil and full sun.
Since tayberries are not grown from seeds, a small pre-grown bush will need to be purchased from a nursery. Dig a hole that is around 6 -12 inches in the garden and transfer the plant immediately; make sure to leave some of the soil from the container so that it can adjust to its new home.
If more than one tayberry bush is going to be planted, make sure to have a space of at least 2.5 inches minimum between each plant. Tayberries also need support; wires can be put around them, or they can be placed beside a wall.
The best time to plant tayberries is during the cool months like autumn and winter; this will give the plant time to establish itself before entering the growing season.
After putting the tayberry plant into the hole, fill it back up with soil, and then add some compost. Gently pat the soil and then water it down to seal the air pockets around the root ball.
When and how to fertilize tayberries
The best time to fertilize tayberries is during the spring before the leaves sprout. Aside from fertilizers, you can also use compost, mulch, or chicken pellets.
Spread two to three inches of mulch each year to retain moisture and to keep weeds from growing around the plants. Spread the fertilizer around the tayberry plants, according to the instructions on the packaging.
Tayberry water requirements
Tayberries need 1 – 2 inches of water per week. Water them more often during the growing season and during a drought. The best time to water the tayberry plants is in the morning so that they have time to dry before nighttime. This will minimize the disease problems that the plants might develop.
How and when to transplant tayberries
Transplanting tayberries can be tricky, especially if the tayberry plant is already large and mature. The best time to transplant tayberries is while it’s dormant, either before or after they’ve flowered and bore fruit.
- First, pick out the new canes and then cut them down until they are 30 inches tall.
- Plant them into a small pot and wait for them to grow roots. Pre-grown tayberry roots can also be purchased from the local nursery. After pruning, plant them into a pot and water them thoroughly. Wait for at least 2 or 3 weeks before transplanting them into their new home.
How much sun does a tayberry need? Can they grow in shade?
Just like any other berries, tayberries need at least 6 – 8 hours of sunlight. They can also tolerate shade but like most berries, they still prefer a space where they can get full sunlight.
When will you know when the fruit is ready to harvest and eat?
It takes 2–3 years for tayberries to bear fruit, and they are ready when they can be easily pulled off from the cane. The berries will turn from red to black. In another 3–4 days, the berries will be fully ready and can be picked and eaten.
Do tayberries require any special seasonal care?
Tayberries are a hardy plant (as they’re a cross between raspberries and blackberries), but they would still benefit from being mulched and protected (by being covered with mulch or a breathable cover) during the coldest months.
Frequently Asked Questions (FAQs) about Berries
Now let’s make sure that all of your berry-growing questions are answered. If your question hasn’t been covered already in this article (or in the FAQs below), please contact me and let me know what it is. I’d love to answer it and get it added here for others to see!
Are berries hard to grow?
Most types of berries are easy to grow; just make sure to learn how to properly take care of them and how to maintain their health. Then there will surely be a sweet and delicious berry crop!
Should I fertilize my berry plants?
Not all berries need fertilizers, some can survive without them. Adding some manure, compost, or mulch into the soil will help quite a bit.
Generally, I just add compost to my berries and they love it. Not that they can verbally complain, but they do produce amazing fruit!
How will I know the pH level of the soil?
Testing kits are widely available in garden centers. Test kits are relatively inexpensive and are also very easy to use.
I recommend you get a soil test from your local university’s agricultural extension. It should tell you about your soil makeup and the pH level.
Next Steps
Now, this article is a long one. I know. So your first next step is to pat yourself on the back for getting through it. Then, it’s time to go read this article on berry sunlight requirements, because it’ll help you determine if that one area you’ve got in mind to plant berries will work – or if you should plant something else instead. And don’t worry – I’ve got suggestions for you based on how much light the area gets!
Resources
Learning from your own experience is essential, but learning from others is also intelligent. These are the sources used in this article and our research to be more informed as homesteaders.
- “Blueberries.” Edited by Robert Thomas et al., Old Farmer’s Almanac, Old Farmer’s Almanac, www.almanac.com/plant/blueberries.
- “Blueberry Bush: Planting, Care, Pruning and HARVESTING INSTRUCTIONS.” Blueberry Care Instructions, www.arborday.org/trees/fruit/care-blueberry.cfm.
- Boeckmann, Catherine. “Blackberries.” Old Farmer’s Almanac, Old Farmer’s Almanac, www.almanac.com/plant/blackberries.
- Bost, Steve. “DISEASES OF SMALL FRUITS.” Tennessee.edu, ag.tennessee.edu/EPP/Redbook/Small%20fruit%20diseases.pdf.
- Erler, Emma. “What Is the Best Way to Grow Elderberries?” Extension, 31 Aug. 2020, extension.unh.edu/blog/2020/08/what-best-way-grow-elderberries.
- Goji Berry – Growing, PRUNING, FRUITING, Care and Health Benefits.” Nature and Garden, 1 Sept. 2020, www.nature-and-garden.com/gardening/goji-berries-lycium.html.
- “Learn about Tayberries.” Burpee, Burpee, 20 May 2021, www.burpee.com/blog/encyclopedia__tayberry-article.html.
- “Raspberries.” Edited by Robert Thomas et al., Old Farmer’s Almanac, Old Farmer’s Almanac, www.almanac.com/plant/raspberries.
- Spengler, Teo. “Transplanting Elderberries – How To Transplant Elderberry Bushes.” Gardening Know-How, www.gardeningknowhow.com/edible/fruits/elderberry/transplanting-elderberries.htm.
- This Old House Reviews Team. “Everything You Need to Know About Everbearing Mulberry Trees.” This Old House, This Old House, 26 Aug. 2021, www.thisoldhouse.com/gardening/21336910/everbearing-mulberry-trees.
- “Transplant Mulberry Tree While It’s Dormant.” Midland Reporter-Telegram, Midland Reporter-Telegram, 7 Feb. 2012, www.mrt.com/lifestyles/article/Transplant-mulberry-tree-while-it-s-dormant-7427668.php.
