Having raspberries in our backyard has been one of my favorite parts of our garden. But what happens when they need to be moved for some reason? What do we need to know and do to move them?
The best time to move raspberry canes (also called suckers or starts) is when the plant is dormant but the soil is workable – usually between late fall and early spring. Here is what you need to know about why, how, and when to move raspberry canes.
Because while you can transplant raspberries at other times, here is the best way to make sure that you move them easily – without sacrificing too much of your harvest.
Can Raspberry Canes Be Moved?
Raspberry canes can most definitely be moved – and we’ll talk about common reasons why that is in just a moment.
But first, let’s talk about how raspberry plants move on their own – or how they propagate themselves and keep growing. That way, you’ll understand better why, when, and how to move them.
Raspberries can grow by one of a couple of ways.
- If you’ve got some raspberries, they can grow from the seeds in the fruit. This takes a good long while, though. And the seeds are itty bitty, so it’s doubly hard.
- Raspberry plants root outwards and then grow new shoots (or canes) upwards from the ground. These new canes can be referred to as starts – and they grow up from the sucker roots. So sometimes they’re also called suckers.
So if you don’t have the patience to start a raspberry from seed, it’s much faster to dig up a start and a few canes – and use that to get your own raspberry patch going. Now, a quick word of warning – once your raspberry patch is settled, growing, and going, it will spread like crazy. Due to how raspberries grow, once they take root they grow amazingly well!
Now, not only will your raspberry row grow outward through sucker growth, but you’ll probably also notice a few new raspberry plants growing on the other side of the yard. That new growth isn’t usually due to roots spreading new starts, though.
That new growth is because some birds got into your patch, ate raspberries, pooped out the seeds, and they grew. So now you’ve got some new starts growing that will either need to be thinned, dug up, or moved. Oh, and this will probably happen on a regular basis (like every year), so be aware and watch for it – or watch your whole garden and yard turn into a giant raspberry bramble.
So let’s talk about why you’d want to move a raspberry plant.
Why Move a Raspberry Plant?
Okay, so now that you know how raspberry plants grow, let’s talk about why you’d want to move them.
Reason #1: You don’t have any raspberries yet and you want some.
Once you’ve picked out a suitable growing spot for your raspberries, get a start and plant it. Don’t forget to mulch and trellis it!
Reason #2: You need a different spot for the patch.
Maybe your patch is in a bad spot (due to sun or water issues) and you’re moving it to a better location.
Get your new spot ready first. Then move your raspberries and get the old spot cleaned out and ready for whatever else is next.
Reason #3: Raspberries are too crowded and have insufficient circulation.
It’s time to thin out that patch. You can either dig up the starts and move them to a new location (for a secondary patch), thin and throw away weak suckers, give starts to a friend, or use a combination of these ideas.
Reason #4: You want to expand your raspberry patch – or add another one.
Once you’ve done your prep work, go ahead and dig up a few healthy (but dormant) starts and move them to your new area for your new raspberry patch.
Reason #5: Someone wants one of your starts.
In this case, you don’t have to do much prep work other than digging up a start – or handing your friend a shovel and telling them which starts they can dig up themselves.
Reason #6: You’re done with raspberries and you want them all gone.
This option makes me sad, but it’s still a valid option. In this case, you’ll want to get those roots all dug up – and let anyone who wants a start claim them before they’ve died.
What does a bad spot for your raspberries look like? It’s this: inadequate sunlight (raspberries like the full sun) or improper soil drainage. Raspberries prefer loamy, well-draining soil. However, they can still grow in some shade (click here to read my full article on raspberries and how to grow them in shade – and some things you’ll need to know) and they can grow in less-than-amazing soil. You’ll just need to keep an eye on things so that watering them doesn’t turn the area into a swamp.
As far as spacing – raspberries grow best when there’s plenty of circulation, sunlight, and airflow to the canes. When the canes grow too crowded, there will be a significant drop in fruit production. So make sure that if you’re just starting out planting your canes, plant them with at least 12-18″ (inches) between them. They’ll fill in that space in no time, so don’t feel bad if it looks bare. It won’t stay that way for long!
If you’re wanting to expand your raspberry patch size, that’s awesome. Go ahead and do that. Just make sure you’ve got defined rows (so you can reach and pick all that delicious fruit) and space between the rows so you can get where you need to go. And remember that those rows will expand – and so you’ll need to keep an eye on them and prune them regularly.
Finally, a note on sharing starts – whether you’re getting one from a friend or if your friend wants one of your raspberries starts. Sharing starts isn’t generally recommended – especially by experts. There’s a risk of sharing unknown plant germs (virus, bacteria, and fungi) as well as insects and other bugs that could cause all sorts of sickness or cross-contamination issues. I’ll talk more about why and specific details later on in this article.
For now, though, just know that it is a risk – and that the experts recommend you get a fresh start from a reputable nursery. However, if it’s a risk you’re willing to take, that’s fine. Just make sure you and your friend both know and accept all of the risks (and read the full warning that’s later on in this article first).
The Best Time to Transplant Raspberries
The best time to move, transplant, or dig up raspberries is while the plant is dormant – but the soil is workable. You’ll know that a raspberry plant is dormant because it’ll look like a hot, brown, dead mess. Usually, this best-time-to-transplant falls between late fall and early spring.
The optimal transplanting time has to do with dormancy and how the plant stores and uses several kinds of sugars, including reducing sugar. Per my research, the reducing sugars rise to their highest level in May – which correlates right with the most dramatic increase in foliage. Those reducing sugar levels will drop in June and then rise again – reaching their max levels in August.
However, while the research was super-interesting and nerdtastic, it’s much easier to show you via pictures the ideal time to move your raspberry starts. So, let’s show you (with pictures) how to know when it’s the best time to transplant raspberries.
Personally, I’m far too busy in the fall to worry about transplanting (or pruning) raspberries. However, if fall works better for you, then that’s great. Wait until after your raspberry harvest is done – and the plant has begun to go dormant.
Even so, this is what a dormant raspberry patch should look like. In fall, there may be a few more green leaves than this – but you don’t want too many.
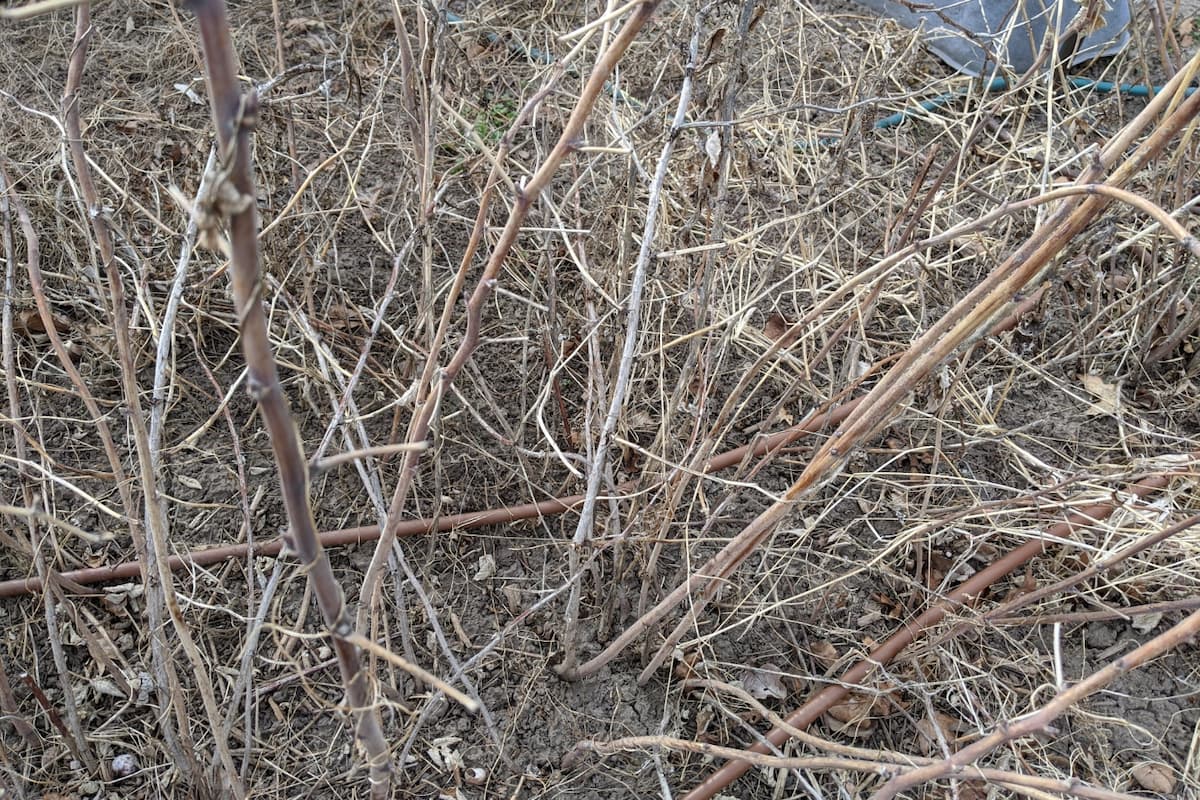
If you’ll notice, I haven’t finished pruning it yet, either. You can see the gray floricanes (second-year canes) that need to be snapped off at ground-level growing with the brown primocanes (first-year canes) that will bear this next year’s harvest.
So don’t dig up and transplant a gray floricane – unless you include a healthy root system and a couple of other primocanes. Digging up and transplanting the gray floricane alone would mean it’ll take your raspberry plant a lot longer to grow and propagate – because it won’t have the green vegetation growing off of a primocane to collect sunlight via photosynthesis. So make sure you get a primocane – even if it’s a small one.
Now, if you miss the fall window for transplanting your raspberries? Don’t stress. Go read my article on taking care of raspberries for the winter and wait for spring.
Now, you may have a few false starts to your spring as we do. That’s okay. The great part about waiting until spring is that it’s so much easier to see when it’s time to both prune and transplant your raspberries – compared to fall, anyway. Plus, there’s usually a good 4-8 week springtime window to get all of this done, depending on where you live.
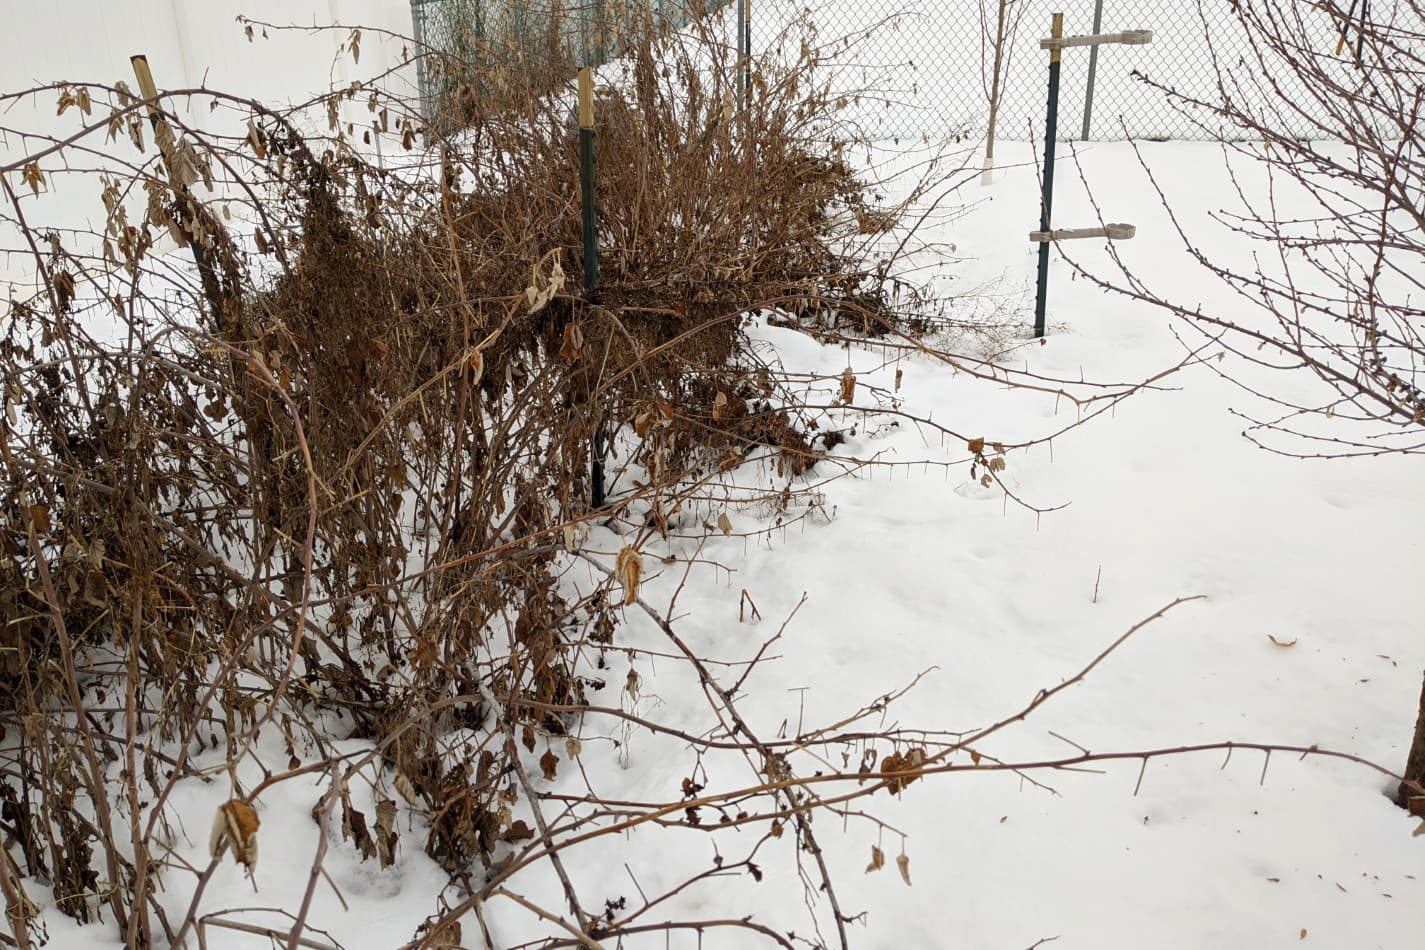
Remember the last photo I shared? Yeah – that was my garden in February. Here’s my garden in early March. It’s still cold, but the soil is finally workable – and I can get started on my raspberry patch-based work. Plus, who wants to garden in the snow? Not me!
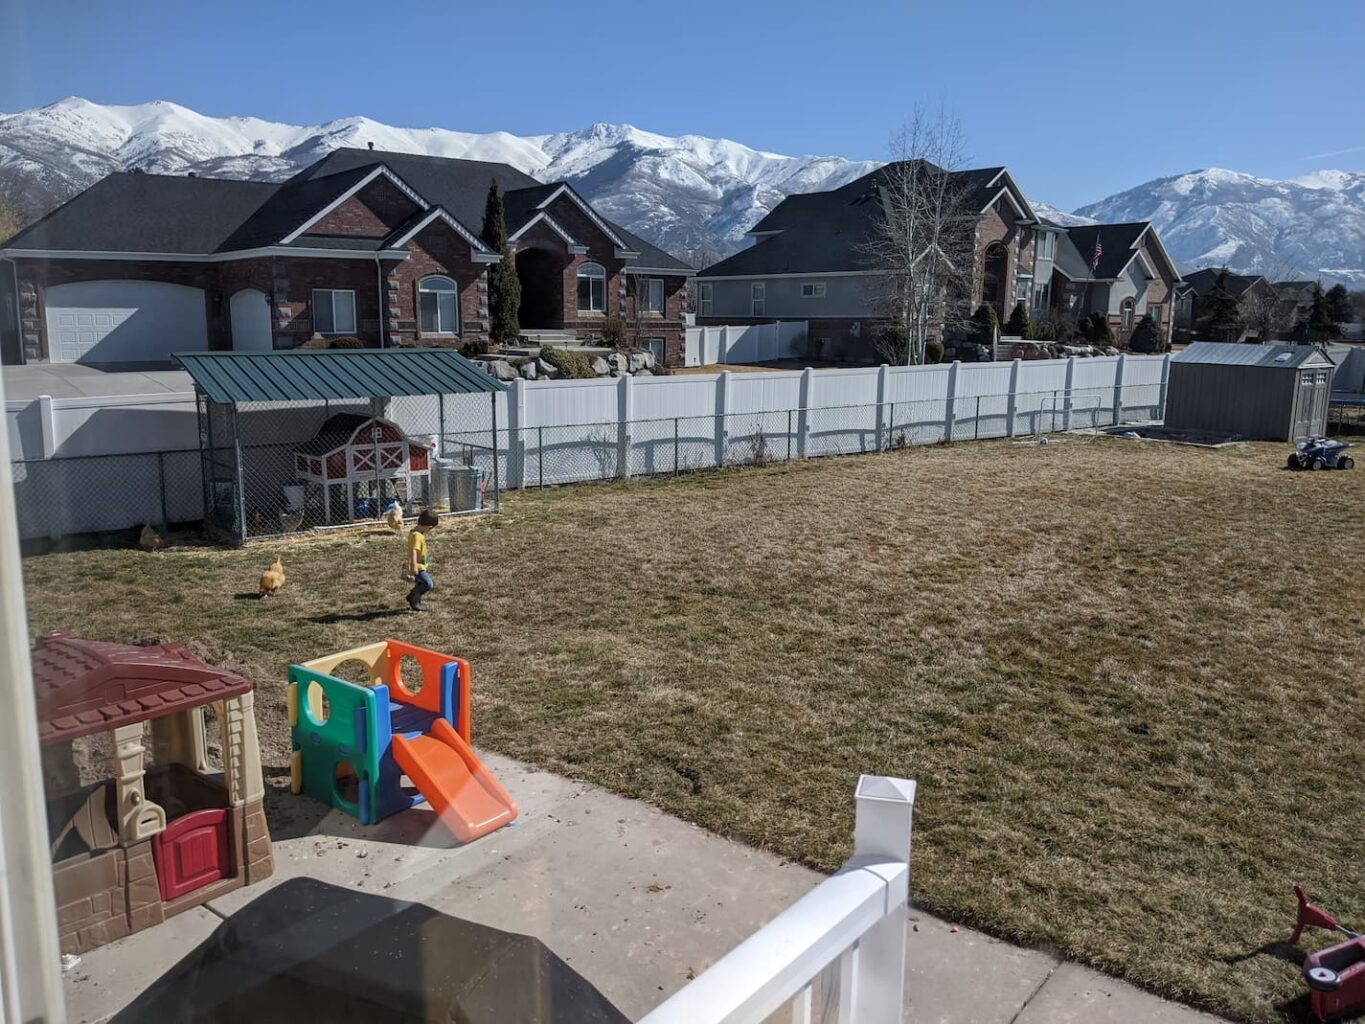
And just for reference, here’s the rest of my yard – the grass hasn’t started growing yet. It’s still patchy from the winter snow. Very few trees have started leafing out, either. And my kids are enjoying playing outside – because hey, it’s March.
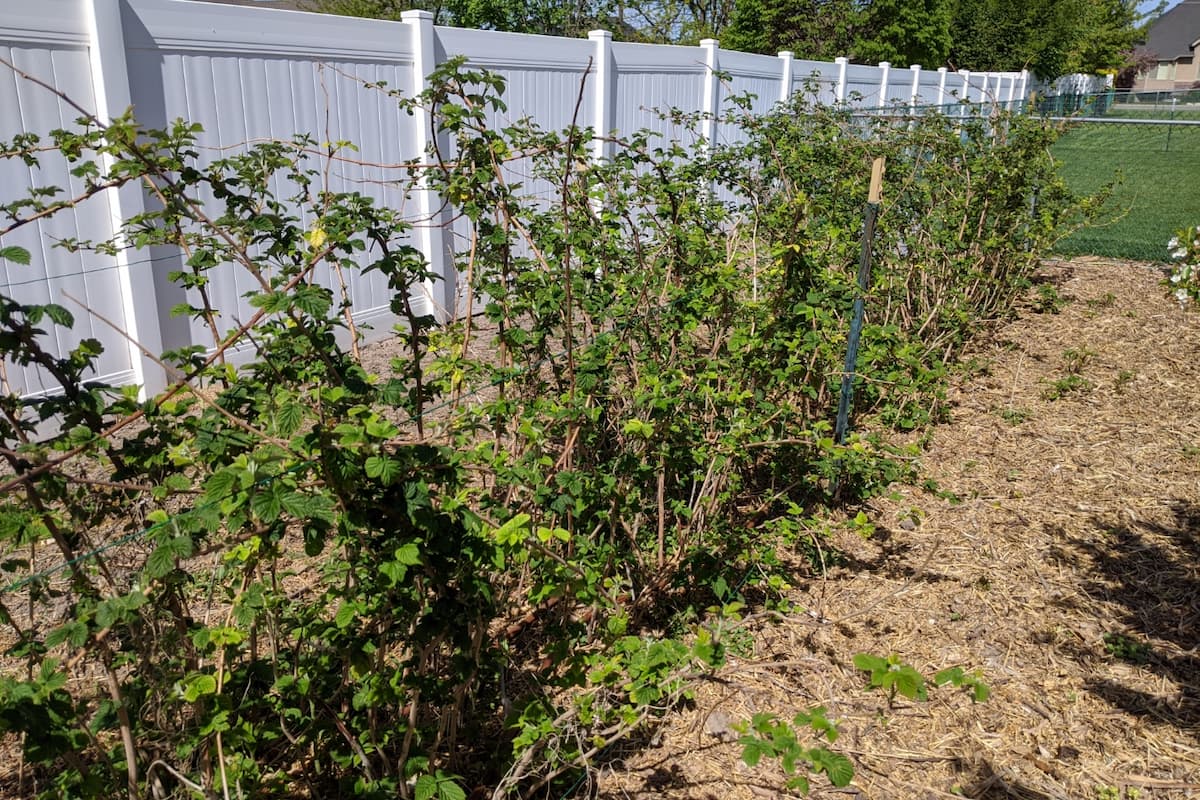
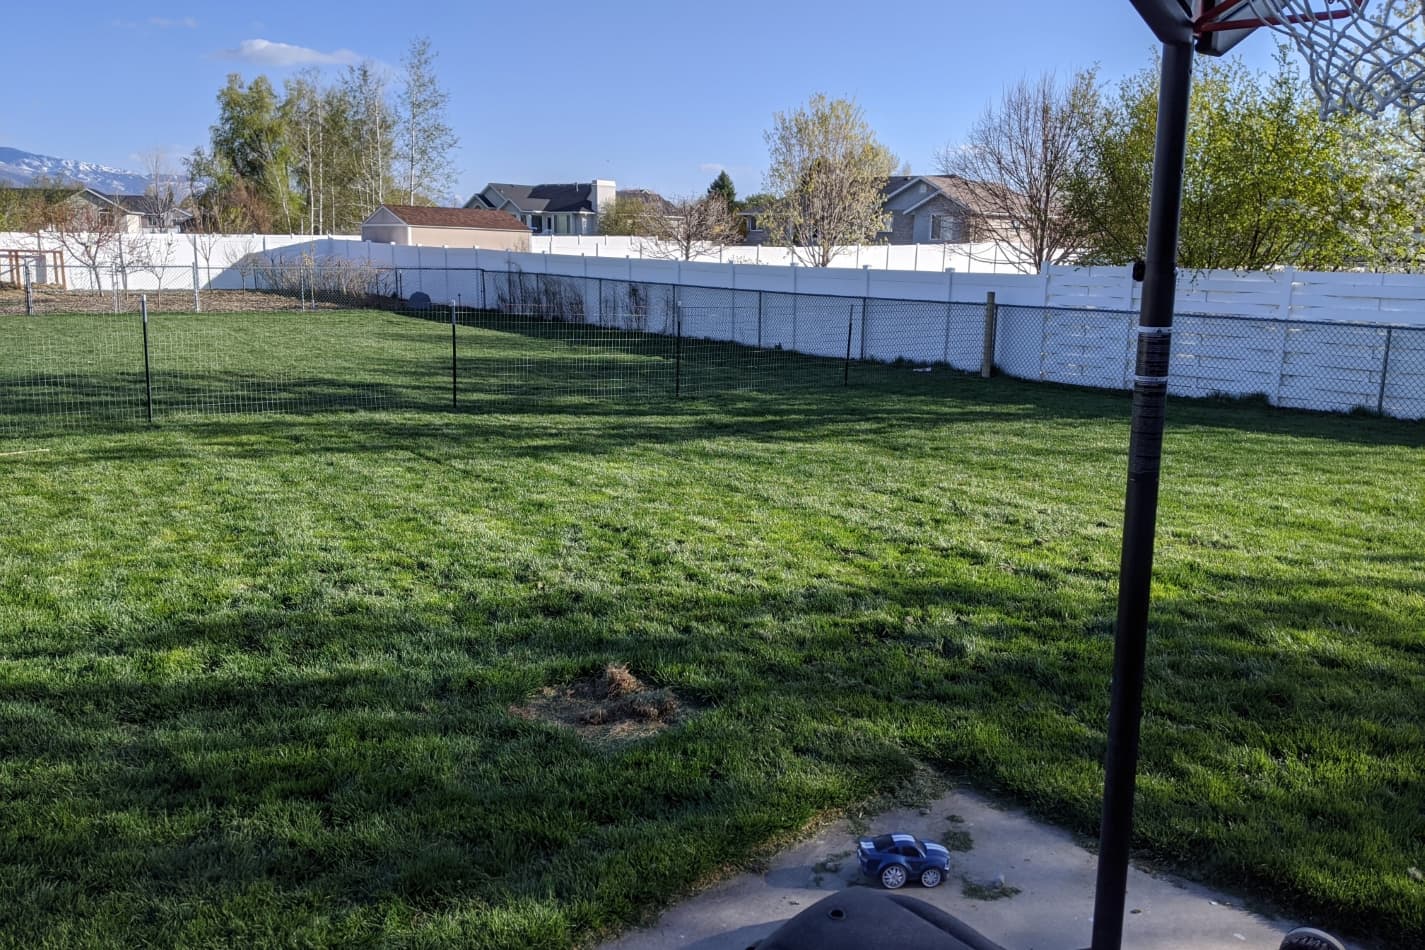
Now, if March is too cold for you to get out and work on moving or planting your raspberries, don’t stress. You’ve got a few weeks to get things done. Here’s my yard a few weeks later. We’ve managed to put in a fence and the grass has started to green up. The trees have also started to grow leaves – but check the raspberries in the distance – they’re still dormant, ugly sticks.
Now, sometime in mid-April, your raspberries will begin to grow leaves – and it usually happens seemingly overnight. Once they’ve started to grow leaves, they’re no longer dormant. That’s how you know that the optimal time for transplanting has passed.
That being said, you can still dig up and transplant any starts at this time. I’ve had friends dig up some of my starts in April and even early May – and once planted they do well. They just don’t have as fantastic of a harvest until at least the next year.
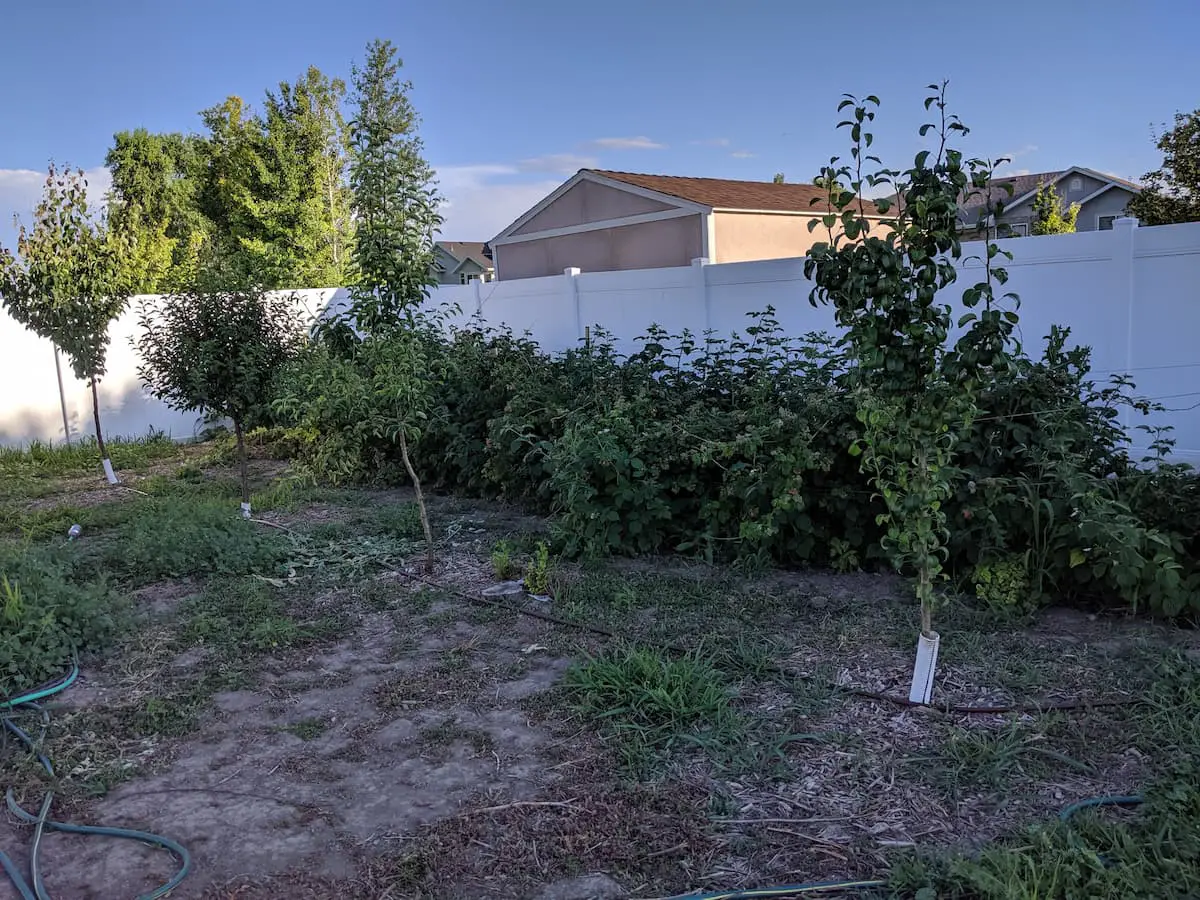
Once they start leafing out more, though, it’s best to wait until they’ve gone dormant again – or you could be sacrificing a couple of years’ worth of harvests. Here’s what “too late – better wait” looks like.
Got it? So the rule of thumb for moving or transplanting raspberries is late fall to early spring. Or if you’re in a zone like us here in Utah, think late October to mid-April. That’s a full six-month window, people! Although, if you account for snow, it’s really two shorter windows – one in fall and one in spring.
Again, I use the spring window – it’s much easier to see it as I can use snow melting as the starting point and seeing the plants growing leaves as a cutoff. For fall, just reverse those windows – your starting window will be watching the leaves brown, die, and fall off – and your ending window will be snowfall.
How to Dig up a Raspberry Start
When you’re ready to dig up a raspberry start or a sucker, start by making sure that your raspberry plants are dormant. If you aren’t sure it’s the right time, refer to the section above – with the complete picture guide that’ll explain how to tell if your raspberries are dormant.
Next, go grab a pointed shovel. The squared-off ones won’t work well. Now that you’ve got the right tool for the job, you want to dig a good-sized chunk of roots and dirt around the visible canes or starts.
- To dig up an existing raspberry cane and start, simply dig up a large chunk – and a good section of the surrounding dirt.
- If it’s a sucker, you may want to mark the halfway mark between a start and the mother plant – and dig that whole section up going in a full circle all the way around the start.
Why? The goal is to disturb the plant as little as possible – that way you aren’t messing with the plant’s reserves and ability to grow in the spring – or your harvest next summer! So when you’re digging around your raspberry plant starts, dig up and bring as much of the soil (and surrounding organic matter) as possible.
Once you’ve dug it up, immediately put the roots into a bucket and surround it with soil – especially if the raspberry was in a sandier soil that fell away while you dug it up. Ideally, surround it with the soil you just dug up. Remember, the goal is as little change as possible right now.
If needed, add some water to keep the roots and dirt system. Some experts recommend using warm or hot water. I’ve always just used water from the kitchen sink that’s room temperature. I don’t use the secondary irrigation or garden hose water with starts simply because it’s not on yet when I am digging them up. That water doesn’t turn on until mid-to-late April.
In any case, make sure your raspberry starts are tucked into some soil (or covered with some cloth and watered well) while moving them to their new home. Then, transplant them as soon as possible.
How Long Raspberry Canes Last
Raspberry canes that are planted and well-tended can last for years. Thanks to the two ways they propagate, they’ll keep growing as long as they’ve got access to sufficient nutrients. And they grow so fast that they’ll expand to take up as much space as you’ll let them have!
But how long do raspberry canes that have been dug up last? Well, that depends on how and where you’re storing them – and how you’re taking care of them.
Here is the ideal care for your raspberry starts: transplant them as soon as possible.
But just in case there’s some bad weather or a surprise that delays you a day or two, it’s always nice to know that your raspberry starts can survive until you can get them planted.
Bare root start
How long it lasts: A few days up to a couple of weeks.
Bare-root raspberry starts do better kept at a cooler temperature to keep them dormant but not so cold that it’ll freeze. They’ll also need to be kept moist and covered with cloth (like burlap). Some nurseries may ship bare-root starts – and they’ll send detailed instructions on how to care for them until you’re able to plant them.
Potted start (small planter)
How long it lasts: Up to several weeks.
A properly potted and watered start could stay in the planter pot for several weeks – or even all summer if it had to.
Potted start (large planter)
How long it lasts: Several weeks or months.
A properly potted raspberry start (or starts) that gets sufficient water could be successfully grown in a large enough planter. Just be sure to take care of it for winter so it doesn’t die.
What factors could shorten this projected timeline for raspberry starts?
Here are a few things that could definitely impact how viable your starts will be – whether they’re bare-root or temporarily potted in a planter.
- Exposure to freezing weather or winds
- Insufficient water
- Being tipped over or manhandled or mistreated
- Forgetting about them
Even then, they may still survive being transplanted. If so, know that your harvest will probably be impacted (and lessened) for the year – or possibly several years. However, it’s possible that, with enough time, your raspberry canes could recover.
But why take the risk? It’s much better to follow the general rule of thumb: transplant them as soon as possible. And if you’ve dug up your starts (or bought them) during the right time of them being dormant, then just go plant them now. That way, they’ll do much better overall.
How to Store Raspberry Canes in Transition
The best way to store raspberry canes (or starts) in transition is in an appropriately-sized pot with sufficient soil. Ideally, it’s a good amount of soil (and lots of organic material) from wherever it was growing. That way, it’s not being shocked or affected by a loss of nutrition – or losing a good chunk of the root system.
When in doubt, grab a 5-gallon bucket. Put your canes in there. Surround them with enough soil and organic matter – and be off to transplant them.
Oh, and here’s a cool thing I learned during my research – when you do dig up a cane for transplant, top the cane. That’s right – cut it off at about a foot (up to two feet) tall. A study I read said that topped canes not only travel better but also have an increased growth rate and berry harvest in their second season post-transplant.
If you absolutely have to have a bare-root system in transition (like if the soil just won’t stay and you can’t dig some up to take with you), then wrap the raspberry roots in some cloth (like burlap) and get it moist. Get home and transplant that as soon as you can – taking care to keep those roots from jostling too much.
I’ve let several friends and family members dig up the starts from our garden – we usually recommend they bring a bucket (or more, depending on how many raspberries starts they’re taking). We let them take some surrounding dirt and a good amount of roots. If we’ve got compost ready, we’ll suggest they take some of that, too. I’m going to have to start adding the suggestion to top the cane, though! Having multiple buckets of raspberry starts and canes in the car can get quite tricky.
Planting Your Raspberries
Now you’re ready to plant (or transplant) your raspberries.
- Start by digging a hole – make it a good-sized one. Most master gardeners recommend a hole that’s 12 inches deep and 18 inches wide. This is probably much larger than the start you got – even with the surrounding dirt and organic matter. That’s okay.
- Once the hole is dug, water the hole.
- Put in the starts (with their soil and accompanying organic matter) and bury them with your soil. You may also want to use the “excess” dirt to create a mound around them for easier watering.
- Mulch the canes.
- If the canes weren’t topped prior to transporting them, go ahead and top them now. Cut them off at about 12-18 inches tall. In some instances, you may want to cut them back to as little as 6 inches tall.
- Water it all again.
- Consider adding an irrigation system to make watering your raspberries more automatic and less likely to be forgotten.
- Consider adding a trellis to your raspberry patch now, rather than waiting until they’re fully grown (and it’s a lot harder to add a trellis). If you’re going to consistently top canes every year, though, then you won’t need a trellis system. More on that in a bit, though!
Congratulations – your raspberry starts and canes are planted and ready to grow.
Mulching Raspberry Starts
When it comes to raspberries, my research has led me to conclude that mulching them is the best way to take care of them on several fronts.
- Mulched plants have better moisture retention than non-mulched plants.
- Mulching raspberries helps control weed growth for up to 2-3 additional seasons.
- One study I read said that mulched raspberries responded better to weed control and moisture retention than straw mulching better than any other method. Compared methods included weed covers, fertilizers, row covers, bare soil, herbicides, and more.
- Mulched raspberries also have better overall growth and berry production than non-mulched plants. Mulching in one year can have net positive benefits for an additional 2-3 years.
So what’s the best mulch to use for raspberries? The study I read found that straw was the best mulch. Not only is it a fairly cheap option, but it helps with weed control and boosting plant growth and berry production.
We use a straw mulch (that’s been composted first) on our raspberries. The study didn’t clarify if the fresh or composted straw was best. However, we compost it first for one very important reason: manure.
Our animals use the fresh straw for bedding – and it collects all sorts of manure. Chicken manure, in particular, can be caustic when fresh. So we let the straw sit and compost for a couple of months before using it to mulch our plants. That way, the chicken manure won’t burn our plants – but will fertilize them. And the straw hasn’t broken down too much – and is still a fantastic mulch.
So if you would rather use a composted straw mulch as we do, that’s totally fine. Or if you’d rather use a direct straw mulch (sans compost and manure), that’s totally fine, too. Just mulch your raspberries – and save yourself a ton of time weeding.
Why You Should Stabilize Raspberry Starts with a Trellis
For all of the research and reading I’ve done on raspberries, you’d think I’d have insisted on trellising them sooner. Sadly, this took me far too many years to get around to. Even so, it’s done now – and I’m so glad!
Trellises are designed to help make harvests easier – because the plant has better support, it stays upright. That means less back pain during harvest. It also opens up the plants so that they can get better airflow and sunlight, which will help them grow and produce better.
In my research, trellising and staking floricanes can increase their berry yield by as much as 68-189%, depending on the variety. Trellised and staked canes can also have a larger leaf area, which will help prevent sunburned fruit and increase the ability of the plant to photosynthesize energy for continued growth. The study also noted that stabilized plants meant an increased diameter in primocane growth – which meant better growth and fruit production the next year.
So if you aren’t trellising and staking your raspberries (especially important in a windy area), then rethink your plan. Consider doing so.
We trellis our plants with some fence posts (t-posts) and green wire. We’ve used twine in the past, but it doesn’t last as long as the wire. In fact, sometimes it won’t last even a whole season. But if you do use wire, remember to warn your kids not to play around with it, even if you get the green-coated varieties. A wire is still wire, after all. Our safety rule is no going into the raspberry patch – just pick what you can reach from the outside. Safety first and all.
Or if you’d rather skip adding the trellis, then think about topping off your canes at 2-3 feet tall. That way, they won’t tip back to the ground – and you’ll increase their stability and overall fruit quality. The downside to topping your canes is that you will decrease the overall yield – but the quality and size of your raspberries do dramatically increase.
Why and When to Get New Starts from a Nursery Instead
While it may be nice to grab a start from a friend, a quick word of warning: it may be safer (and better) to get a new start from a nursery instead. Why? Because your friend’s raspberries may (accidentally) come with some nastiness that you don’t want to have in your garden or homestead.
Here are some things that could (again, accidentally) come with starts from an existing raspberry patch in your friend’s yard.
- Blights
- Cane-based diseases
- Insects or pests
- Fungi
- Weeds (seeds)
- Snails
- Diseases that could affect your other plants
- Chemicals like insecticides or fungicides if used
For these reasons, the official recommendation is to get a fresh, disease-and-pest-free start from a reputable nursery.
However, that doesn’t mean you can’t dig up a start from a friend’s yard. It just means that you need to know that it’s a calculated risk. How much do you trust that person? What kind of care do they take care of their plants? Do you agree with their use of chemicals, sprays, or their preference to not spray? How will you care for the starts once you’ve gotten them? Will you use any chemical or organic sprays?
If you’re okay with your friend’s gardening practices and you’re okay with the fact that, despite all of their best intentions, you may pick up a hitchhiking insect that could cause havoc in your garden, then go for it. Calculated risk, remember?
Personally, I’m okay with getting starts from a select few friends and neighbors – as long as the plants look generally healthy. And I’ll also admit that I do check it for any signs of boring insects or other potential problems. I’m also all right with using a variety of safe and/or organic sprays to help the plant while the plant is in a pseudo-quarantine period – and then while it’s adjusting to my backyard homestead.
However, it’s going to be a personal choice. If you aren’t willing to have a quarantine period or to use any sprays, then it will be far easier to skip snagging starts from neighbors – and go directly to the nursery.

Related Questions
How Do I Protect Raspberry Plants in Winter? Raspberries may need to be mulched and protected from any winter winds that could damage the plant. For full details and examples, read my article on protecting raspberries in winter here.
Can Raspberry Bushes Grow in the Shade? Raspberries can still grow in the shade, though the harvest may not be as big, juicy, or delicious as if it were in full sun. However, some shade can protect the fruit from sunburn. Read my full guide to growing raspberries in the shade here.
Can I Freeze-Dry Raspberries? Raspberries are easy to freeze dry and can store for many years in a mylar bag. For more details on freeze-drying raspberries (and on 70+ other foods that freeze-dry), read my full guide to freeze-dryer foods here.
Resources
Learning from your own experience is essential, but learning from others is also intelligent. These are the sources used in this article and our research to be more informed as homesteaders.
- Charles J. Engard, “Translocation of Carbohydrates in the Cuthbert Raspberry,” Botanical Gazette 100, no. 3 (Mar. 1939): 439-464. https://doi.org/10.1086/334803
- Faby, R. (2008). CONTROL OF CANE DISEASES IN RASPBERRIES. Acta Hortic. 777, 323-326 DOI: 10.17660/ActaHortic.2008.777.48 https://doi.org/10.17660/ActaHortic.2008.777.48
- Fuchigami, et al. “The Anatomy of Tissue Cultured Red Raspberry Prior to and after Transfer to Soil.” Plant Cell, Tissue and Organ Culture (PCTOC), Martinus Nijhoff/Dr. W. Junk Publishers, 1 Jan. 1981, link.springer.com/article/10.1007/BF00041654.
- Goubran, FH, and JG Richards. “Effects of Cutting and Cold-Storage of Parent Canes on Cane Production of Raspberry.” CSIRO PUBLISHING, CSIRO PUBLISHING, 1 Jan. 1986, www.publish.csiro.au/an/EA9860501.
- J. P. Hudson (1954) Propagation of Plants by Root Cuttings: I. Regeneration of Raspberry Root Cuttings, Journal of Horticultural Science, 29:1, 27-43, DOI: 10.1080/00221589.1954.11513797
- “Raspberries.” Utah State University, extension.usu.edu/yardandgarden/fruits/raspberries.
- Trinka, David L., and Marvin P. Pritts. “Micropropagated Raspberry Plant Establishment Responds to Weed Control Practice, Row Cover Use, and Fertilizer Placement.” Journal of the American Society for Horticulture Science, 1 Jan. 1992, pp. 874–880.
- Vanden Heuvel, Justine E., et al. “Cane Stabilization Improves Yield of Red Raspberry (Rubus Idaeus L.).” HortScience, 1 Apr. 2000, pp. 181–183. https://doi.org/10.21273/HORTSCI.35.2.181